Back to Parent

Outcome


Conceptual Design Overview

Purpose:

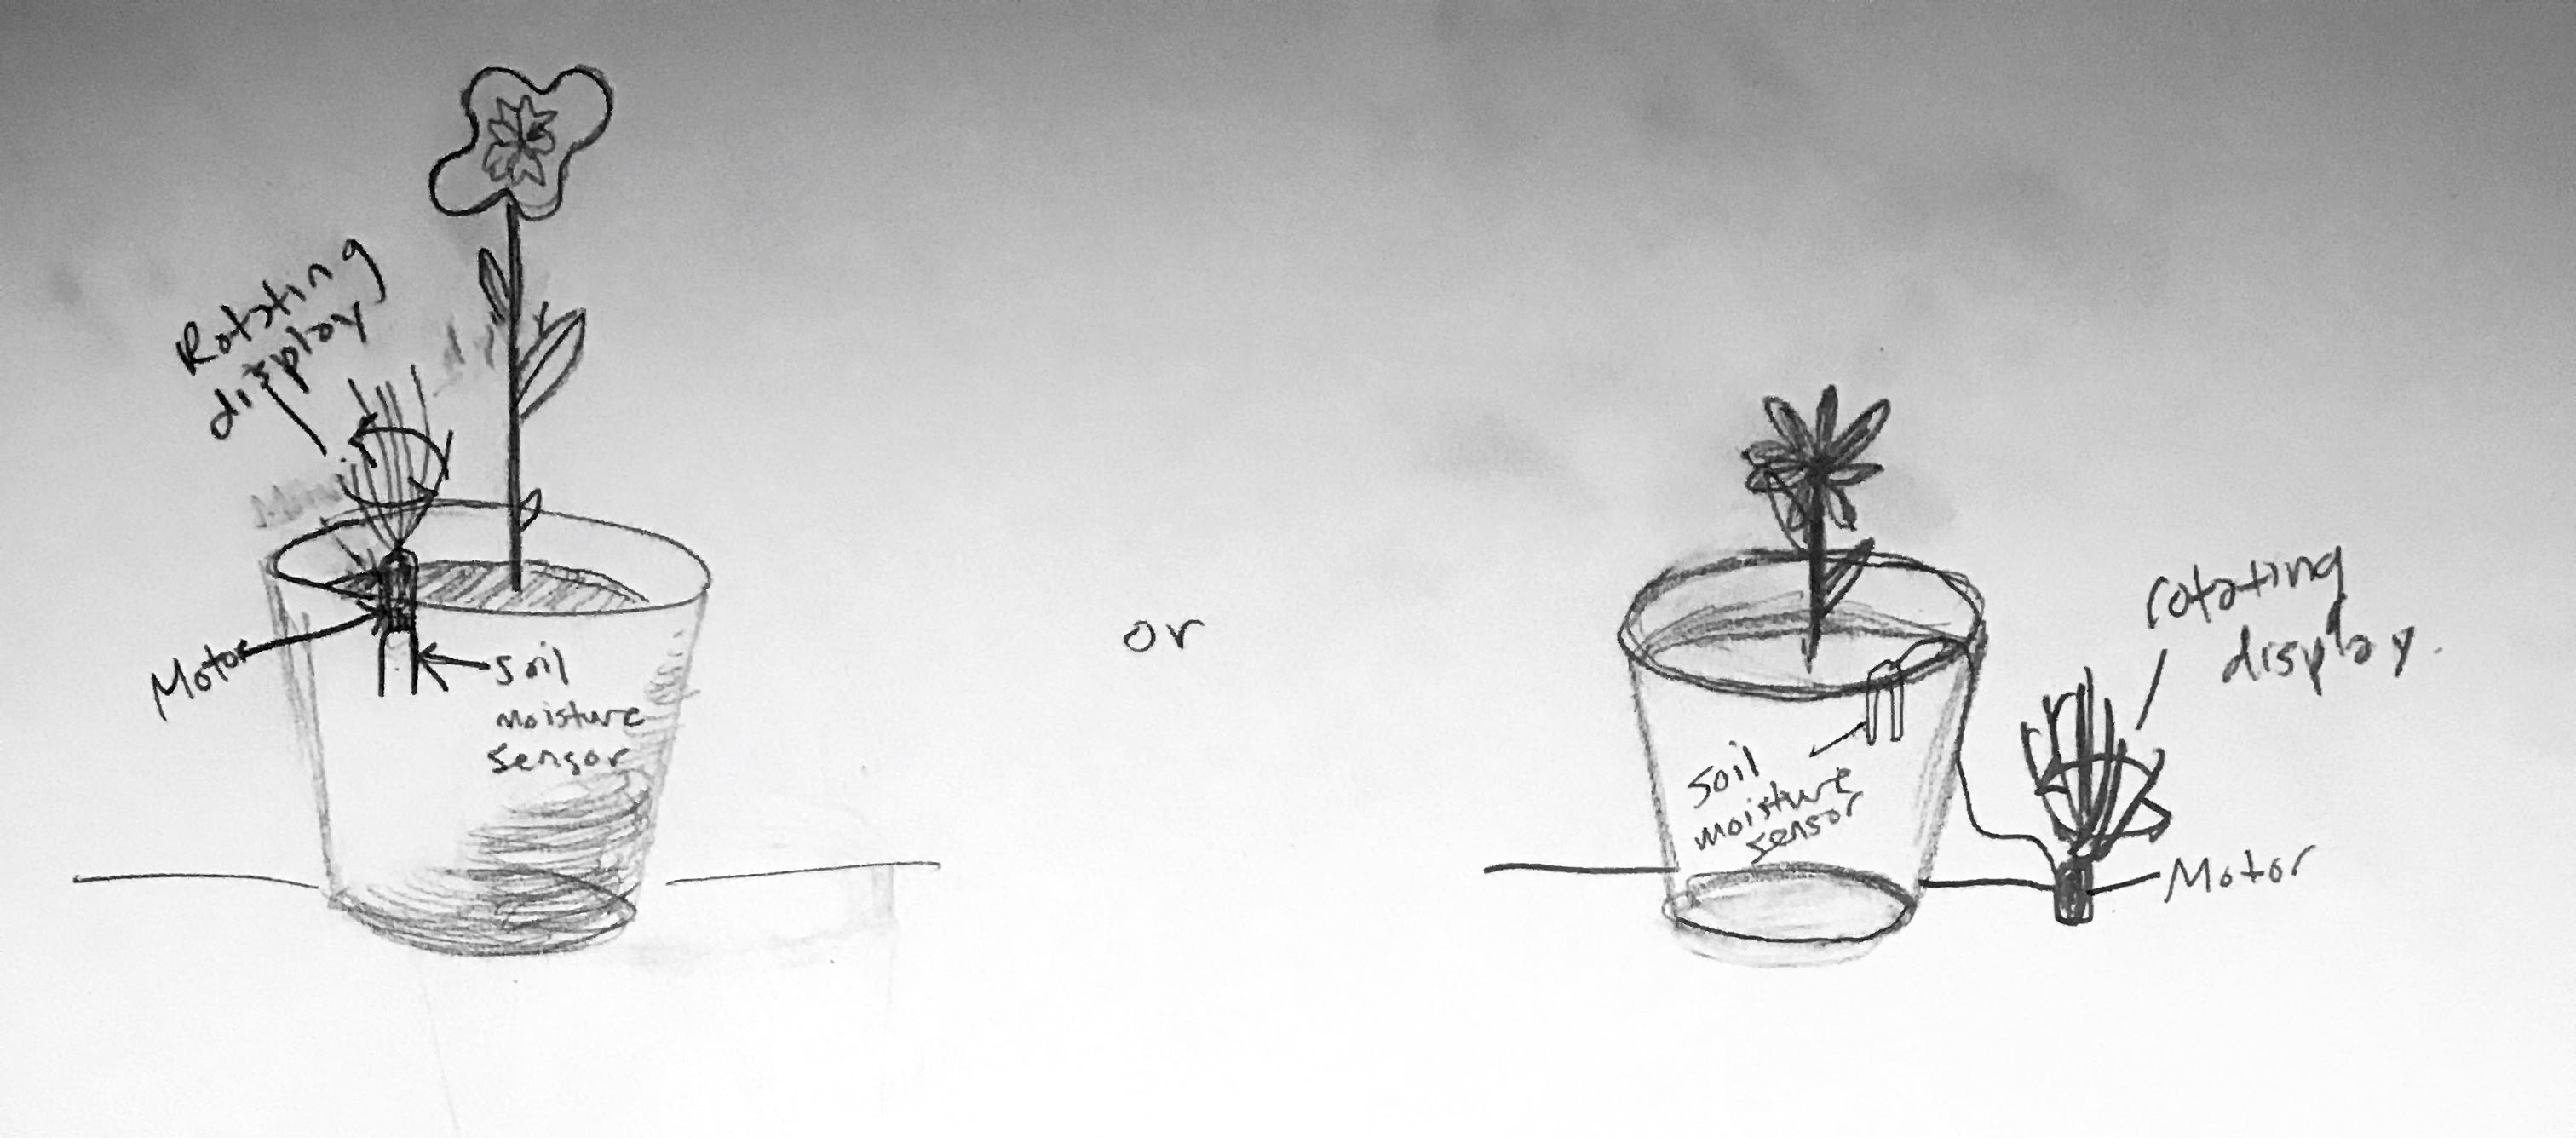
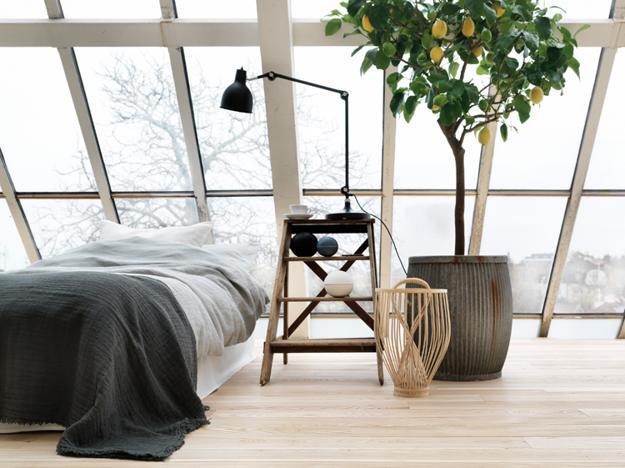
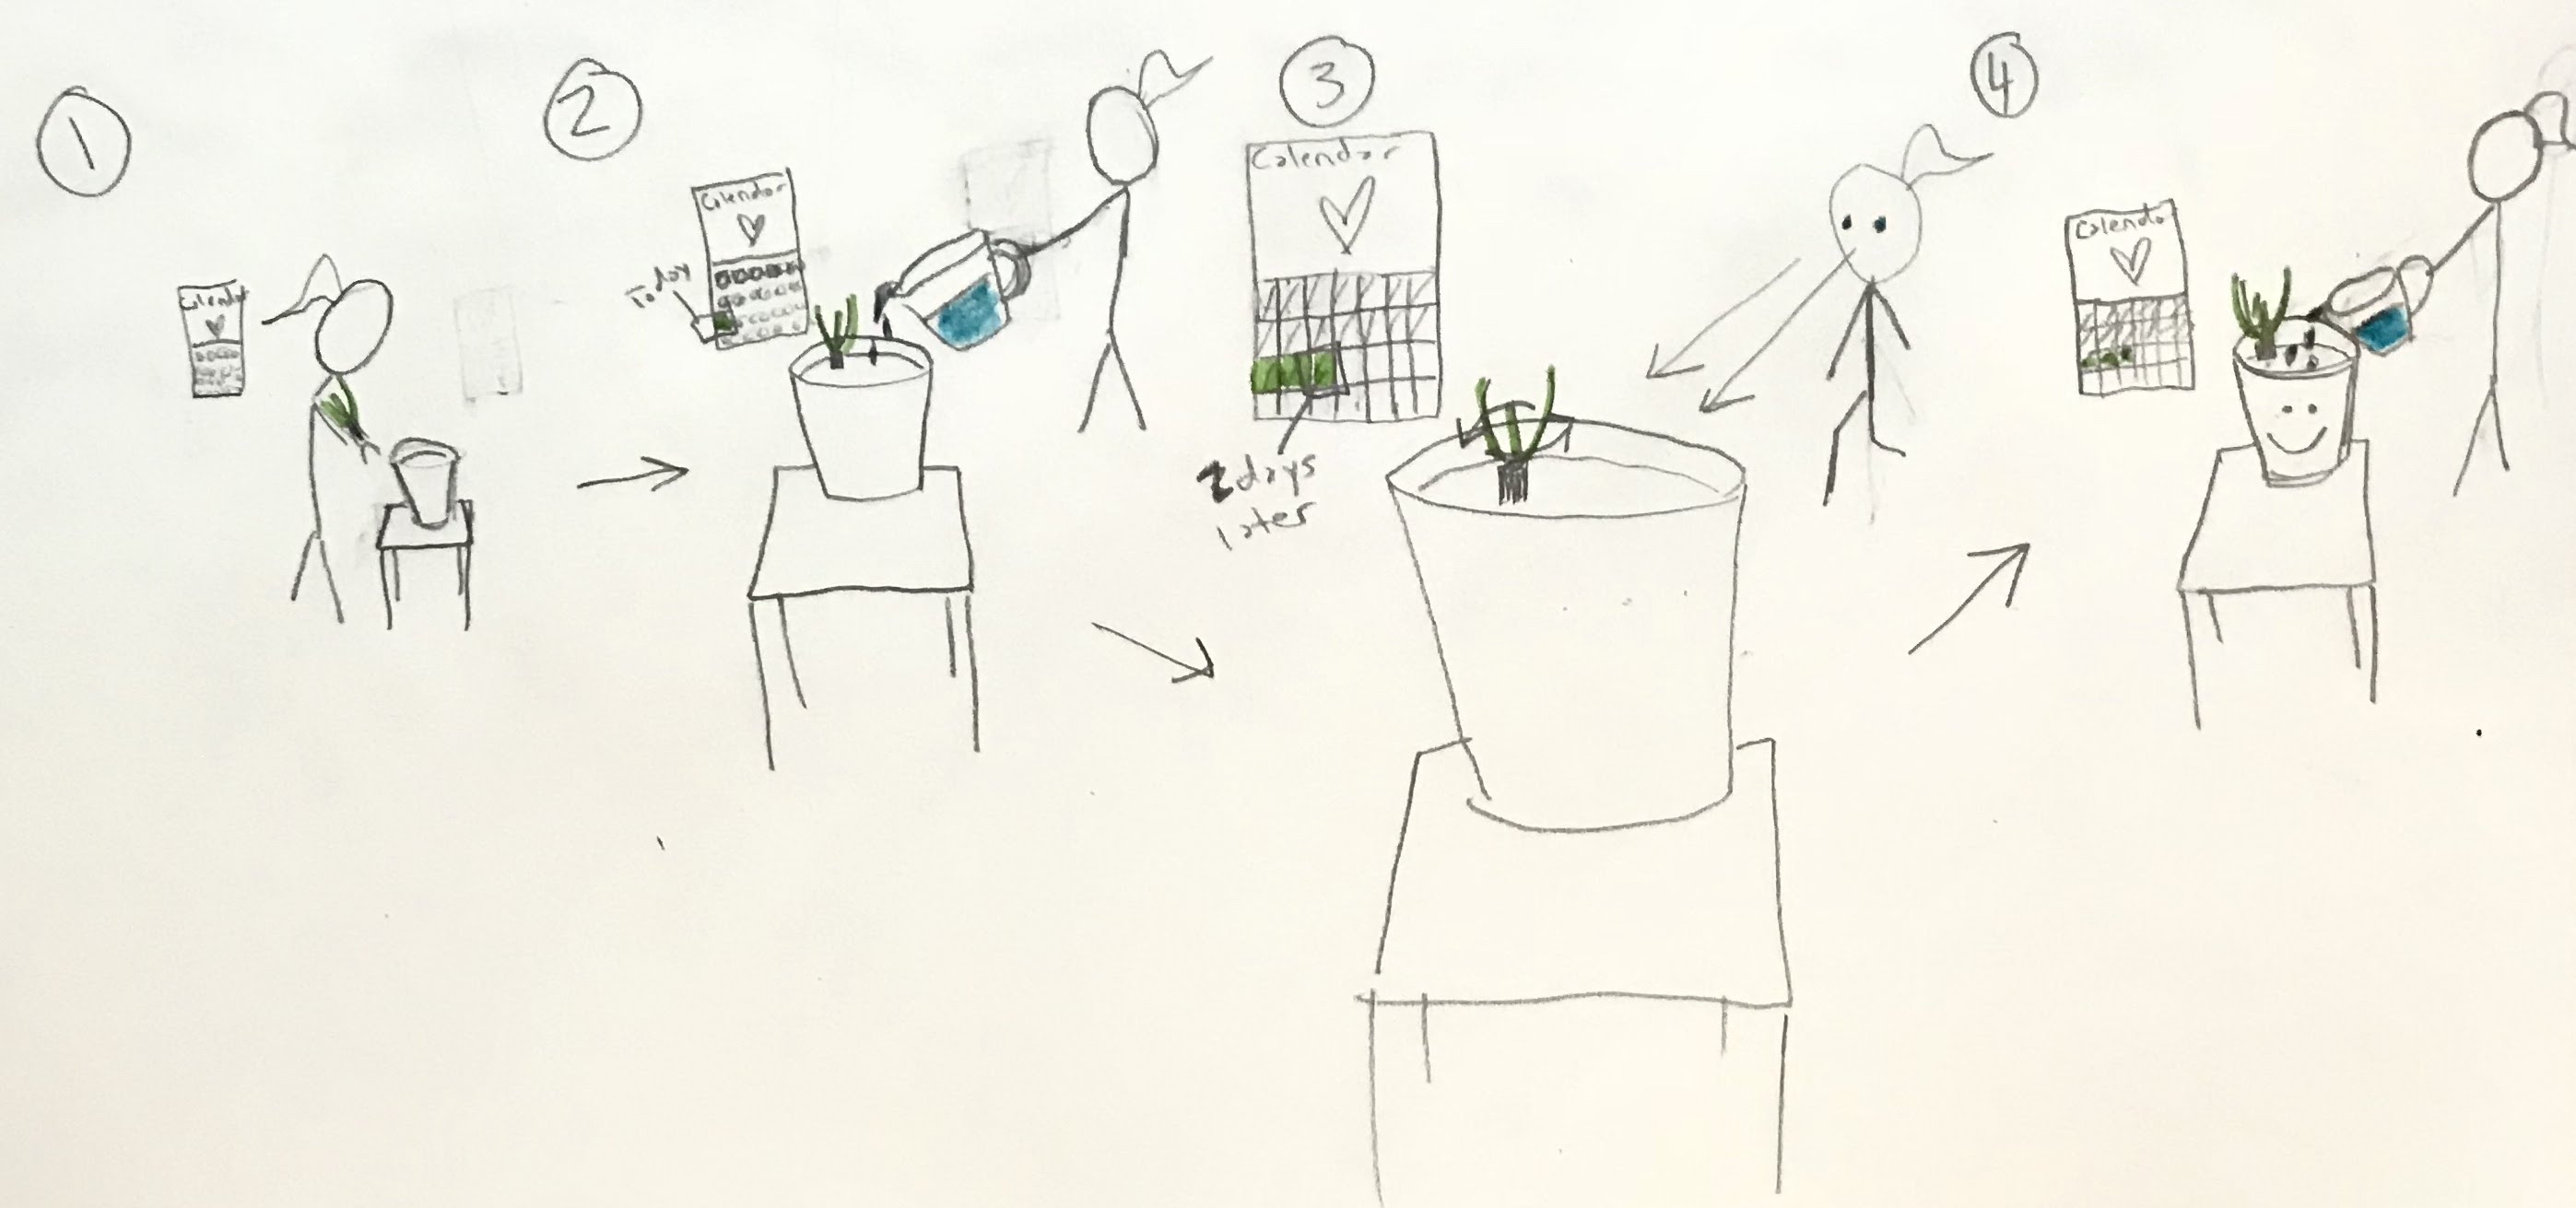
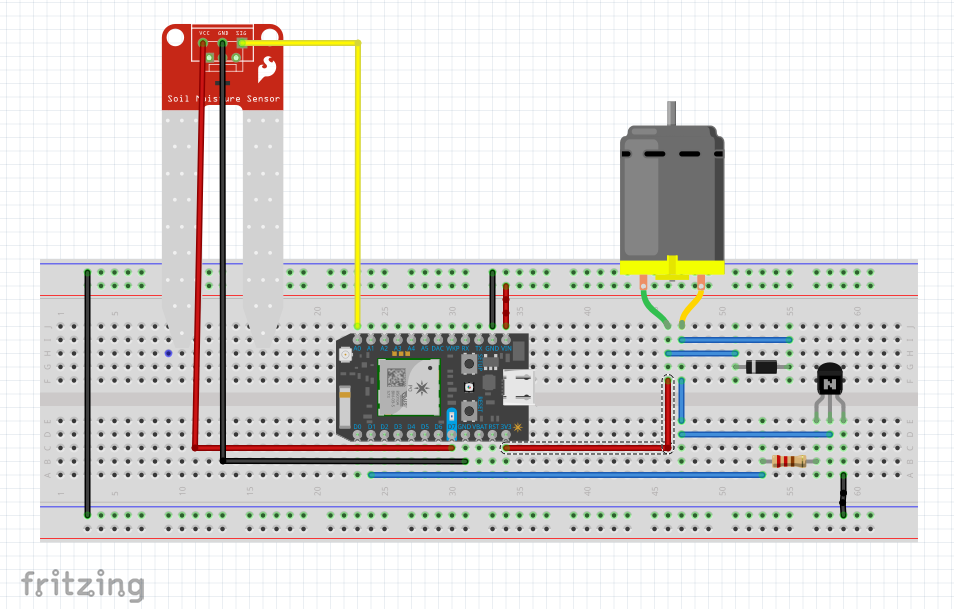
Water Me! is a project that represents intimate personal data as motion in a semi-public space. When your house plant's moisture level is low (<200 reading in the soil moisture sensor), a motor turns that has a soft and long leaf like object attached to it. The resulting waving motion of the leaf like object is a display/signal that you need to water your plant or that you haven't been taking good care of your plant. This is semi-public, because it will be located wherever your house plant is located, and typically, a house plant is placed in a home space where anyone in that space could see it if you allowed them to enter it. It could also be placed in office plants and used for a similar reason. 

Problem Statement & Goal:

To design and prototype an ambient object that represents whether you are taking care of your plant/if you need to pay more attention to you plant as motion in a semi-public space. The design should be non-intrusive, but obvious enough to be noticed and to help you make a positive behavior change. In this case, that positive behavior change is to pay attention to your plant by watering it.

Concept Sketch Illustrations:

Img 4339
Show Advanced Options
Green ideas interior decorating house plants 3
Show Advanced Options

Concept Story Board | Proposed Interaction:

Img 4340
Show Advanced Options

Video | Illustrative Scenario:

Show Advanced Options

Below is the moisture levels measured by the Water Me! sensor in dry and moist scenarios:

Screen shot 2018 02 07 at 17.43.22
Show Advanced Options
Screen shot 2018 02 07 at 17.42.55
Show Advanced Options

Design & Development Process

Bill of Materials:

  1. Breadboard (generic) x 1
  2. Particle Photon x 1
  3. DC motor/DC Pump x 1
  4. TIP120 Transistor x 1
  5. 350 Ohm Resistor x 1
  6. Schottky Diode x 1
  7. SparkFun Soil Moisture Sensor (with Screw Terminals) x 1
  8. 12 Jumper Wires 
  9. 5V Supply from a Battery

Fritzing Diagram:

Ambient project
Show Advanced Options

Code Development Process:

1. Set up the code for the soil moisture sensor. To do this, you must declare integers for the soil moisture sensor in an analog pin, the soil moisture power in a digital pin and then store the variable for soil value. 

Show Advanced Options

2. Complete the setup for the soil moisture sensor and a function that you will call later to read the soil moisture content. Below is the code with notes inline explaining what the code means.

Show Advanced Options

3. Then you will connect the soil moisture sensor to wifi and the particle cloud and crete variables that expose soil moisture as an integer in the cloud. You will also add in text to confirm that the soil moisture sensor is working. You will create a loop and inside read whether the soil moisture value is working and print a confirmation.

Show Advanced Options

4. Write the code for the motor, connect it to the cloud and display it as an integer variable there. Then add functionality of it into the loop. You will do this by declaring an integer for motor, setting motor as an output, setting the motor to off before the loop is read, and then activating the motor in the loop when the soil moisture sensor reads a level < 200. You will also create a variable for motor to be read in the cloud. All of this is written inline in the code below.

Show Advanced Options

If all of this is written in, you have completed the code to make this project work! Nice work!

Make sure the pins for your D#'s and A#'s are written correctly throughout (we had trouble keeping track of these and it definitely slowed us down ;) ). 


Below is a final snippet of the Water Me! code:

Show Advanced Options

Reflections & Next Steps

We learned that it takes intentional, thoughtful design to create a product that displays sensitive information, but in a way that doesn't negatively impact the user or anyone else who may interact with the product. 

In the future, we would start the process with a more purposeful ideation session around the many different options or areas we could explore to display sensitive information that haven't been explored yet. We are aware that products like Water Me! currently exist (like the Thirsty Light, https://www.amazon.com/Thirsty-Light-Original-Digital-Moisture/dp/B0017RXJUS). Though creating Water Me! was an educational experience for us, it could be even more exciting to tackle an issue or project concept that has not been robustly and/or successfully addressed.

Next steps for this project would be to connect the motor to multiple plants, to have the motor run at different speeds depending on the level of dryness (not just programmed to one level) and/or to attached the motor to the moisture sensor in a way that looks more like the original concept sketches we presented at the beginning of this documentation. 

Challenges:

We faced two major challenges during this project and they are explained below:

1. Programming the if statement for the motor: Once we were able to get the soil moisture sensor (SMS) read and sending readings to the cloud, we had some difficulty figuring out how to get the motor to turn off and on when the moisture reading was below 200. This is partially because we were relying too heavily on documentation done by other people and because their projects were actually much different than ours. There isn't much documentation about how to program motors when information is read by a more complicated sensor like the SMS that we chose. Ultimately, we found a particle.io community project that was somewhat similar to ours and made sense to us (referenced below) and we manipulated the code to suit our needs.

2. Setting up the motor hardware: Online, we also found many different ways to set up the DC motor we used. We were able to power it and connect it to the cloud easily, but we had difficulty wiring it correctly so that it was not on all the time and could turn on and off per the commands sent to it by the SMS. Ultimately, our professor, Daragh Byrne, and TA, Roberto Andaya, guided us to resolve this issue by directing us to the transistor we should use TIP120 and a better way of wiring the motor, which is how it is wired in the fritzing diagram shown earlier in our documentation. 

Drop files here or click to select

You can upload files of up to 20MB using this form.