Plant Mario
A plant can sing your favorite Mario song to you!
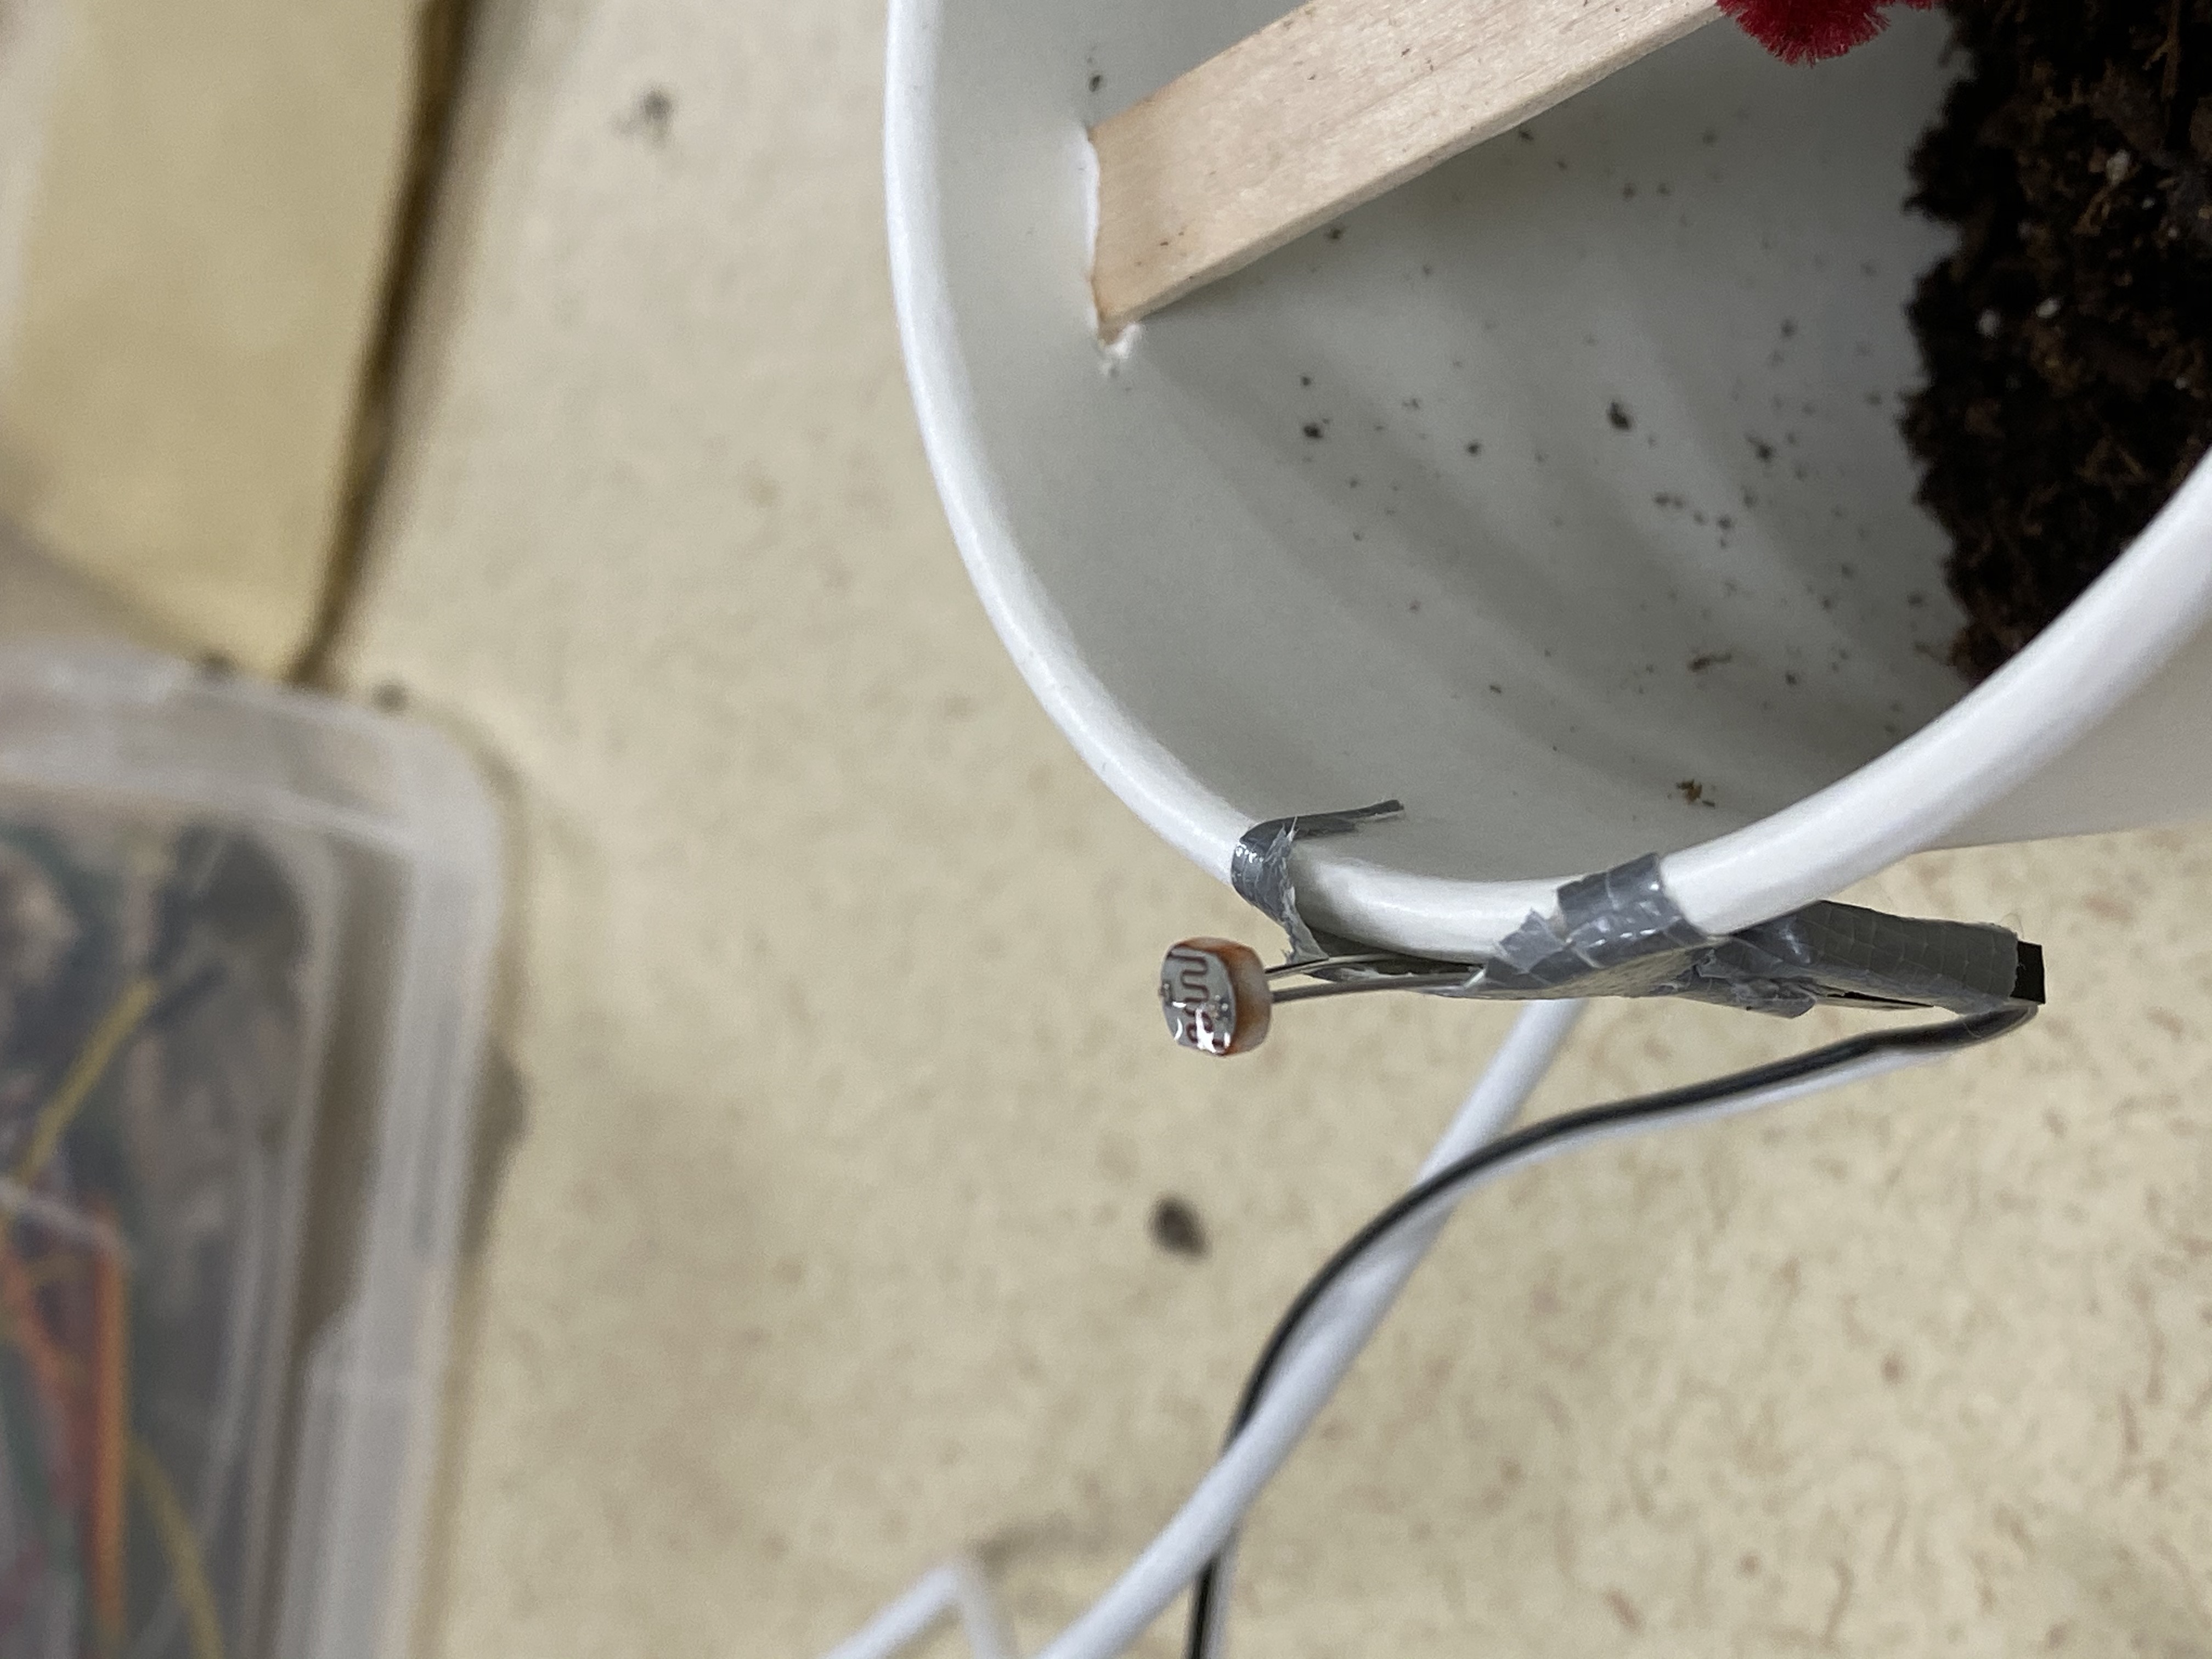
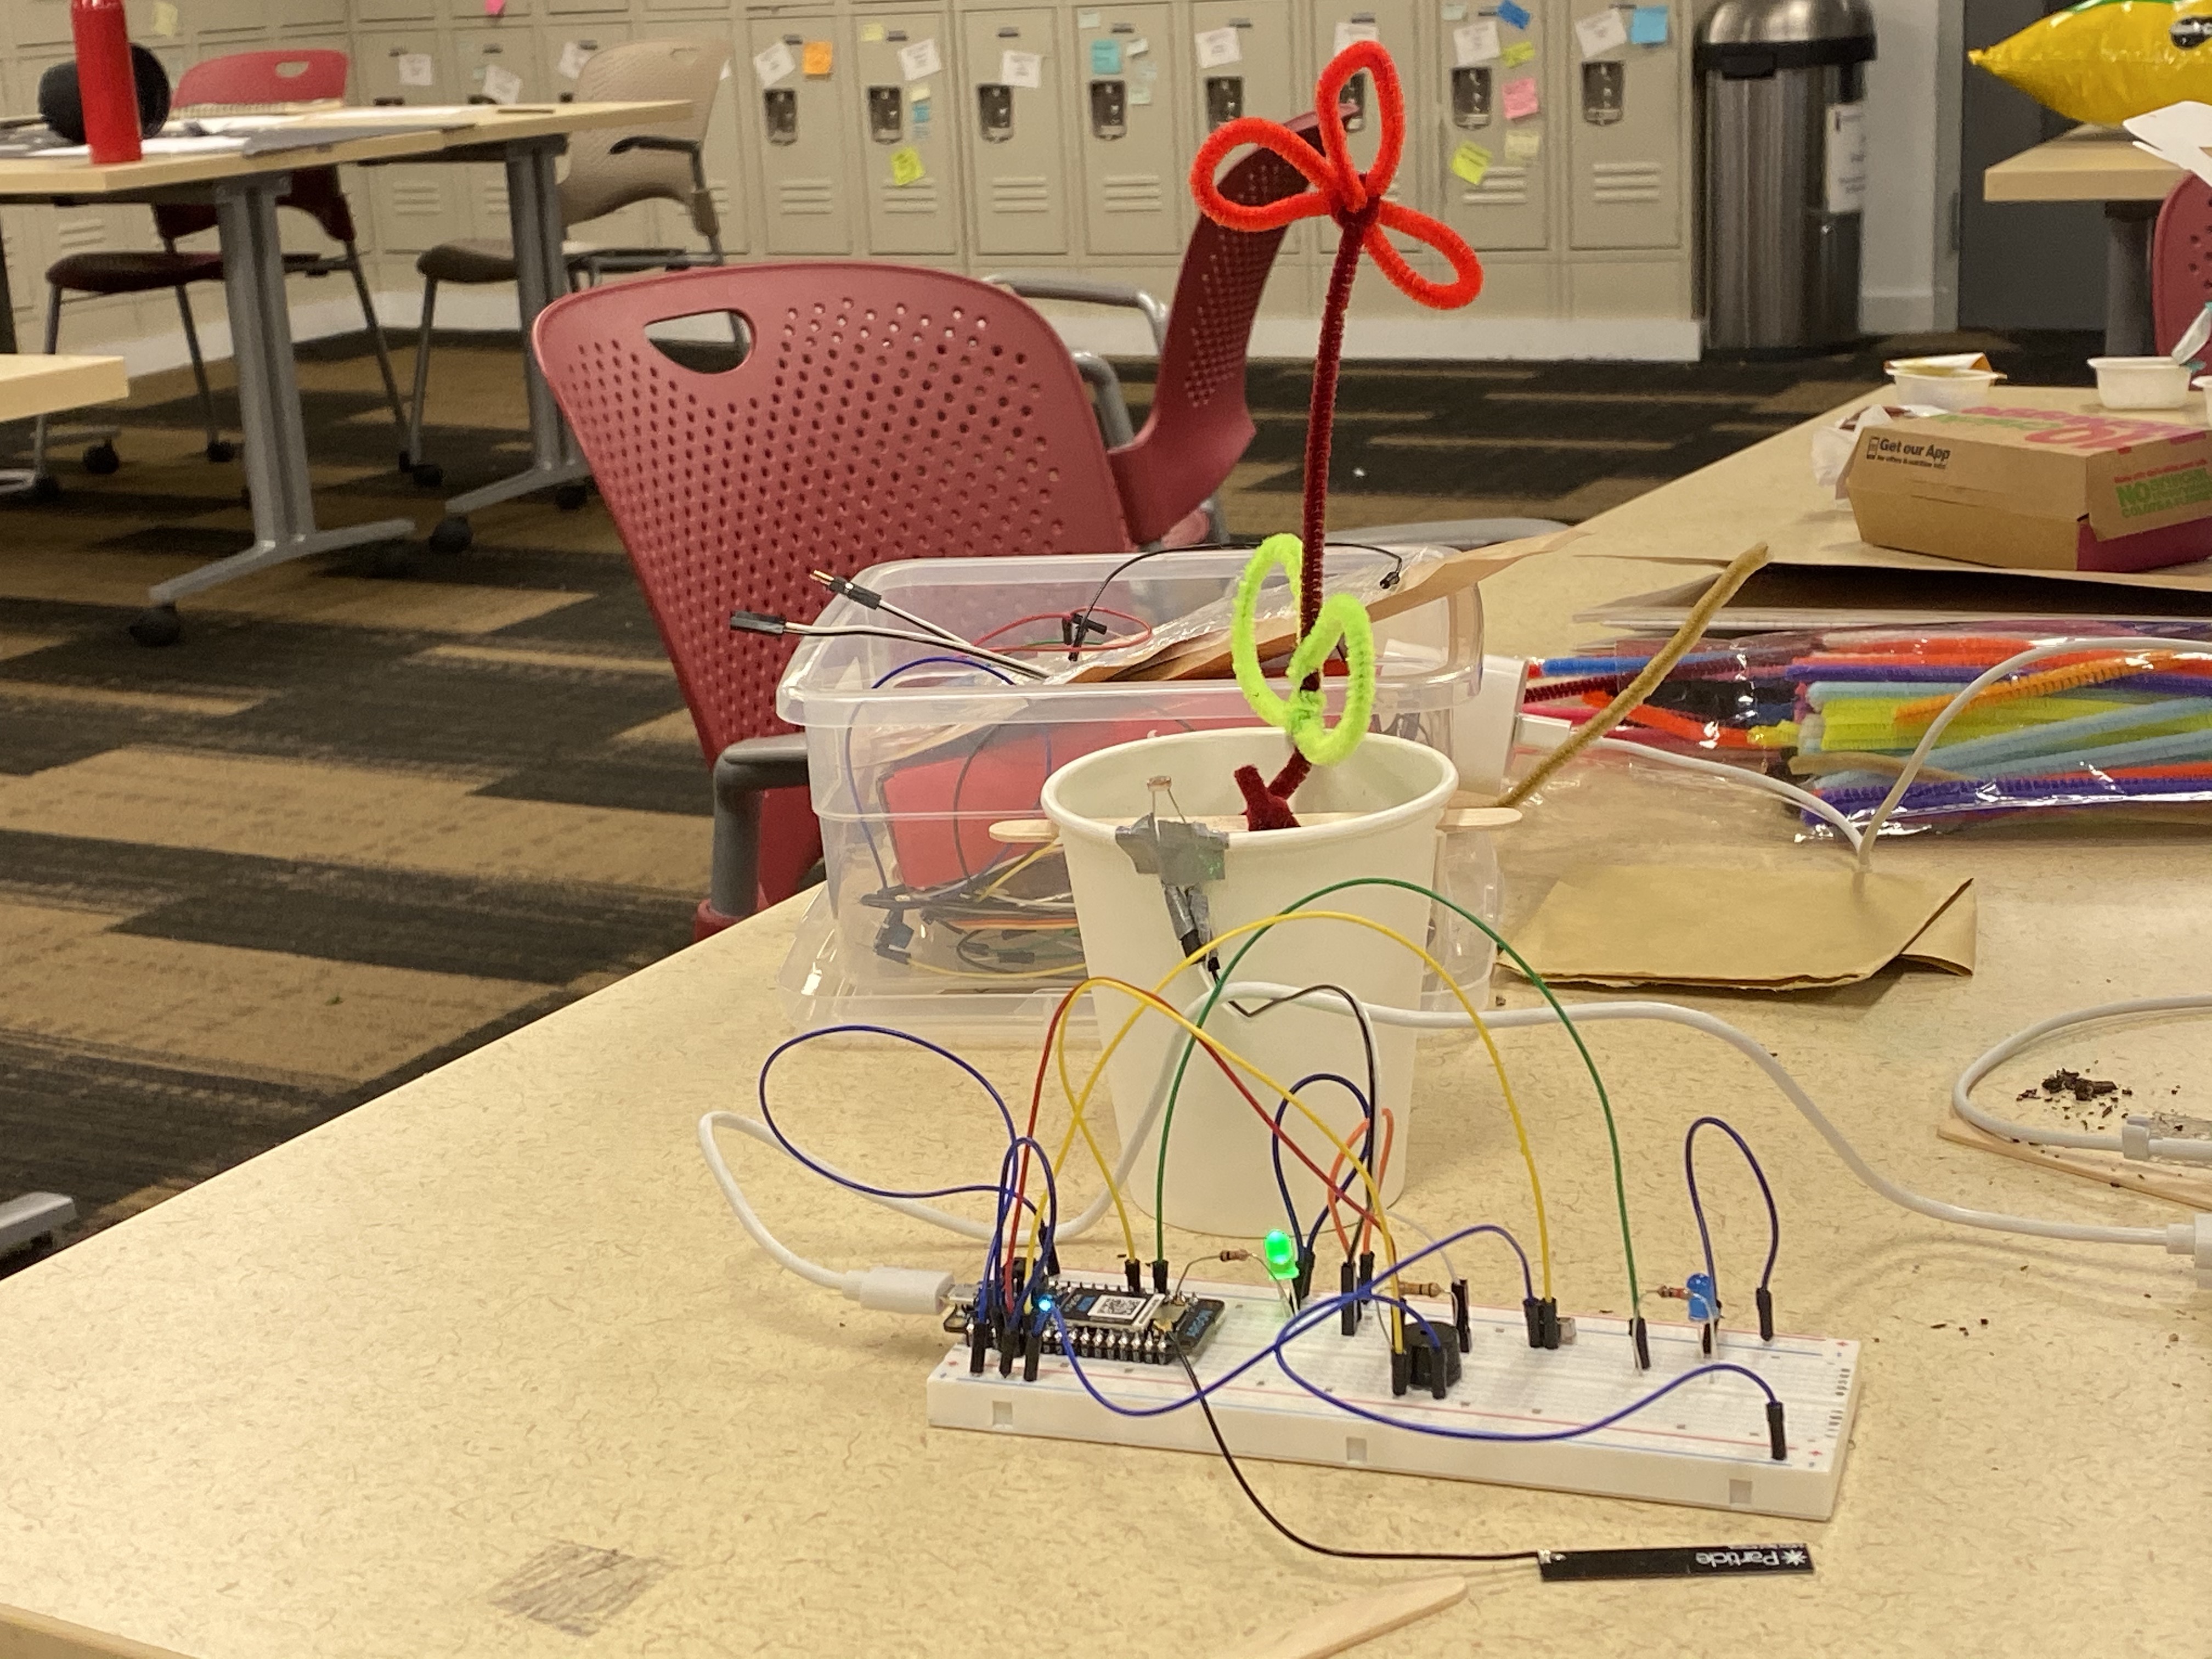
It has a photoresistor to detector light change of the environment around itself. It pushes notification to its owner in a 15-minute cycle during the day to let the owner know about the light condition around the plant. It also generates a log on Google sheet to collect light data throughout the day. This type of solution is best for the type of plans that are not in favor of bright conditions. It also connects with IFTTT so that the owner can receive notifications about the plant status.
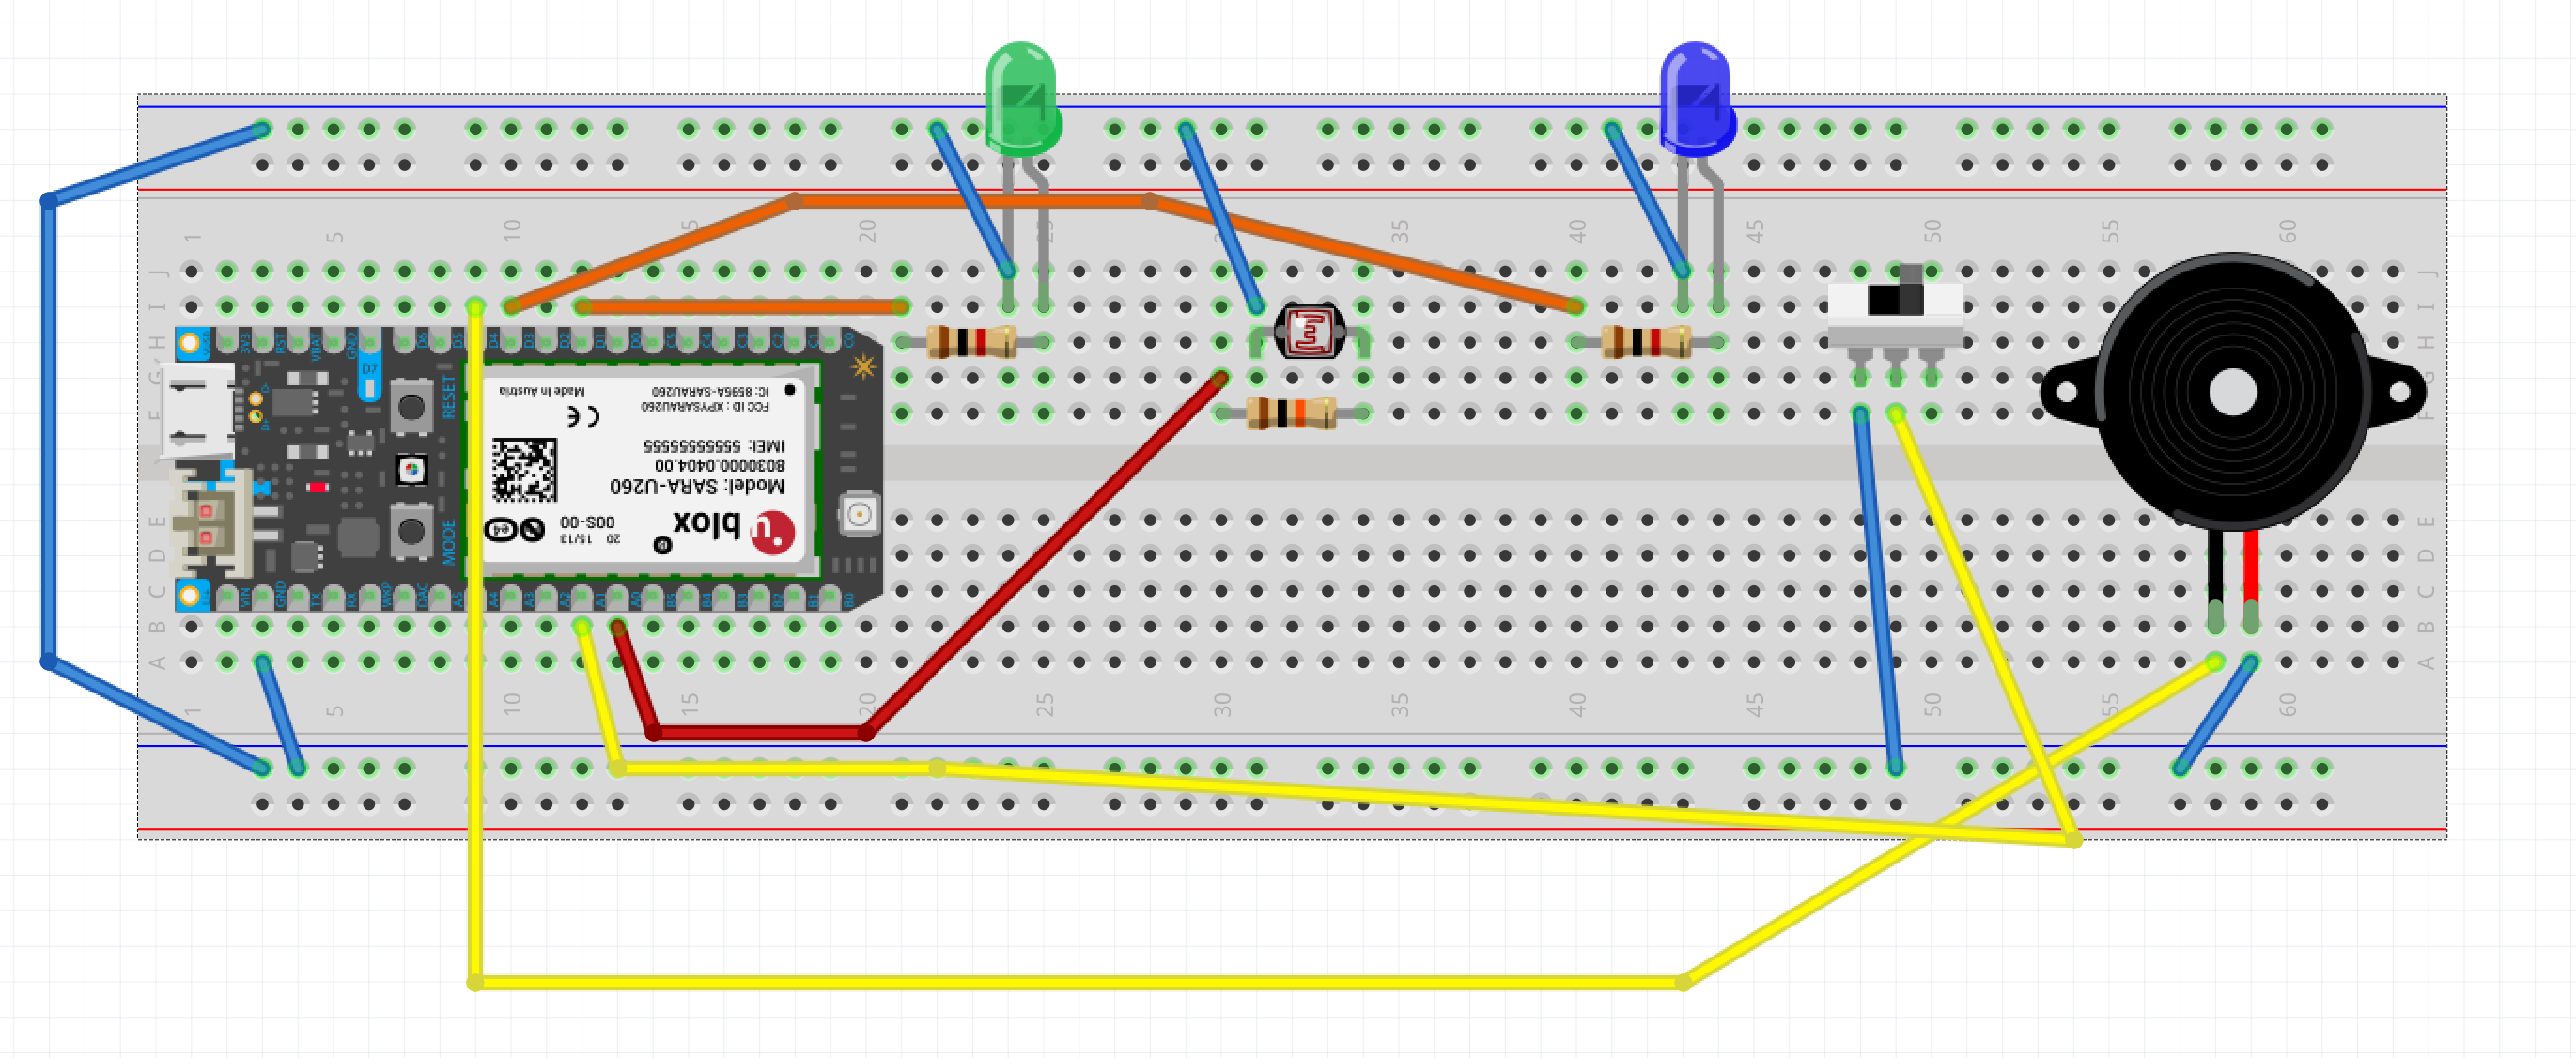
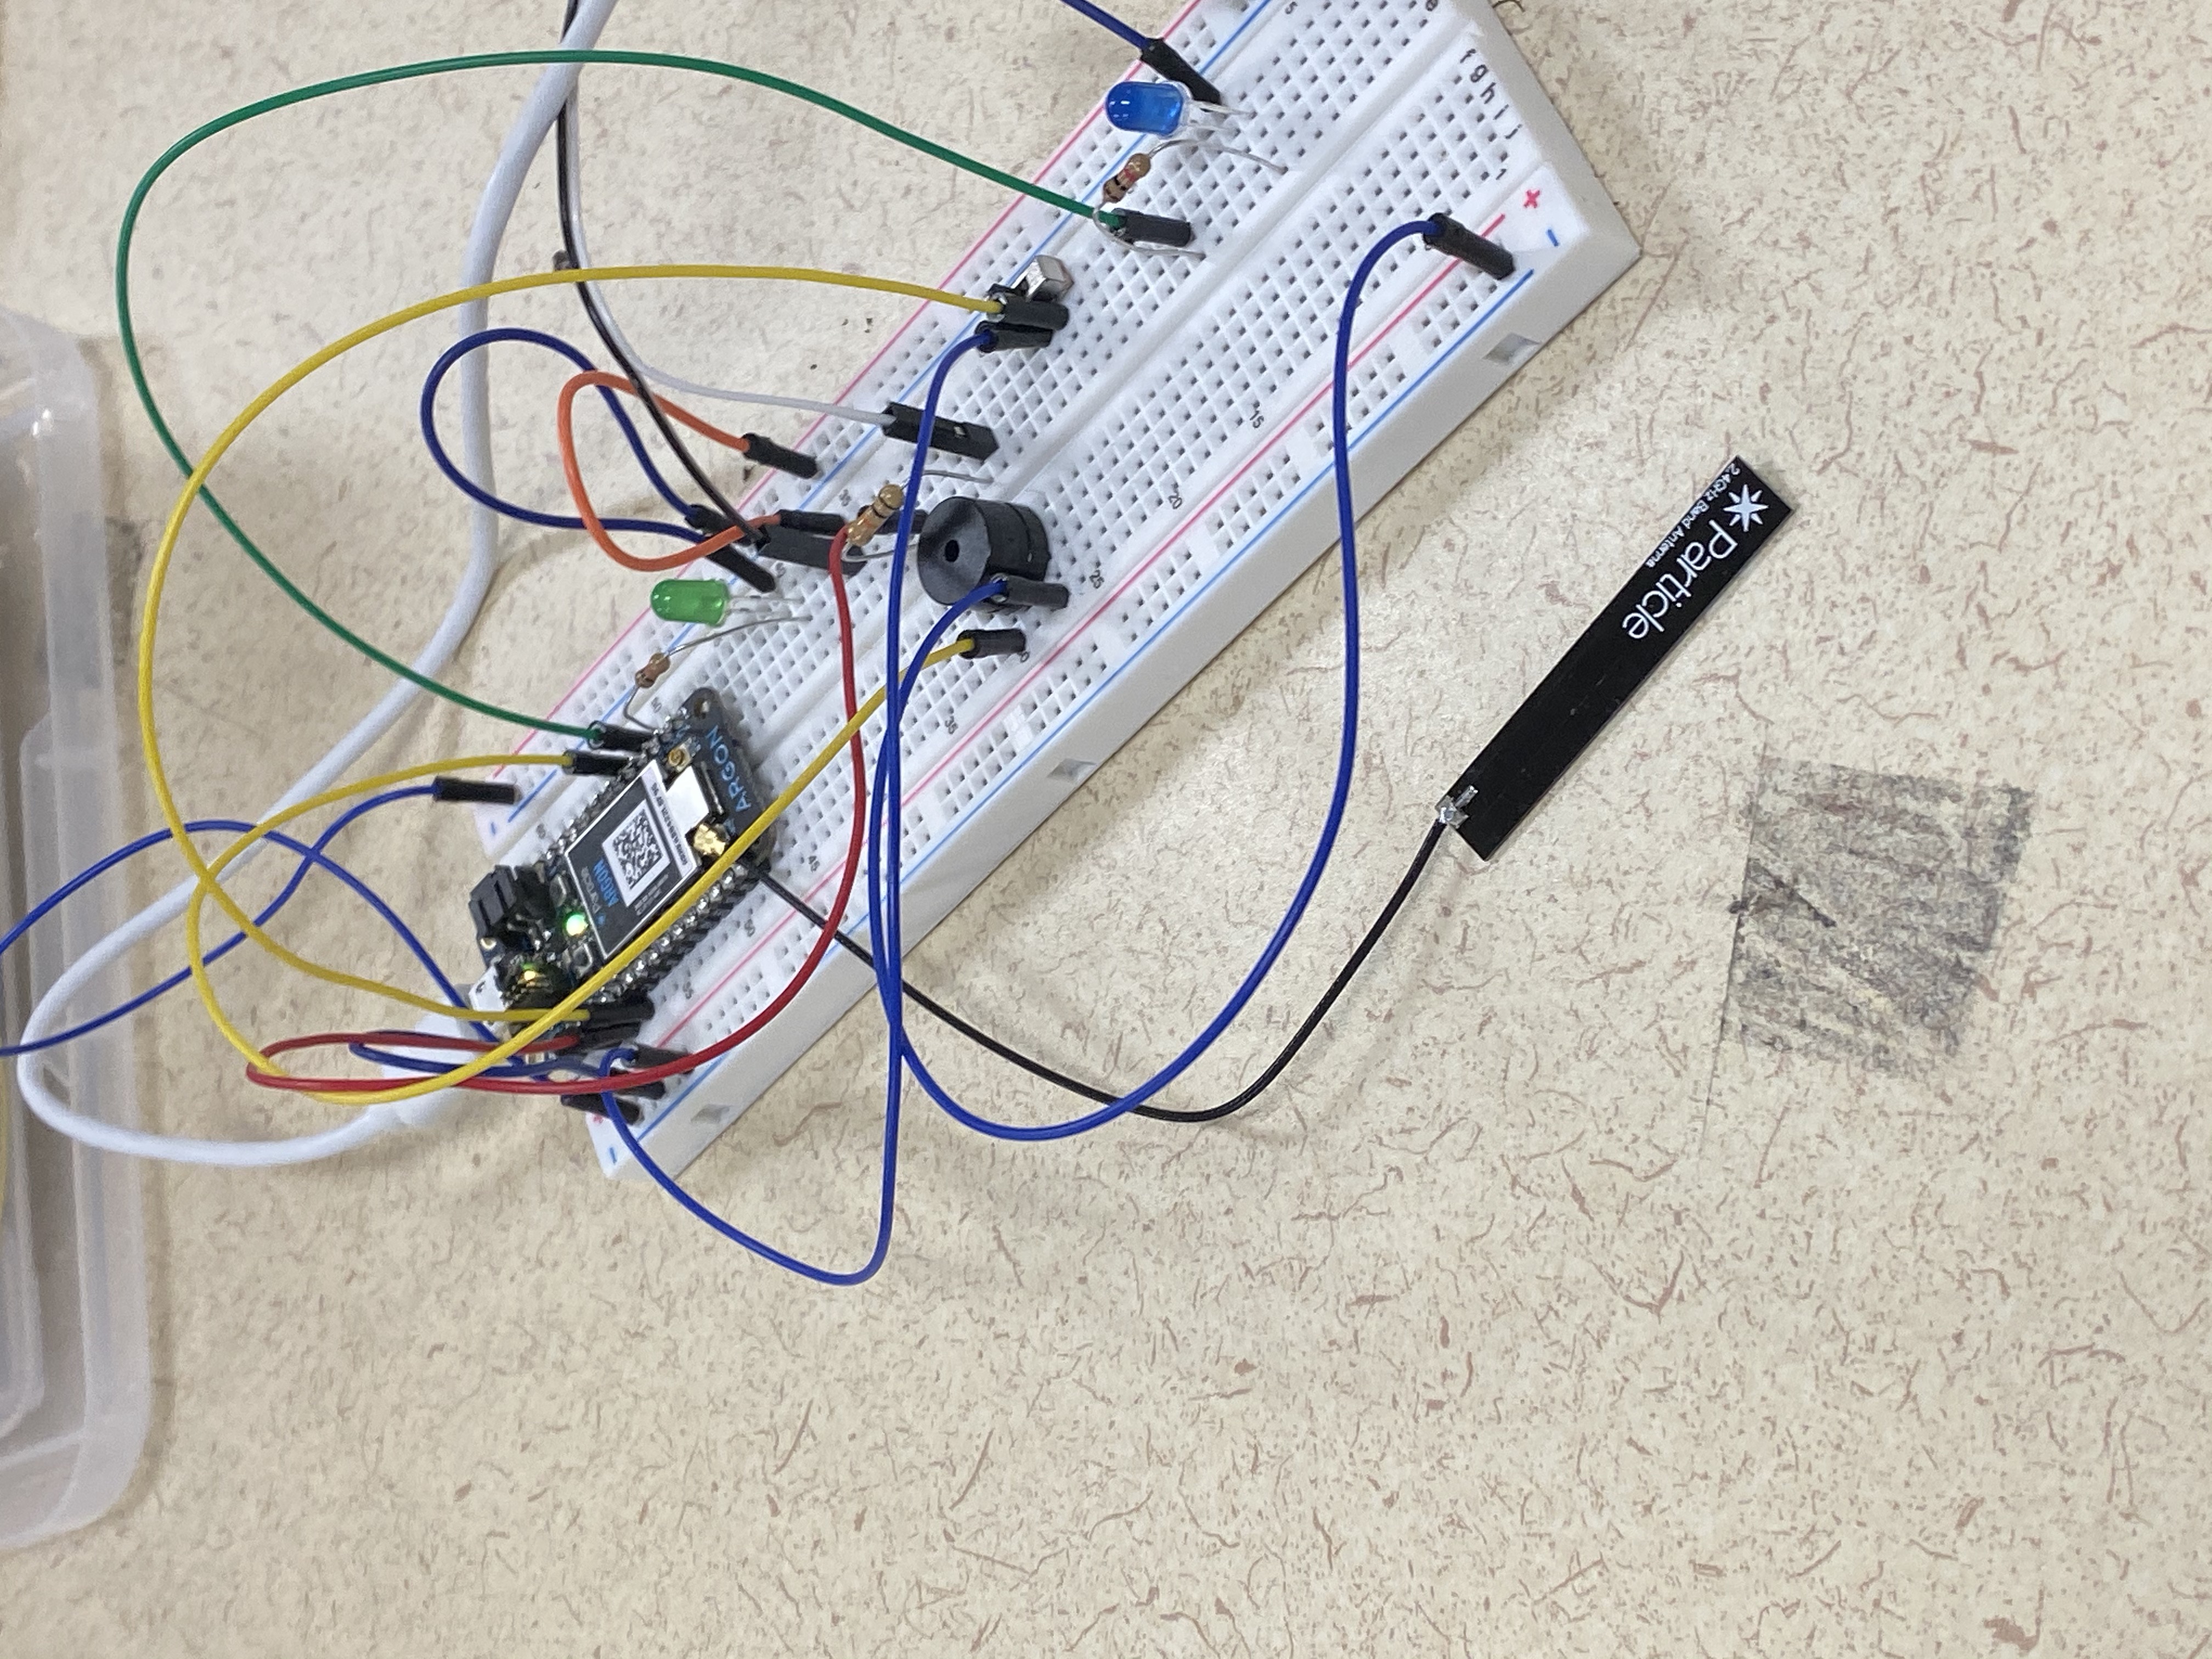
First, I identified a few key features of the device. I thought about what signal it needs to give to the user and how the user would like to get notified when the plant needs more care. Then I decided to use the photoresistor to detect the light level and an LCD light screen that can show emojis that represent plant status based on light conditions. To make the plant more vivid, I added a piezo to have it generate a Super Mario song to the user.
I connected the sensors and the components on the board. During the process, I've been thinking about the essential parts of implementing a solution. However, when I try to connect the LCD screen to the breadboard with particle Argon, I found that it is hard to find a working library to make the LCD screen work. Due to the time constraint, I wasn't able to pursue that route. Then I decided to do something similar that can express the same idea. I eventually used LED light to indicate the two different ambient light status of the plant. I reuse the code that I wrote in the skill development practice. Here is a high-level step-by-step process:
In the next step, I will improve the richness of the environmental information collected by the device that can help the plant to grow more. First, it will be a real plant instead of a mockup. Secondly, I will add more sensors to collect more information that is related to the plant's growth. Thirdly, the plant will be able to water itself with soil moisture data collected. There will be a more user-friendly dashboard for the owner to monitor the plant status. Also, I will use the LCD light to reflect the "plant emotion" based on collected environment data.
The most the challenges that I encountered is the complete complexity of implementing the LCD screen. It is extremely hard to find a working library that can be compatible with the screen in a short time. And It is also tough to make sure all the parts are working together without a freaking each other. In addition to that, the particleboard is very fragile, and it is very easy to break. I will definitely start early on this project to avoid any unexpected accidents that will prevent me from moving forward. Other than the point above, I also realized that the complexity of design on the board. Meeting all the feature requirements is not a one-step work. It is crucial to make sure thinking carefully before starting implementation.
The Super Mario Piezo Code
https://www.hackster.io/jrance/super-mario-theme-song-w-piezo-buzzer-and-arduino-1cc2e4
You can upload files of up to 20MB using this form.