
49713 Designing for the Internet of Things
· 16 members
A hands-on introductory course exploring the Internet of Things and connected product experiences.
Found in DioT 2019: Connected Communities
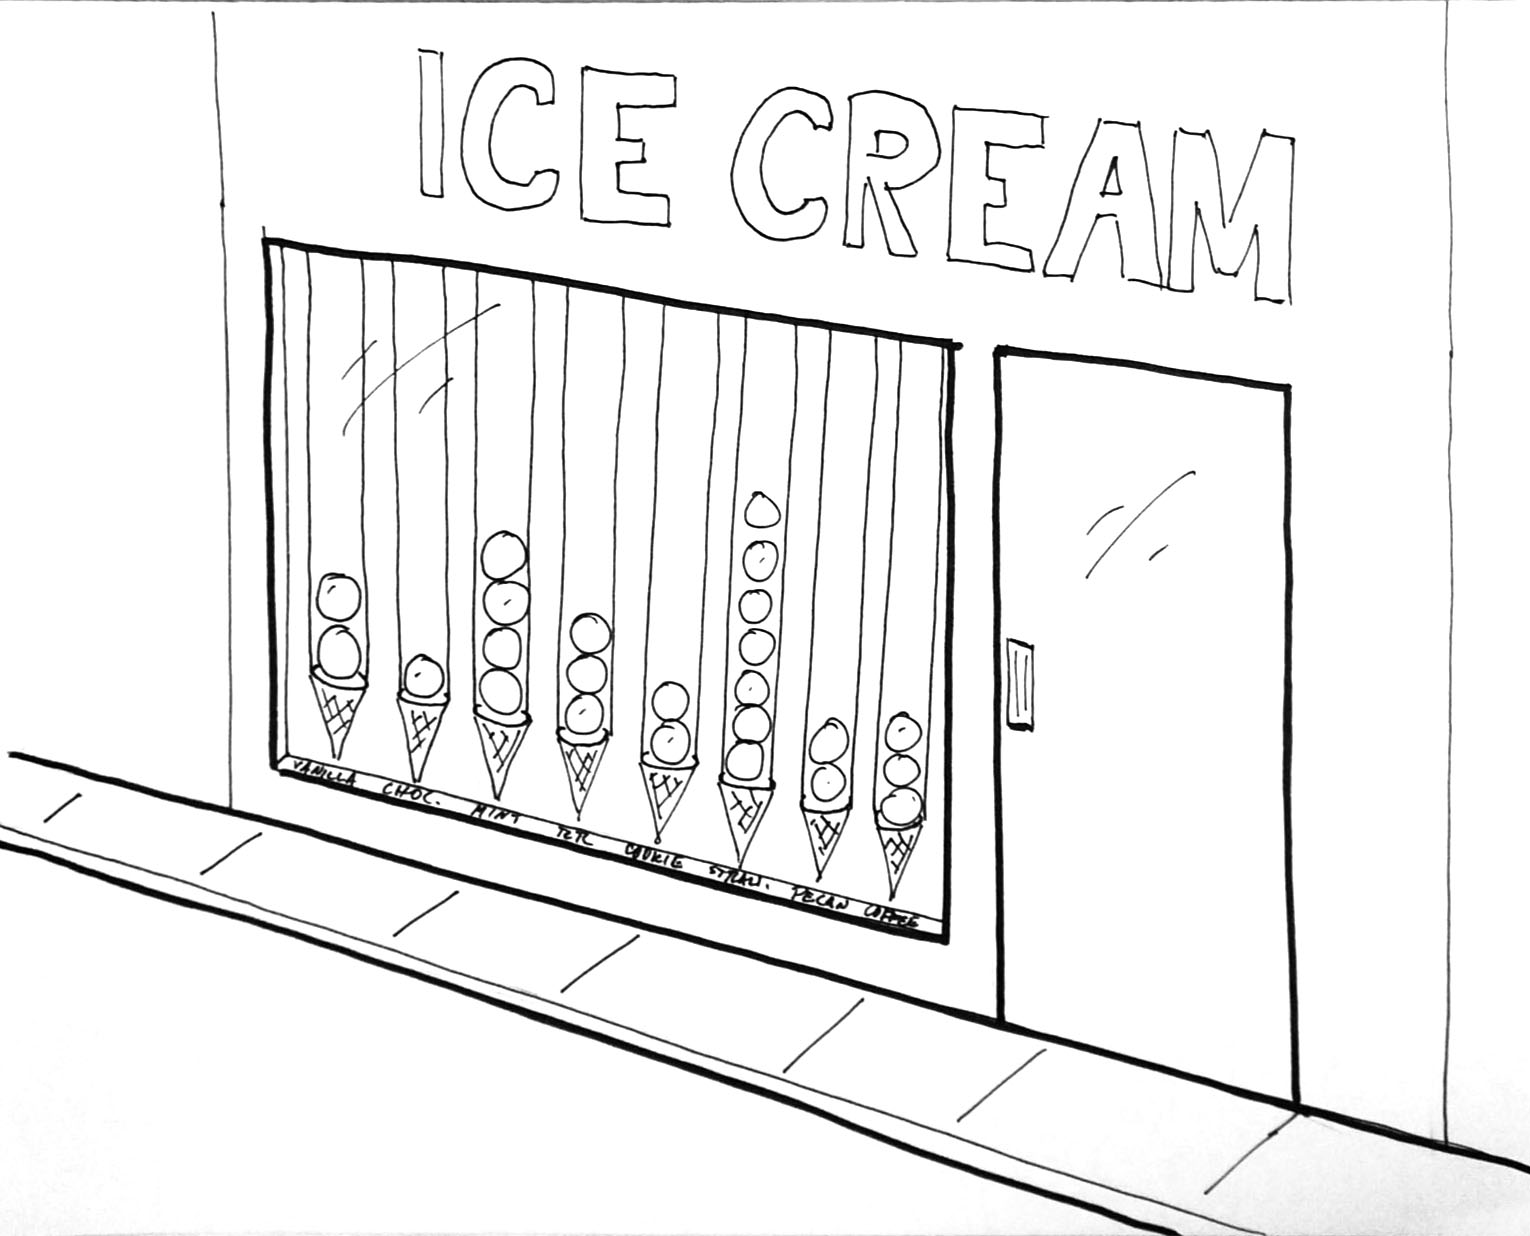
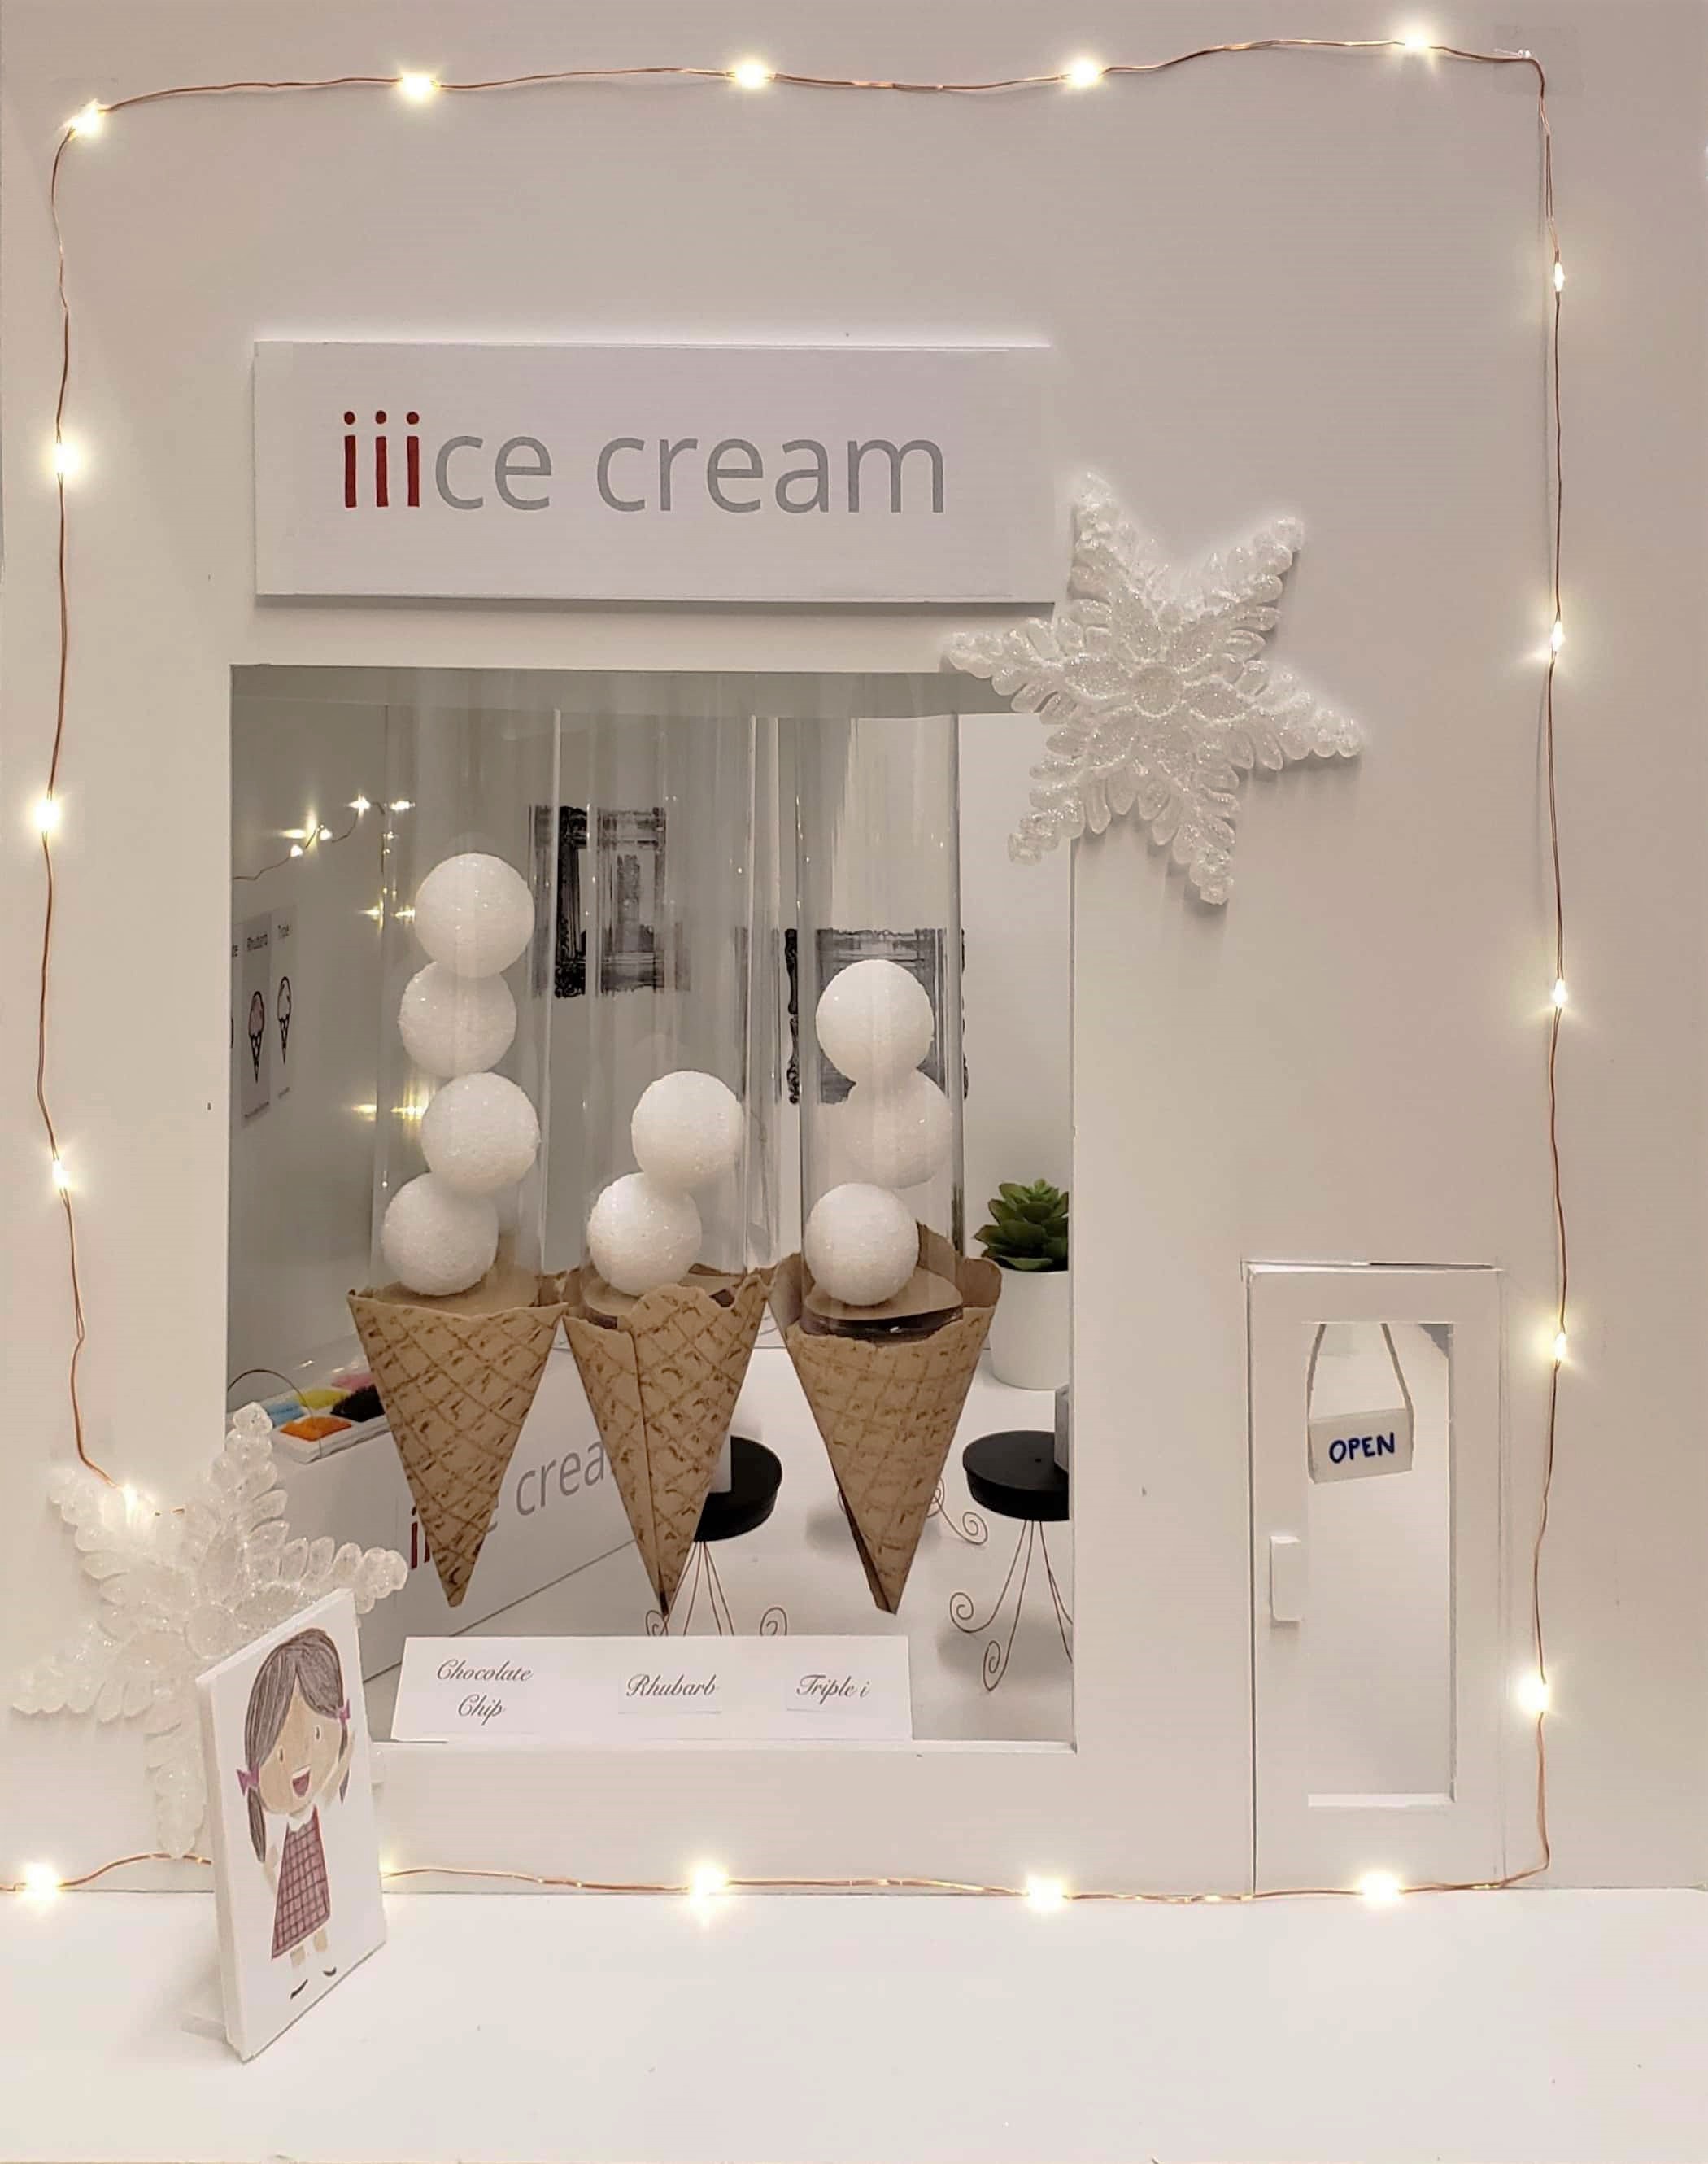
Storefront display and in-store interaction to help bring together ice cream lovers.
We are targeting people who bond over their love for food, specifically those with a sweet tooth. Communities have formed on platforms such as Yelp and TripAdvisor where they review their experiences at particular restaurants and talk about what they ordered. Information from one member is helpful for all the others when they are deciding where or what to eat.
For Ice-cream stores in particular, there is usually a dilemma on which flavor to pick from among so many, or which is flavor is most popular at that particular store. We also wanted to focus on an experience that brings joy to those who interact with it. Ice cream is admittedly an indulgence, but we wanted to enhance the attraction by making it exciting for anyone to view from the outside and even more fun to interact when inside the shop.
Our community revolves around people who love food and are in the neighborhood for this particular ice cream shop. We want to create an ambient way for this community to learn from each other and share their experiences without having to download an app or search through countless reviews.
Yelp and TripAdvisor are commonly used platforms to understand the popularity of restaurants and the food they offer. But these are digital solutions, and do not involve the community on a more social level. Opposite to this, many restaurants display their specials, but there is no communication for how popular these are.
However, there are some precedents to interactive store displays. DeepLocal has created several storefronts that interact with the people around them, like their Nike display in London. In Las Vegas, there are towering M&M containers at M&M’s World, displaying vast quantities of all the different colors. Many toy stores contain gumball machines or marble machines displaying a complex transportation system that is fun to watch no matter your age. We wanted to combine all of these ideas into a fun and interactive solution to display the popularity of ice cream flavors.
Initially we began discussing the type of community we wanted to focus on. First narrowing down to foodies, we then narrowed down further to desserts. Within this category, we defined our problem around the difficult choice of selecting an ice cream flavor. We also wanted to enhance the neighborhood connectivity by installing this in a local store instead of a large national chain.
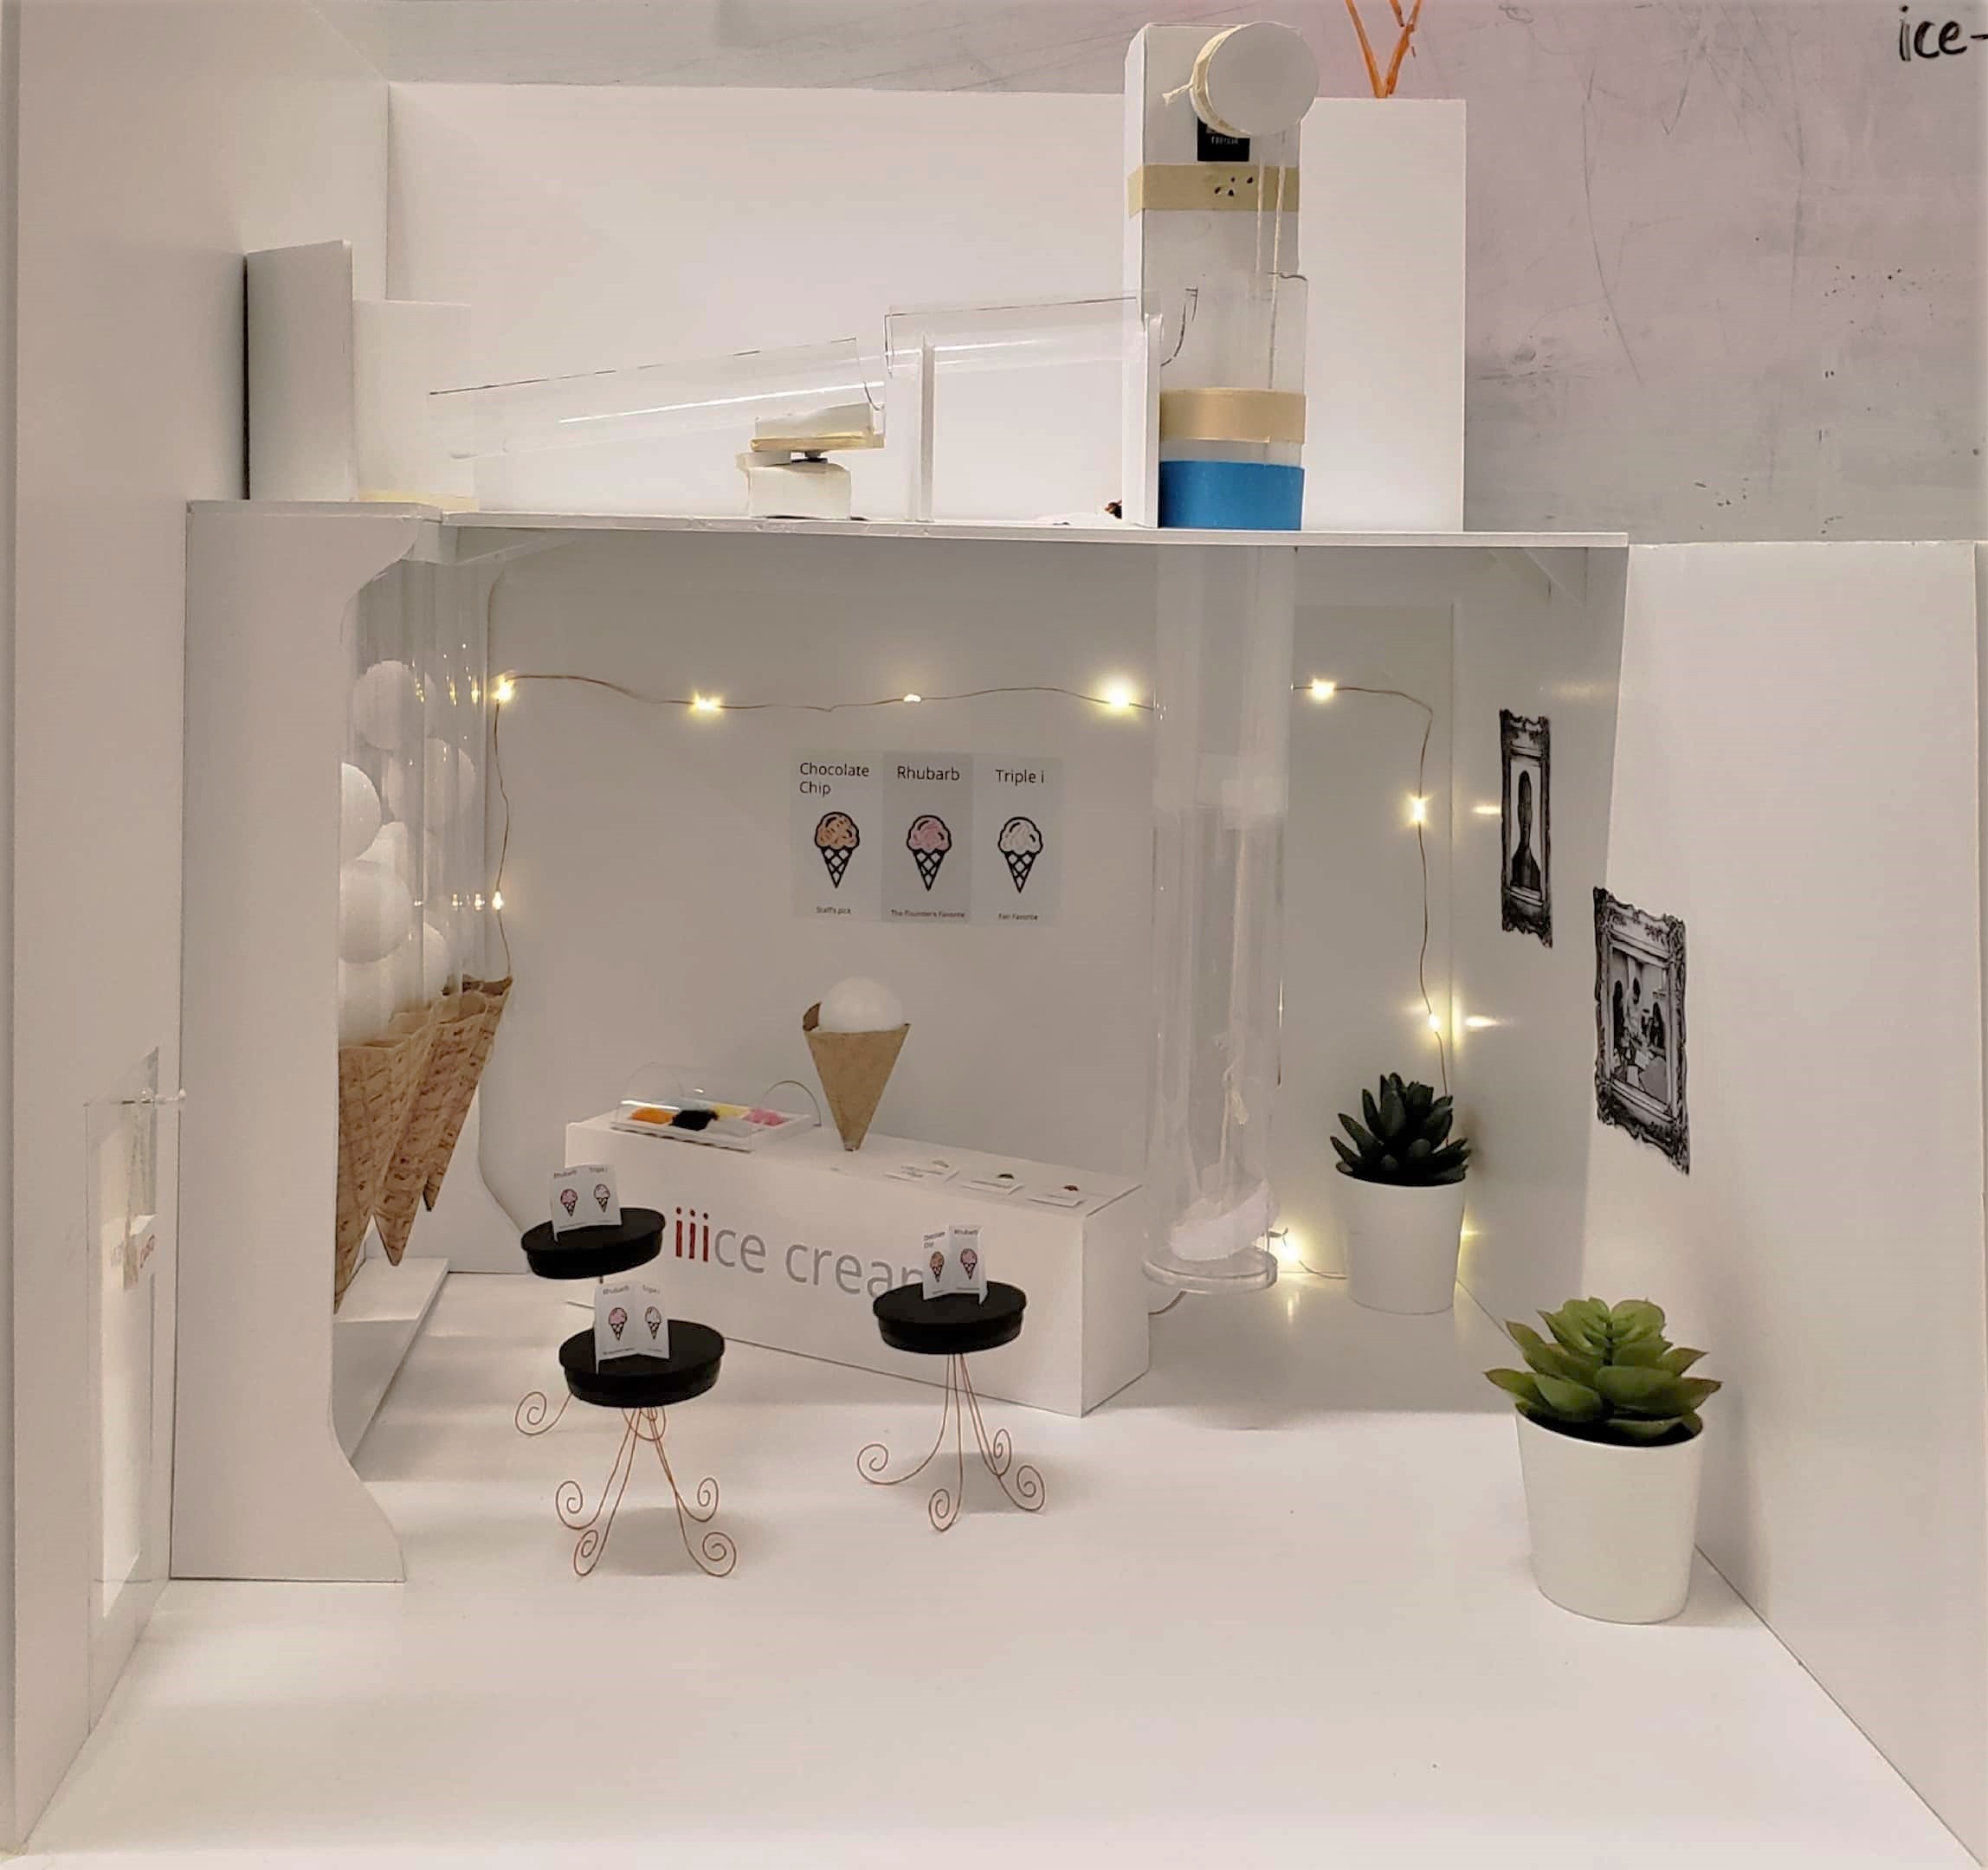
When designing the space, our primary challenge was around the interaction of the ice cream scoop balls themselves. Initially, the balls would just be in a reservoir on top and would be fed down the correct tube. However, we wanted to add additional interaction to the experience. So, we elected to have the customer place a ball on an “elevator” beside the counter. The mechanism would then raise the ball and direct it towards the correct tube. Getting the ball to elevate to the top of the store and falling out was the biggest challenge with unpredictable behavior from the continuously winding servo. Three or four different mechanisms were explored before the final version was selected and proven.
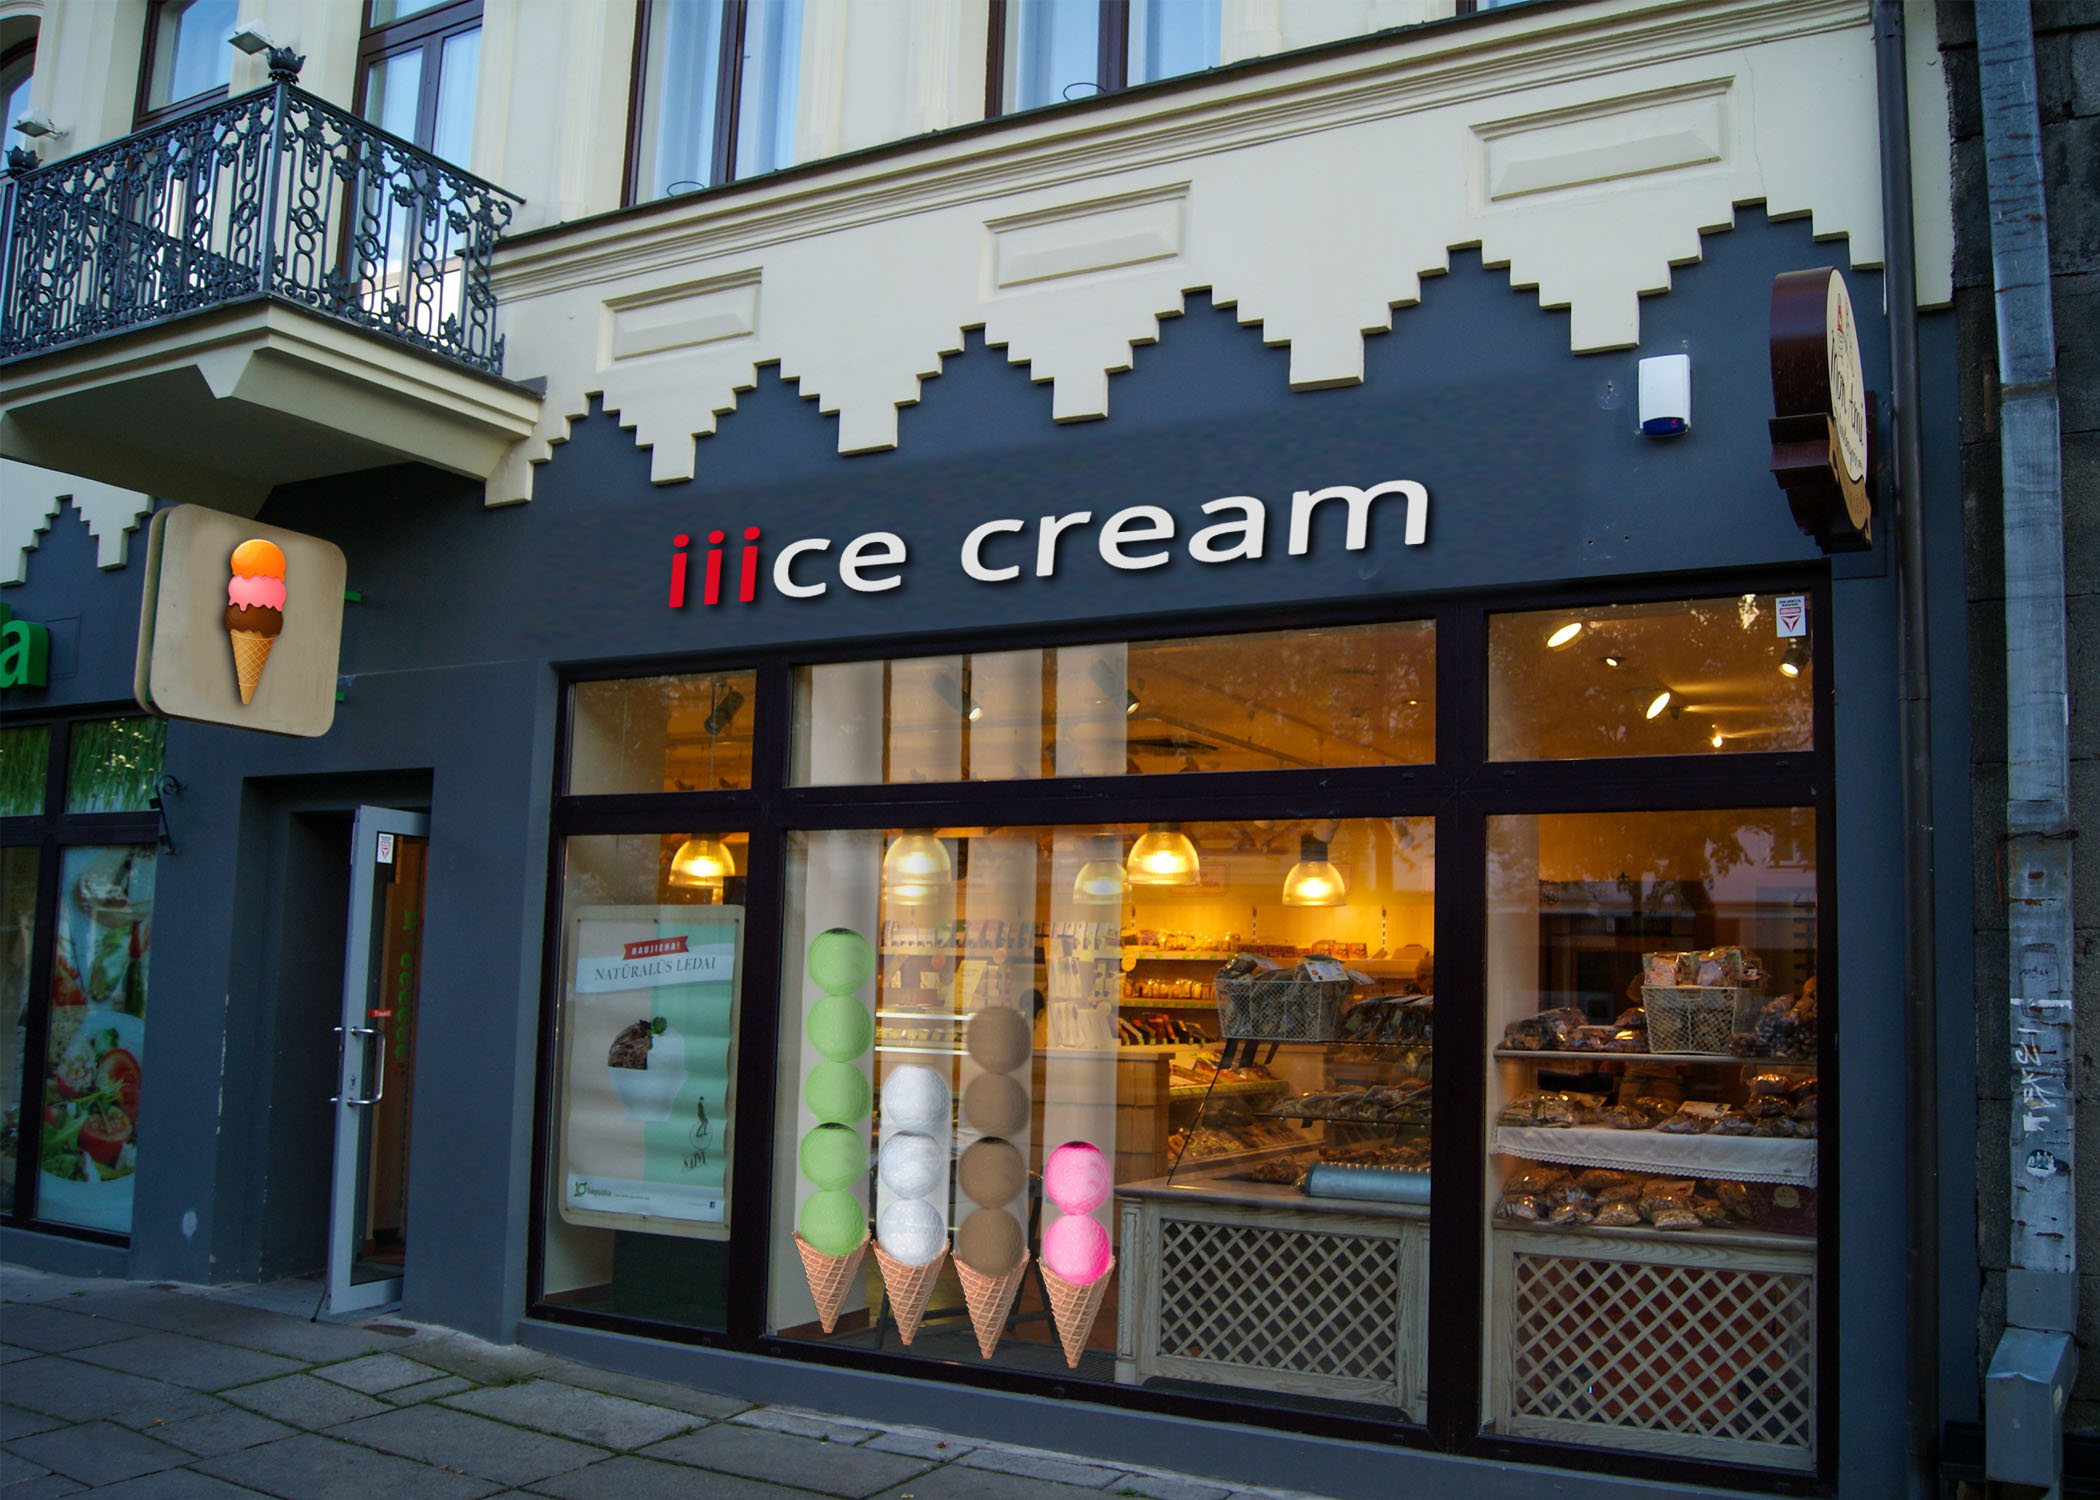
The ambient ice cream display is meant to be a storefront display at a neighborhood ice cream shop. As people walk by, they see which flavors are the most popular through the bar-chart effect created by the balls and cones in the window. As a fun interaction, people could observe how the display changes throughout the day, week, or even based on the time of year.
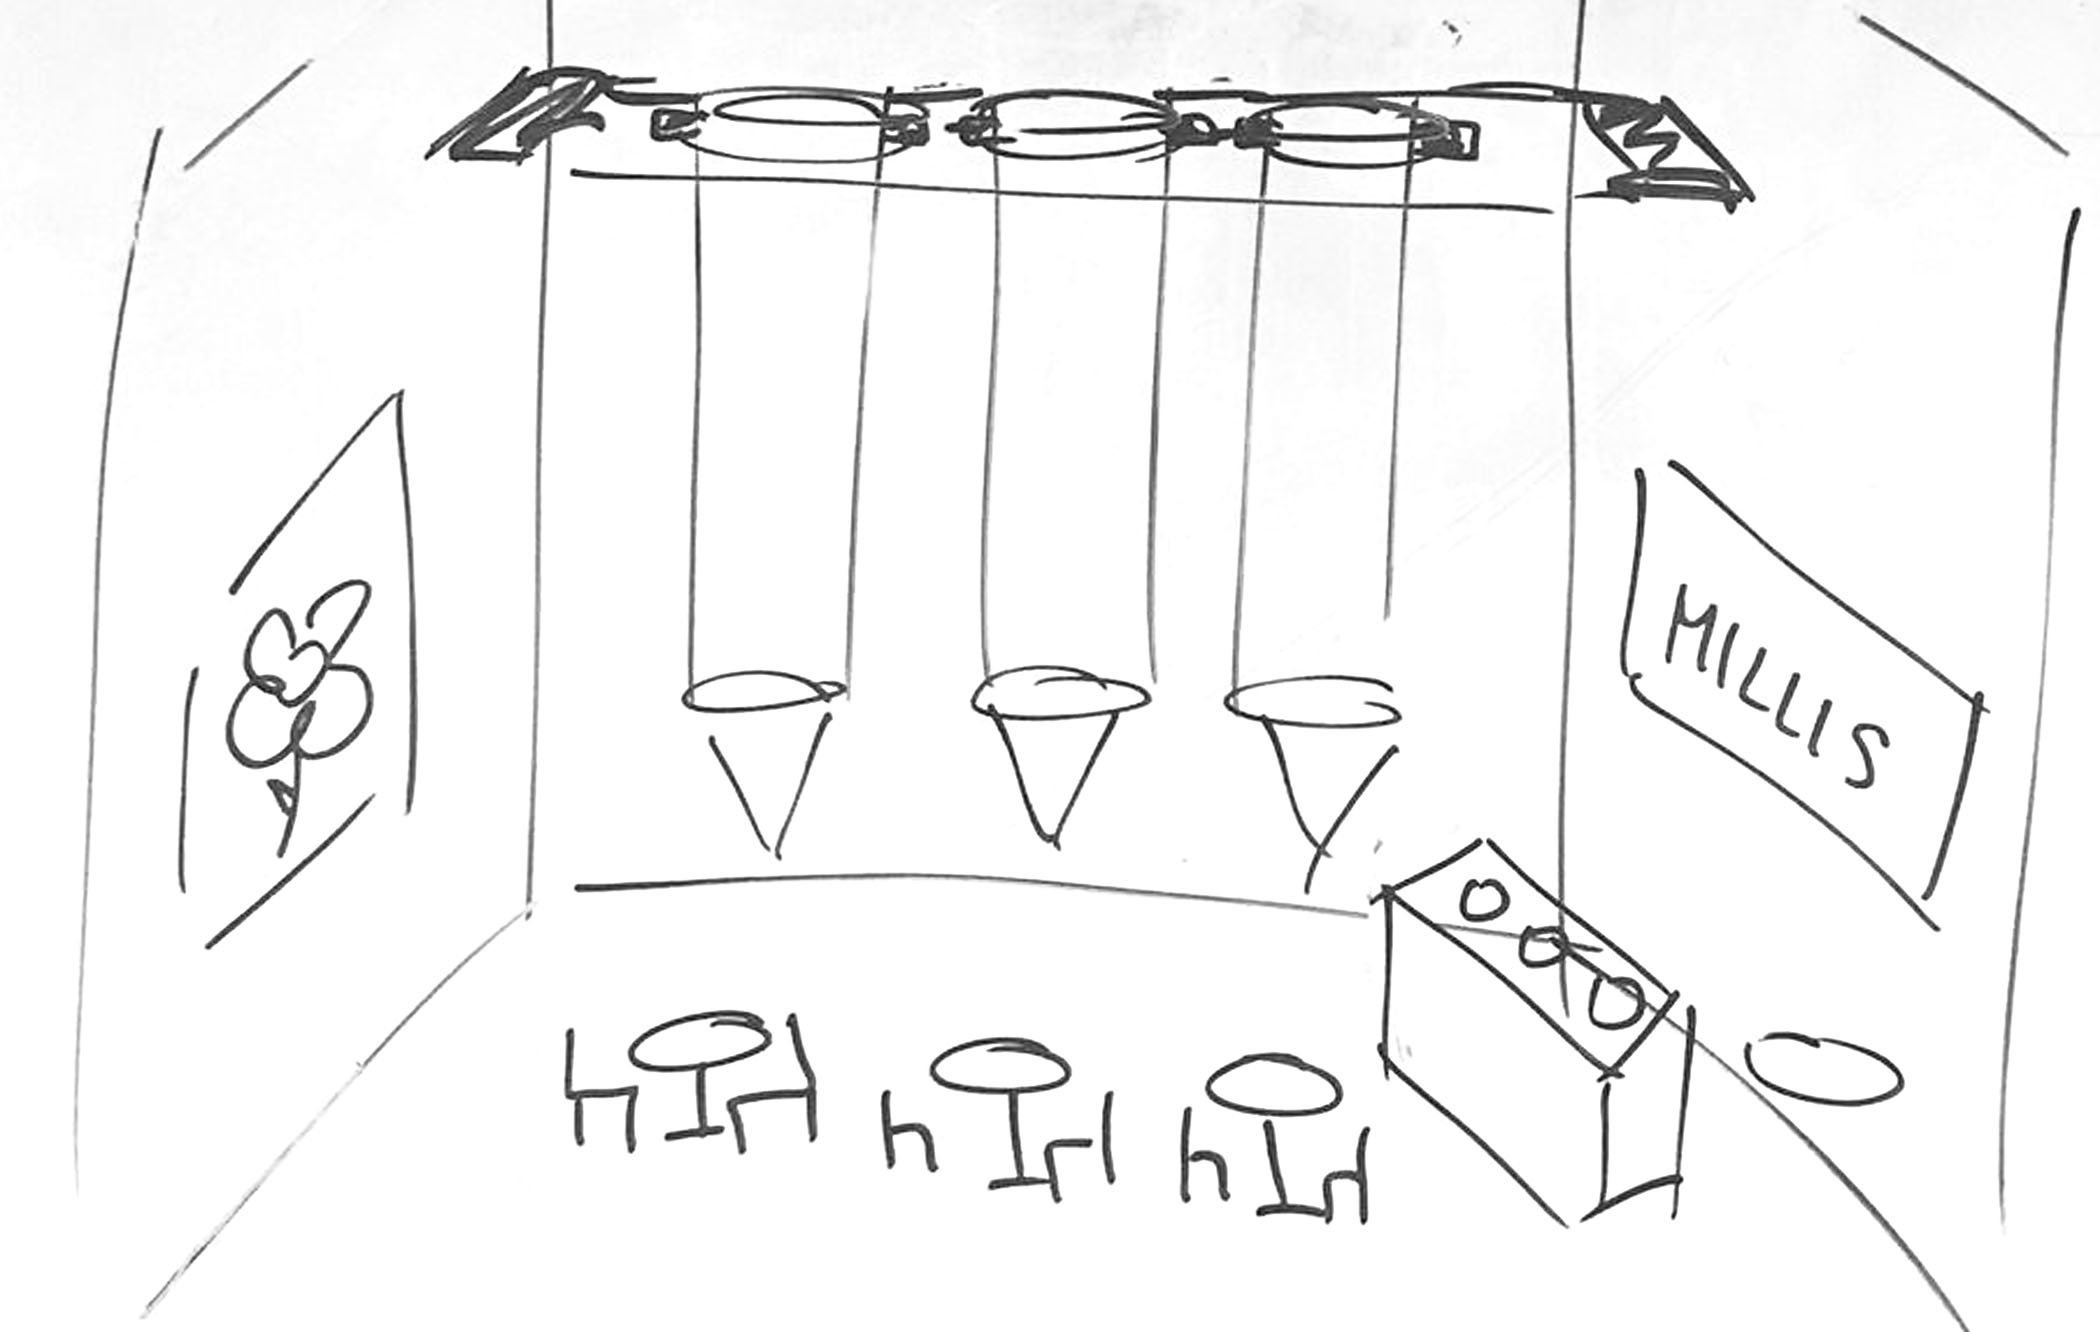
The storefront display could also persuade people to become part of the interaction. Going inside the store, a mechanism that transports the balls is on display for everyone to see. When a customer orders an ice cream, they are allowed to place a ball in the “elevator” and watch it be transported to the storefront display, so every customer feels personally involved.
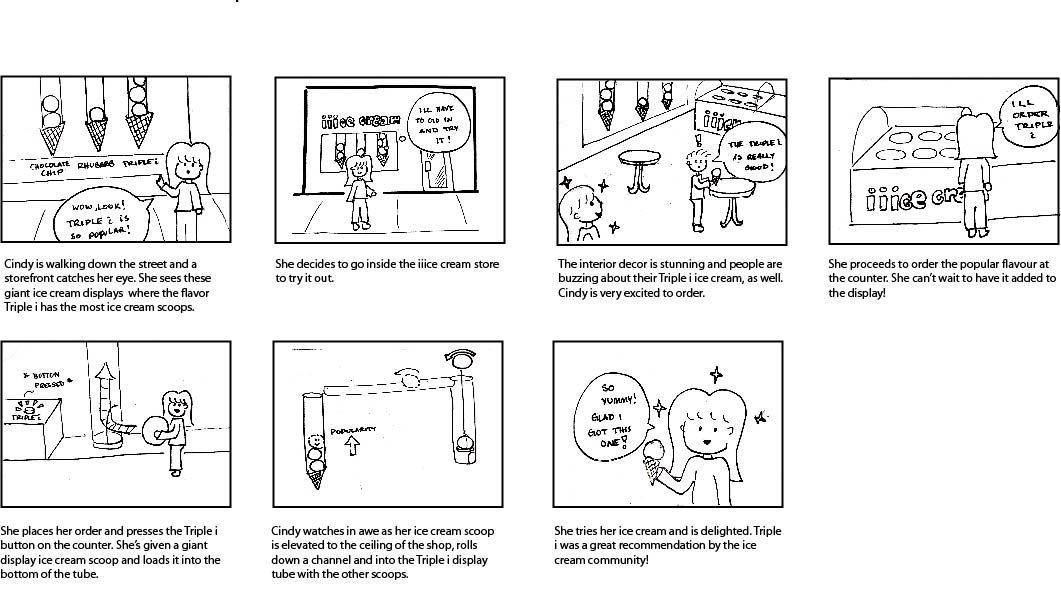
Below is a storyboard of how one may interact with the iiice cream store. Following are the workflows of each component of the prototype: Counter (buttons for ordering and neopixel), swiveling servo (direct the ice cream scoop ball to the correct display) and the continuous-winding servo (to elevate the ball to the channel to be distributed).
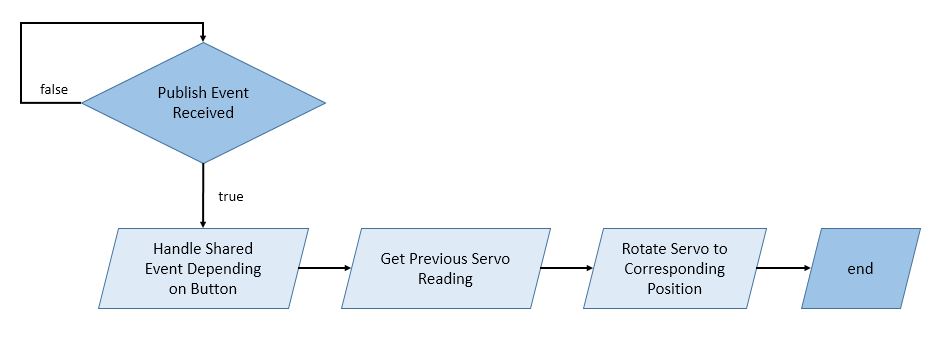
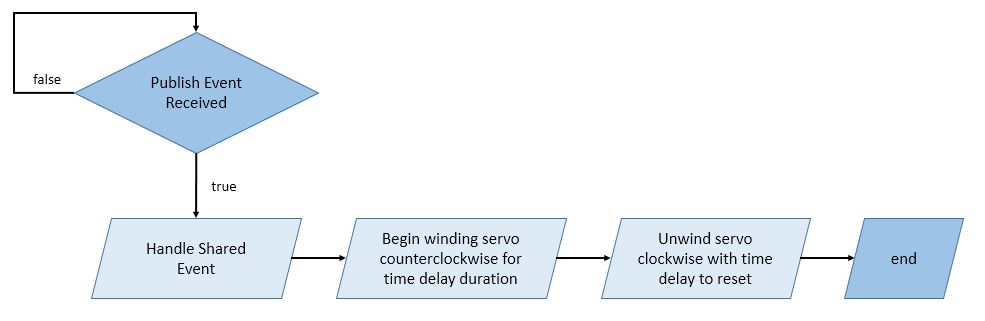
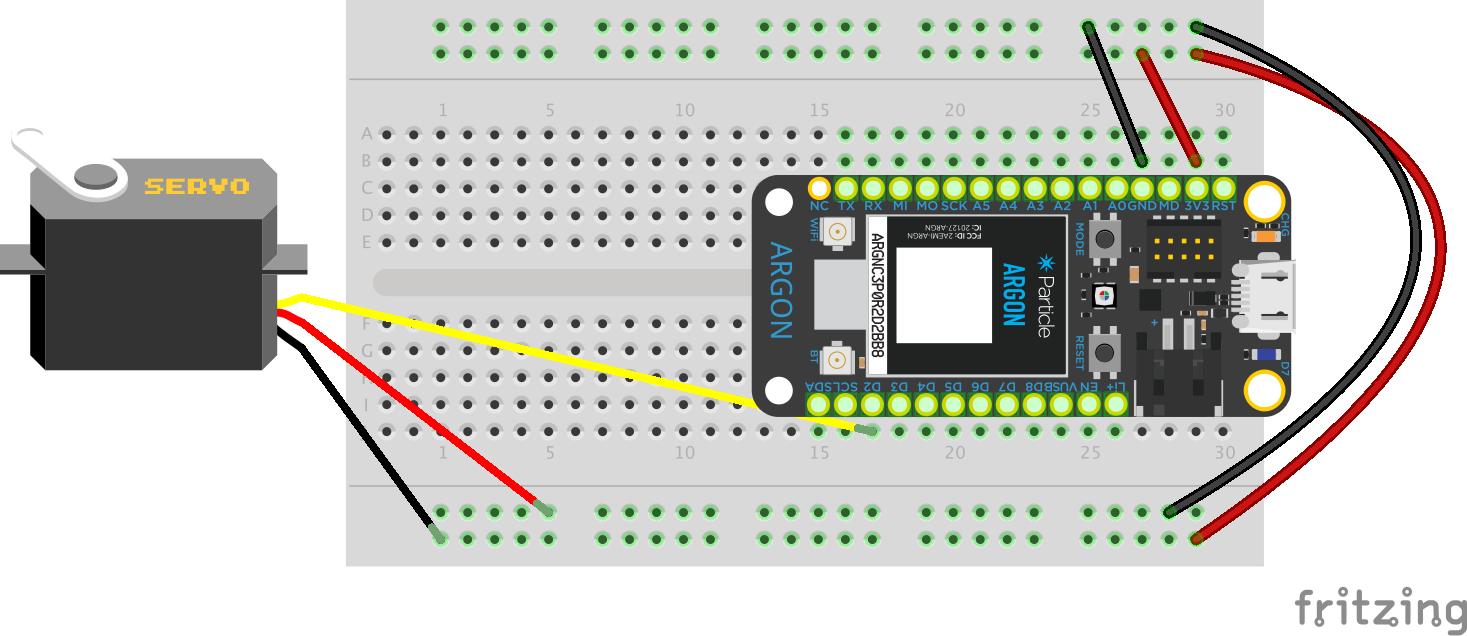
For this project we used three Particle Argons which communicate with each other. When a flavor is chosen and a corresponding button is pressed from the first particle board, it publishes an event to the other two. The second particle board is connected to a continuous servo which acts as a pulley to elevate the ball of ice cream, and the third particle board is connected to a small servo which directs the ball into the corresponding flavor of ice cream.
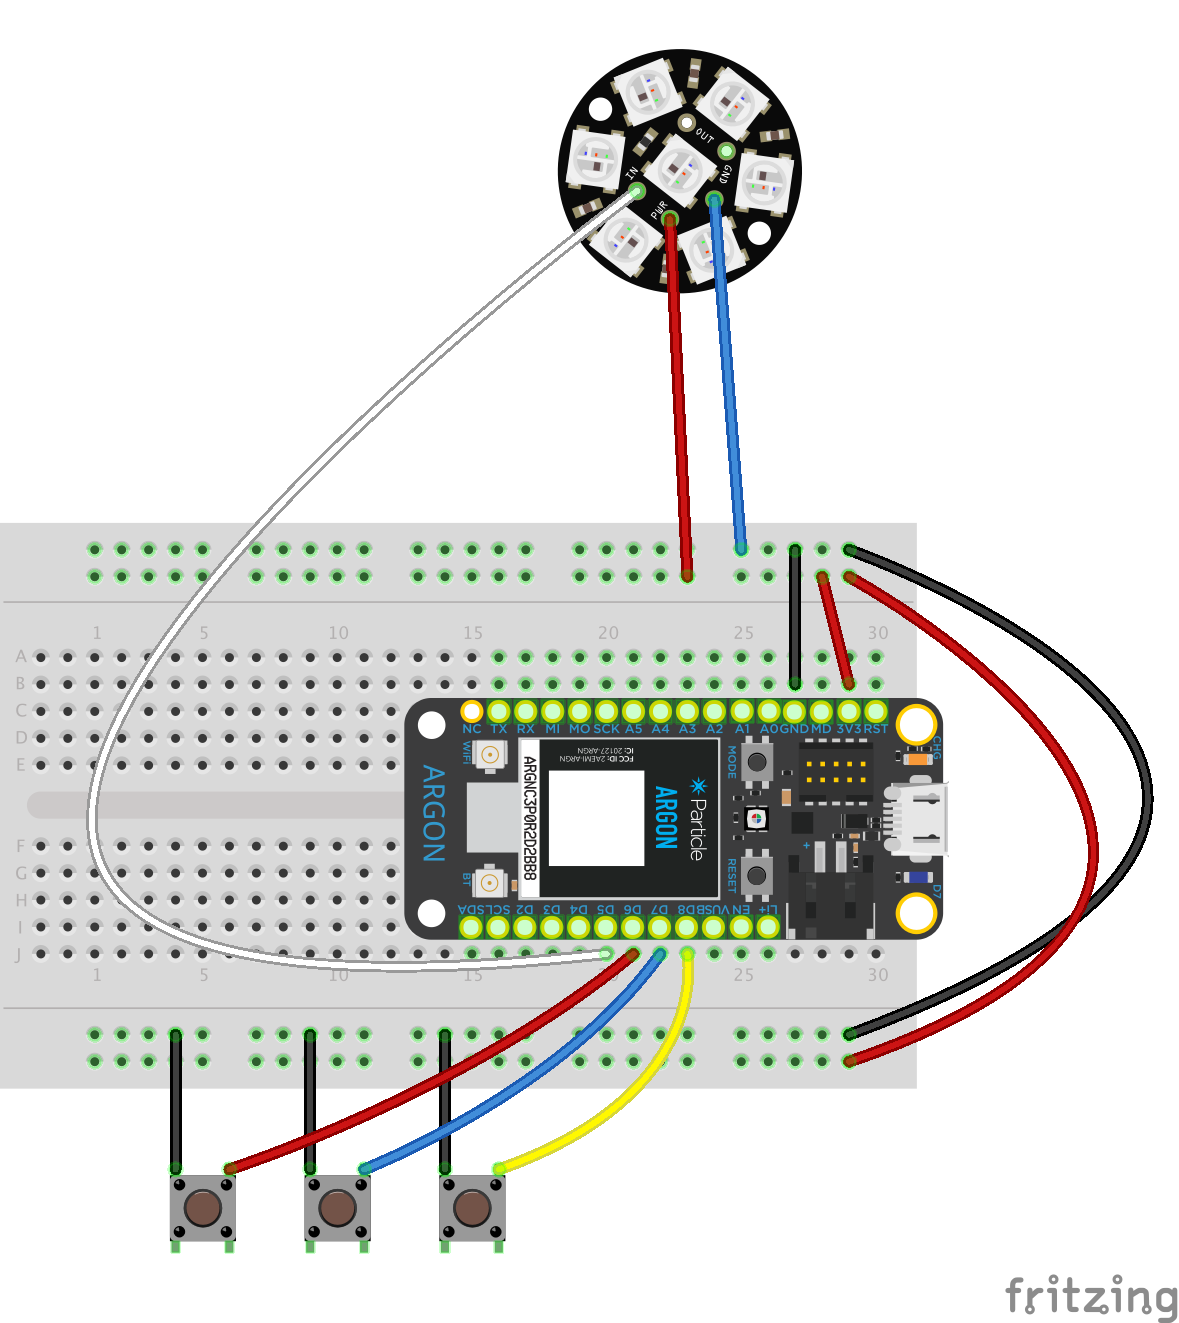
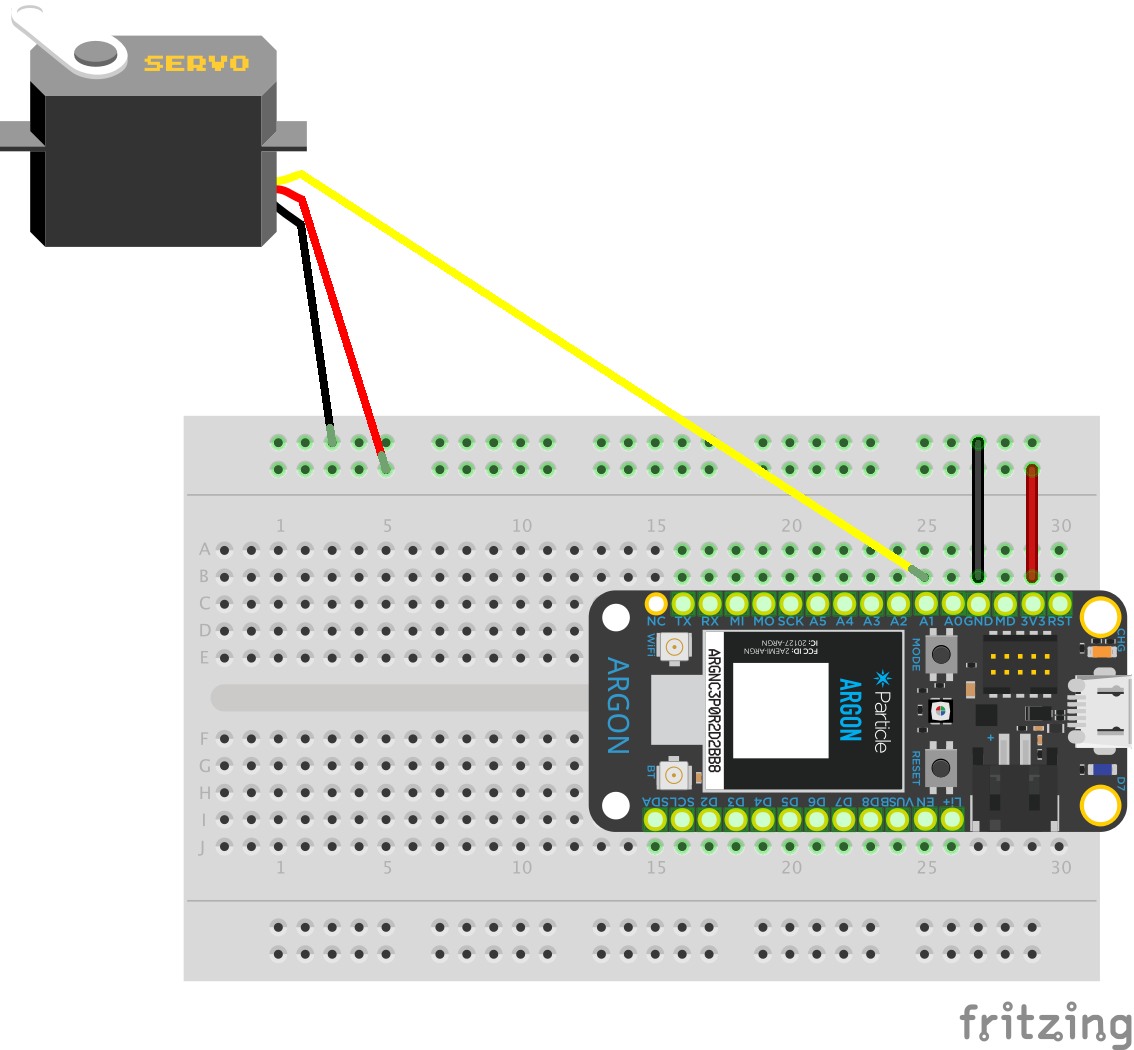
Components Used
3x Particle Argon
3x Pushbutton
1x SG51R Servo
1x FS5103R Continuous Servo
1x Neopixel Jewel
Jumper Wires
// This #include statement was automatically added by the Particle IDE.
#include <neopixel.h>

//************************************************//
//Button code
//************************************************//

//Declare buttons
int blueButton = D3; //Flavor 2
int redButton = D4; //Flavor 3
int yellowButton = D2; //Flavor 1

int blueButtonState = 0;
int redButtonState = 0;
int yellowButtonState = 0;

// This value will store the last time we published an event
long lastPublishedAt = 0;
// this is the time delay before we should publish a new event
// from this device
int publishAfter = 10000;

//************************************************//
//Neopixel code
//************************************************//

#define PIXEL_PIN D5
#define PIXEL_COUNT 7
#define PIXEL_TYPE WS2812
#include <neopixel.h>
Adafruit_NeoPixel strip = Adafruit_NeoPixel(PIXEL_COUNT, PIXEL_PIN, PIXEL_TYPE); //define neopixel

uint32_t colorOff = strip.Color(0, 0, 0);


void setup() {

    Particle.subscribe("langley/2019/iot/eventFinished/", finishedEvent);
    //Set up particle variables for console
    Particle.variable("blueButtonState", blueButtonState);
    Particle.variable("redButtonState", redButtonState);
    Particle.variable("yellowButtonState", yellowButtonState);
    //Particle.variable("completed", completed);

    //Declare button pin modes
    pinMode(blueButton, INPUT_PULLUP);
    pinMode(redButton, INPUT_PULLUP);
    pinMode(yellowButton, INPUT_PULLUP);

    strip.begin();
    strip.show();

    //For steup, test neopixel
    iceCreamFlavor1();
    turnColorOff();
}

void loop() {

    //get button states
    blueButtonState = digitalRead( blueButton );
    redButtonState = digitalRead( redButton );
    yellowButtonState = digitalRead( yellowButton );

    //Determine which button is pressed
    //Publish event accordingly and color for Neopixel
    if ( blueButtonState == LOW )
    {
        delay(1000);
        iceCreamFlavor2();
        blueButtonPublish();
        delay(2000);
    }
    else if (redButtonState == LOW) {
        iceCreamFlavor3();
        redButtonPublish();
        delay(2000);
    }
    else if (yellowButtonState == LOW) {
        iceCreamFlavor1();
        yellowButtonPublish();
        delay(2000);
    }

}

void blueButtonPublish()
{
  // Remember that a device can publish at rate of about 1 event/sec,
  // with bursts of up to 4 allowed in 1 second.
  // Back to back burst of 4 messages will take 4 seconds to recover.
  // So we want to limit the amount of publish events that happen.

  // check that it's been 10 second  since our last publish
  if( lastPublishedAt + publishAfter < millis() )
  {

      String eventName = "langley/2019/iot/blueButtonPressed/" + System.deviceID();

      // then we share it out
      Particle.publish( eventName, "Blue" );

      // And this will get shared out to all devices using this code

      // we just pubished so capture this.
      lastPublishedAt = millis();
  }

}

void redButtonPublish()
{
    // Remember that a device can publish at rate of about 1 event/sec,
  // with bursts of up to 4 allowed in 1 second.
  // Back to back burst of 4 messages will take 4 seconds to recover.
  // So we want to limit the amount of publish events that happen.

  // check that it's been 10 secondds since our last publish
  if( lastPublishedAt + publishAfter < millis() )
  {

      String eventName = "langley/2019/iot/redButtonPressed/" + System.deviceID();

      // now we have something like "diot/2019/paired/0123456789abcdef"
      // and that corresponds to this devices info

      // then we share it out
      Particle.publish( eventName, "Red" );

      // And this will get shared out to all devices using this code

      // we just pubished so capture this.
      lastPublishedAt = millis();
  }

}

void yellowButtonPublish()
{
  // Remember that a device can publish at rate of about 1 event/sec,
  // with bursts of up to 4 allowed in 1 second.
  // Back to back burst of 4 messages will take 4 seconds to recover.
  // So we want to limit the amount of publish events that happen.

  // check that it's been 10 secondds since our last publish
  if( lastPublishedAt + publishAfter < millis() )
  {

      String eventName = "langley/2019/iot/yellowButtonPressed/" + System.deviceID();

      // now we have something like "diot/2019/paired/0123456789abcdef"
      // and that corresponds to this devices info

      // then we share it out
      Particle.publish( eventName, "Yellow" );

      // And this will get shared out to all devices using this code

      // we just pubished so capture this.
      lastPublishedAt = millis();
  }

}

//Yellow Button
void iceCreamFlavor1() {

    //setting colour based on the handler event (blue/green/yellow)
    uint32_t colorYellow = strip.Color(2550, 255, 50);

    for(int i=0; i< strip.numPixels(); i++) { //light up one bye one
        strip.setPixelColor(i, colorYellow );
        delay( 1000 );
        strip.show();
    }

}

//Blue Button
void iceCreamFlavor2() {

    //setting colour based on the handler event (blue/green/yellow)
    uint32_t colorBlue = strip.Color(0, 0, 255);

    for(int i=0; i< strip.numPixels(); i++) { //light up one bye one
        strip.setPixelColor(i, colorBlue );
        delay( 1000 );
        strip.show();
    }

}

//Red Button
void iceCreamFlavor3() {

    //setting colour based on the handler event (blue/green/yellow)
    uint32_t colorRed = strip.Color(255, 0, 0);

    for(int i=0; i< strip.numPixels(); i++) { //light up one bye one
        strip.setPixelColor(i, colorRed );
        delay( 1000 );
        strip.show();
    }

}

void turnColorOff() {

    for(int i=0; i< strip.numPixels(); i++) { //light up one bye one
        strip.setPixelColor(i, colorOff);
        delay( 1000 );
        strip.show();
    }

}

void finishedEvent(const char *event, const char *data)
{

    String eventName = String( event );

    String deviceID = System.deviceID();

    if( eventName.indexOf( deviceID ) != -1 ){
      return;
    }

    turnColorOff();

}// int servoPin = A1;
int servoPin2 = A1;
// Servo myServo;
Servo myServo2;
// int servoPos = 0;
int servoPos2 = 0;
bool run = false;
// uint32_t w = strip.Color(0, 0, 0);
// //setting colour based on the handler event (blue/green/yellow)
// uint32_t c = strip.Color(255, 255, 255);
// This value will store the last time we published an event
long lastPublishedAt = 0;
// this is the time delay before we should publish a new event
// from this device
int publishAfter = 10000;
void setup() {
// myServo.attach( servoPin );
myServo2.attach( servoPin2 );
//myServo2.write ( 93.5 );
//my retrieve (Flavor 1)
Particle.subscribe("langley/2019/iot/yellowButtonPressed/", handleSharedEvent );
// my retrieve (Flavor 2)
Particle.subscribe("langley/2019/iot/blueButtonPressed/", handleSharedEvent );
//my retrieve (Flavor 3)
Particle.subscribe("langley/2019/iot/redButtonPressed/", handleSharedEvent );
Particle.variable("run", run);
// turnonLight();
}
void loop() {
if (run) {
myServo2.attach( servoPin2 );
delay(200);
//up
myServo2.write( 115 );
//for counterclockwise
delay(8400);
//delay(8000); //clockwise
//down
myServo2.write( 72 );
delay(8350);
//myServo2.write( 93.5 );
myServo2.detach();
run = false;
finishedEvent();
}
}
void handleSharedEvent(const char *event, const char *data)
{
String eventName = String( event );
String deviceID = System.deviceID();
if( eventName.indexOf( deviceID ) != -1 ){
return;
}
run = true;
}
void finishedEvent()
{
// Remember that a device can publish at rate of about 1 event/sec,
// with bursts of up to 4 allowed in 1 second.
// Back to back burst of 4 messages will take 4 seconds to recover.
// So we want to limit the amount of publish events that happen.
// check that it's been 10 secondds since our last publish
if( lastPublishedAt + publishAfter < millis() )
{
String eventName = "langley/2019/iot/eventFinished/" + System.deviceID();
// now we have something like "diot/2019/paired/0123456789abcdef"
// and that corresponds to this devices info
// then we share it out
Particle.publish( eventName, "finished" );
// And this will get shared out to all devices using this code
// we just pubished so capture this.
lastPublishedAt = millis();
}
}Servo MyServo;
int current =0;
void setup()
{
MyServo.attach(D2);
Particle.subscribe( "langley/2019/iot/yellowButtonPressed/", handleSharedEventYellow );
Particle.subscribe( "langley/2019/iot/blueButtonPressed/", handleSharedEventBlue );
Particle.subscribe( "langley/2019/iot/redButtonPressed/", handleSharedEventRed );
}
void loop()
{
}
//for YELLOW button
void handleSharedEventYellow(const char *event, const char *data)
{
String eventName = String( event );
String deviceID = System.deviceID();
//servo start
current=MyServo.read();
//for loop with delays to slow down movement of servo
for(int i=current; i>45;i--)
{
MyServo.write(i);
delay(50);
}
if( eventName.indexOf( deviceID ) != -1 ){
return;
}
}
//for BLUE button
void handleSharedEventBlue(const char *event, const char *data)
{
String eventName = String( event );
String deviceID = System.deviceID();
//serov start
current=MyServo.read();
//for loop with delays to slow down movement of servo
if(current<60)
for(int i=current; i<60;i++)
{
MyServo.write(i);
delay(50);
}
else if(current>60)
for(int i=current; i>60;i--)
{
MyServo.write(i);
delay(50);
}
//
if( eventName.indexOf( deviceID ) != -1 ){
return;
}
}
//for RED button
void handleSharedEventRed(const char *event, const char *data)
{
String eventName = String( event ); // convert to a string object
String deviceID = System.deviceID();
// MyServo.write(80);
// delay(8000);
// MyServo.write(4);
current=MyServo.read();
//if(current<80)
for(int i=current; i<80;i++)
{
MyServo.write(i);
delay(50);
}
// else if(current>80)
// for(int i=current; i>80;i--)
// {
// MyServo.write(i);
// delay(50);
// }
if( eventName.indexOf( deviceID ) != -1 ){
// if we get anything other than -1
// the event came from this device.
// so stop doing stuff
return;
}
}
To take this project forward we would need to refine the mechanism that transports the ball so that it works more smoothly and reliably. Further, we would need to include more ice cream flavors in the display to make it closer to a real-world ice-cream store experience. We could also expand the concept of an ambient storefront towards other popular food items like pizza or donuts to involve individuals from all realms of the food-lover community.
Interesting feedback we received during the presentation was that we should think about other ways that this data could be collected and used, as well as finding ways to increase community engagement and making the product more scalable. These would definitely be important considerations to make for future iterations of the project.
This project is only accessible by signed in users. Be considerate and think twice before sharing.
A hands-on introductory course exploring the Internet of Things and connected product experiences.
Storefront display and in-store interaction to help bring together ice cream lovers.
December 7th, 2019