49713 Designing for the Internet of Things
· 18 members
A hands-on introductory course exploring the Internet of Things and connected product experiences.
Creating an IoT project that senses how strong the wind is and users can use it to prepare what to wear outside
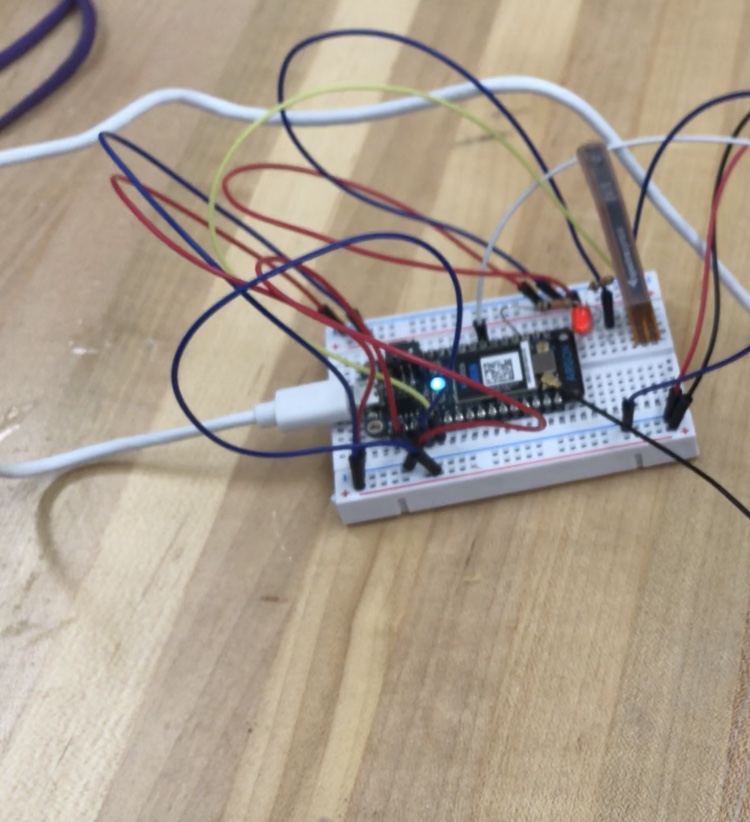
This project is to create a little wind detector for me and my roommate. We always look at the weather forecast to decide what to wear tomorrow, but we cannot feel how big the wind is. This little device can help users have an overall understanding of how big the wind is so that they can prepare their outwear.
Since the sensor is a flex sensor, I want it to send the bending information to the LED light to inform users about the real-time windy situations outside. Then people can prepare what to wear outside when looking at the LED signal on the device. Less bending means there is less wind, and the light will be blue. More bending means more dramatic wind and the light will blink red.
I already have a soldered Neopixel LED from the bootcamp. It can be a good indicator since I can easily change the color of the light and it should also be able to be turned on and off. And in this case, I want the LED turns blue if there is intense pressure applied on the sensor (indicating the big wind and it can be really cold). On the other hand, the LED should turn red if the pressure is small. There are many challenges. I coulnd't get the code right, and the circuit didn't work out well either. But luckily after help from out TAs I noticed that one of my indicators was wrong. Then things worked out perfectly.
// This #include statement was automatically added by the Particle IDE.
#include <neopixel.h>
// IMPORTANT: Set pixel COUNT, PIN and TYPE
#define PIXEL_COUNT 1
#define PIXEL_PIN D6
#define PIXEL_TYPE WS2812B
Adafruit_NeoPixel strip(PIXEL_COUNT, PIXEL_PIN, PIXEL_TYPE);
// Define a pin that we'll place the FSR on
// Remember to add a 10K Ohm pull-down resistor too.
int redValue = 255; // Full brightness for an ANODE RGB LED is 0, and off 255
int greenValue = 255; // Full brightness for an ANODE RGB LED is 0, and off 255
int blueValue = 255; // Full brightness for an ANODE RGB LED is 0, and off 255</td>
int flexPin = A0;
// Create a variable to hold the FSR reading
int flexReading;
// Our button wired to D0
int buttonPin = D3;
// Define a pin we'll place an LED on
int ledPin = D2;
// Create a variable to store the LED brightness.
int ledBrightness = 0;
// Our button wired to D0
int buttonPin = D3;
void setup() {
// Set up the LED for output
pinMode(ledPin, OUTPUT);
pinMode(PIXEL_PIN, OUTPUT);
// Create a cloud variable of type integer
// called 'light' mapped to photoCellReading
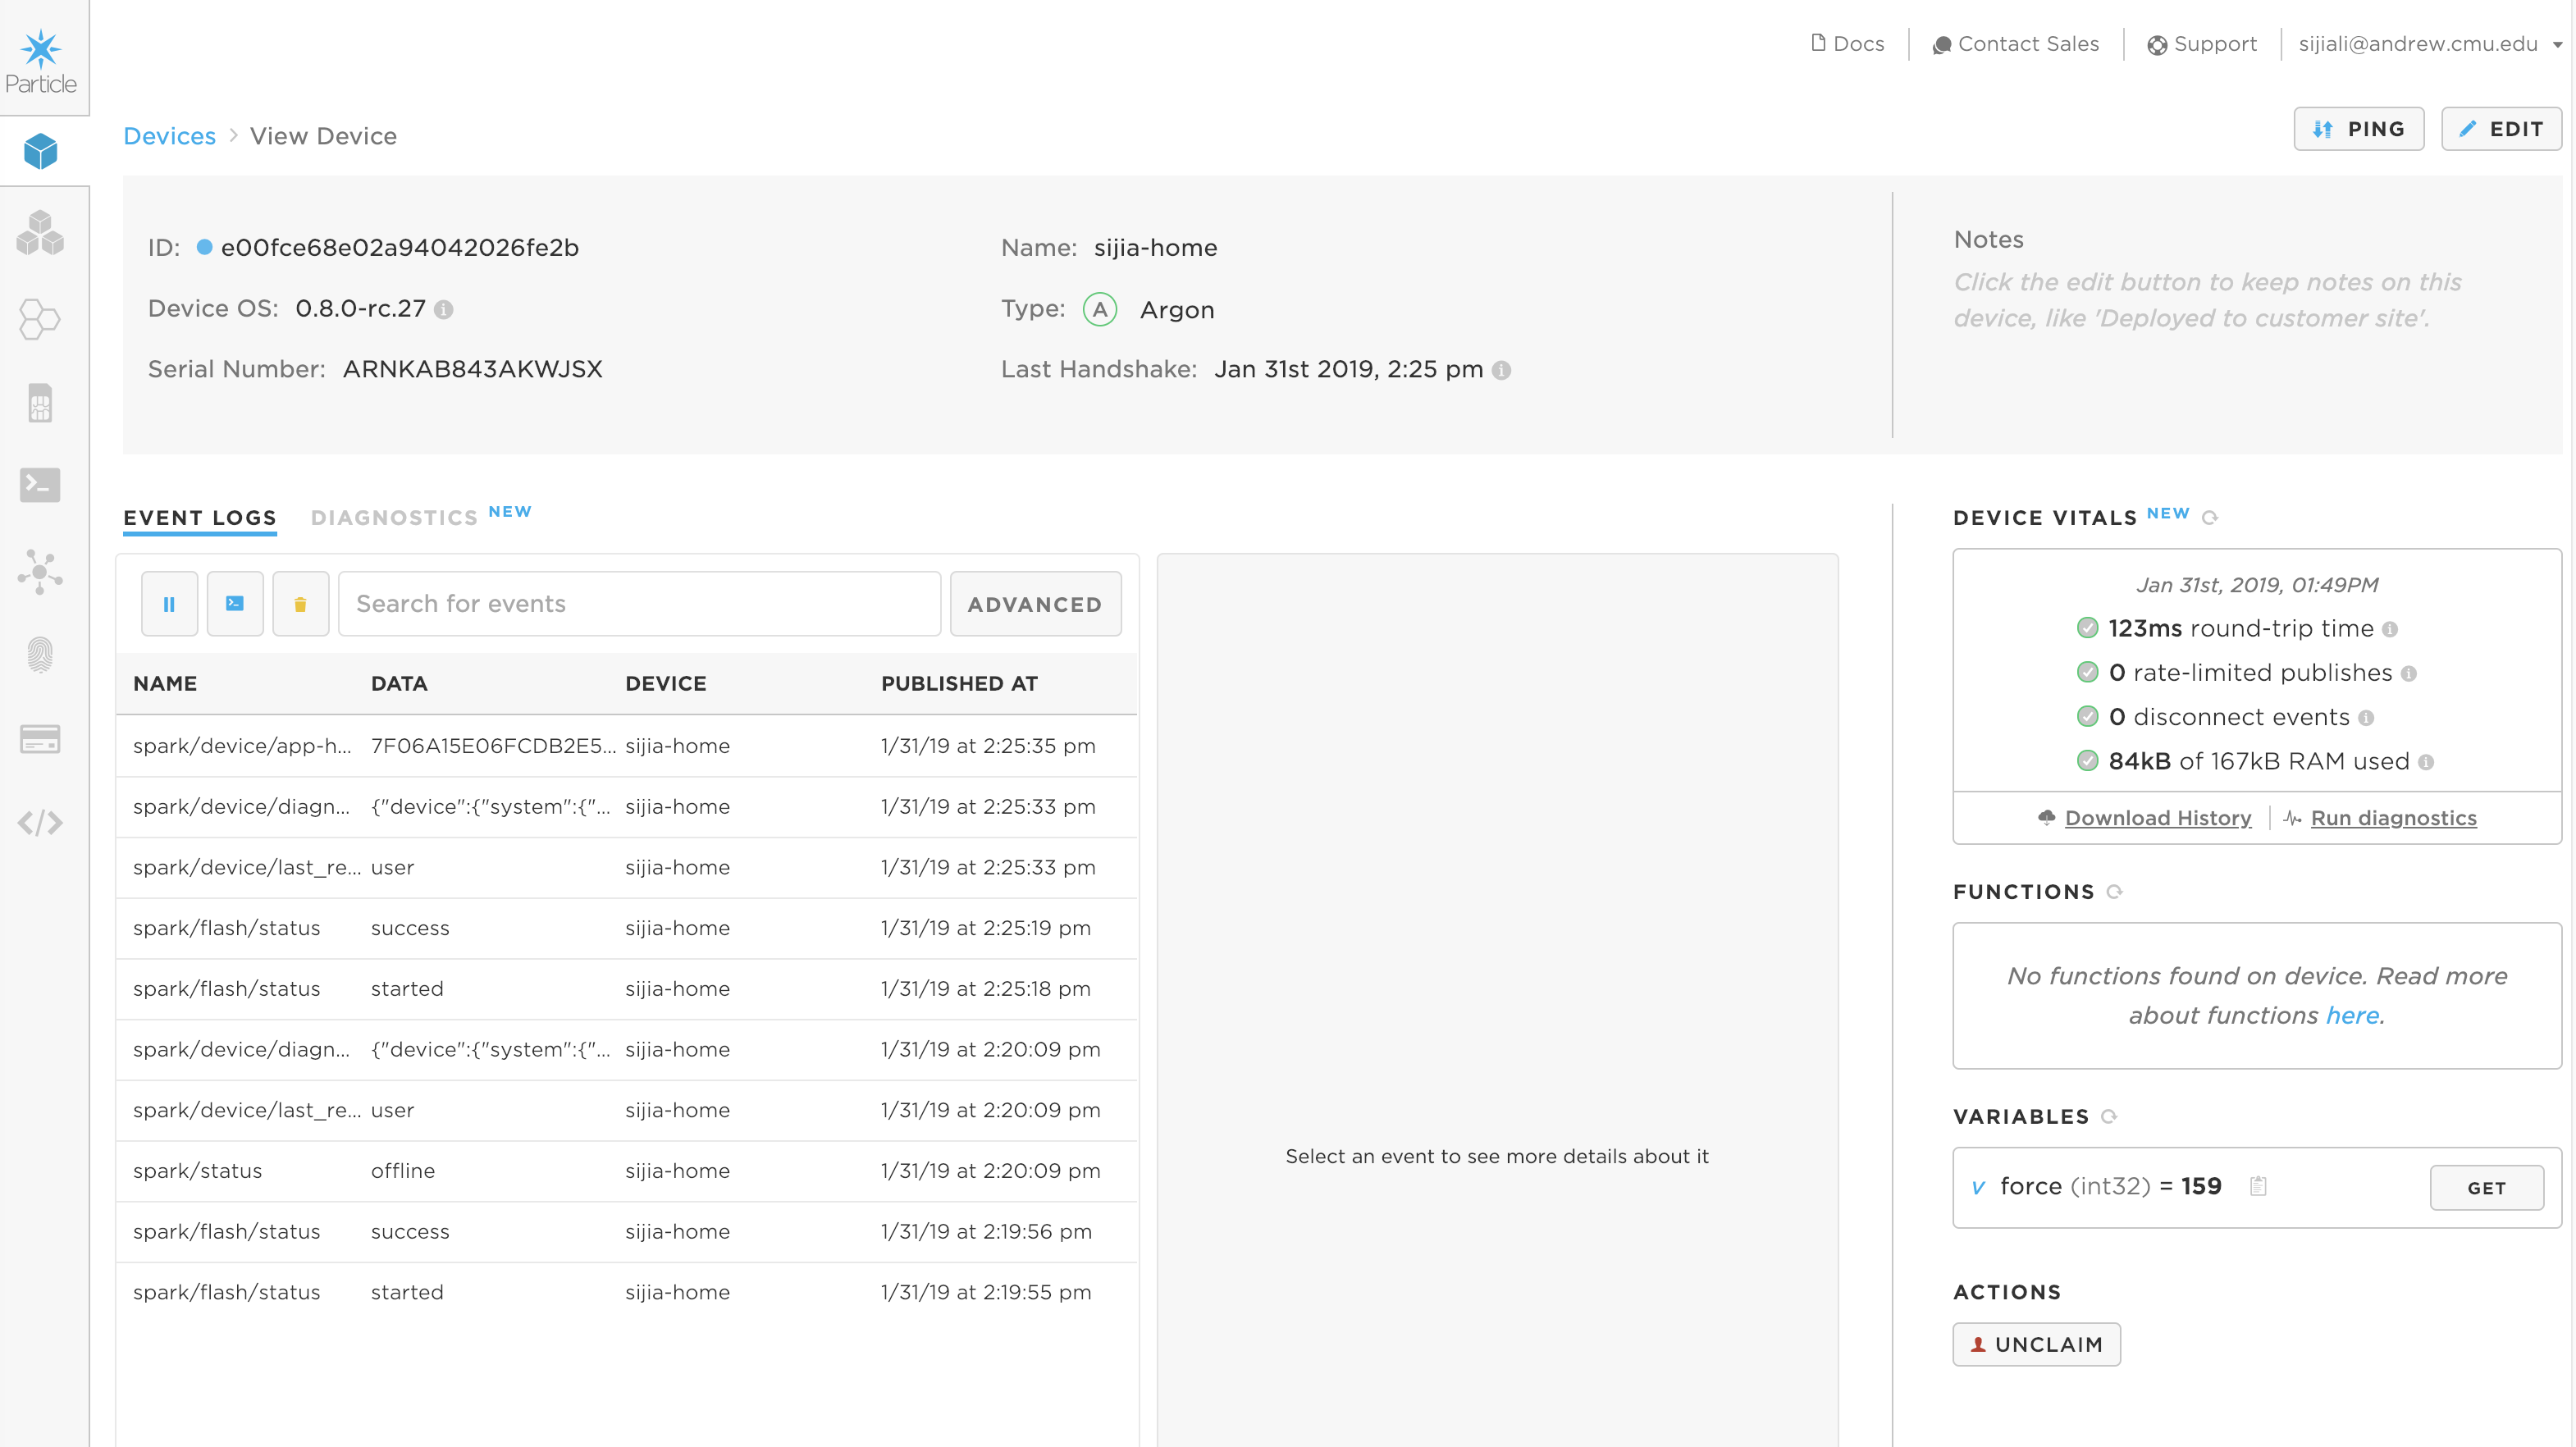
Particle.variable("force", &flexReading, INT);
strip.begin();
pinMode( buttonPin , INPUT_PULLUP); // sets pin as input
// We also want to use the LED
pinMode( ledPin , OUTPUT ); // sets pin as output
}
void loop() {
// Use analogRead to read from the sensor
// This gives us a value from 0 to 4095
flexReading = analogRead(flexPin);
// Map this value into the PWM range (0-255)
// and store as the led brightness
ledBrightness = map(flexReading, 0, 160, 0, 255);
setRGBColor( ledBrightness,0,(256 - ledBrightness));
// fade the LED to the desired brightness
analogWrite(ledPin, ledBrightness);
// wait 1/10th of a second and then loop
delay(100);
// // First... On
// digitalWrite(ledPin, HIGH); // Turn ON the LED pins
// delay(500); // Wait for 1000mS = 1 second
// // Now... Off
// digitalWrite(ledPin, LOW); // Turn OFF the LED pins
// delay(3000); // Wait for 1000mS = 1 second
// // rinse + repeat
// find out if the button is pushed
// or not by reading from it.
int buttonState = digitalRead( buttonPin );
// remember that we have wired the pushbutton to
// ground and are using a pulldown resistor
// that means, when the button is pushed,
// we will get a LOW signal
// when the button is not pushed we'll get a HIGH
// let's use that to set our LED on or off
if( buttonState == LOW )
{
// turn the LED On
digitalWrite( ledPin, HIGH);
}else{
// otherwise
// turn the LED Off
digitalWrite( ledPin, LOW);
}
}
void setRGBColor( int r, int g, int b ){
redValue = r;
greenValue = g;
blueValue = b;
strip.setPixelColor(0, redValue, greenValue, blueValue);
strip.show();
}I want to make it more intelligent, and I think it should also be connected to the phone so that people can set some customized ranges and get notifications for super crazy weather conditions. It can be connected to Twilio to be a conversational bot (like what we did for Programming for Online Prototype class).
Plus, there can be more form explorations for my wind detector too. It can be a small decoration at home, like a Christmas light or small bedside lamp.
My technical limitations definitely restrict my ability to make the project more creative. It has so much potential if I can connect more sensors to it ( a more active reaction such as alert alarm or vibrations, etc.). Also, after the real scenario testing, the light color might not be stable and I realized that a more dynamic color range needs to be added for an accurate forecast.
https://diotlabs.daraghbyrne.me/docs/working-with-sensors
https://diotlabs.daraghbyrne.me/docs/a-simple-internet-appliance
Big thank you to Daragh, Dylan, Taylor, Robert, Cem
This project is only accessible by signed in users. Be considerate and think twice before sharing.
A hands-on introductory course exploring the Internet of Things and connected product experiences.
Creating an IoT project that senses how strong the wind is and users can use it to prepare what to wear outside
January 31st, 2019