Receive a notification when you need to change the ice in your ice machine
Problem Statement:
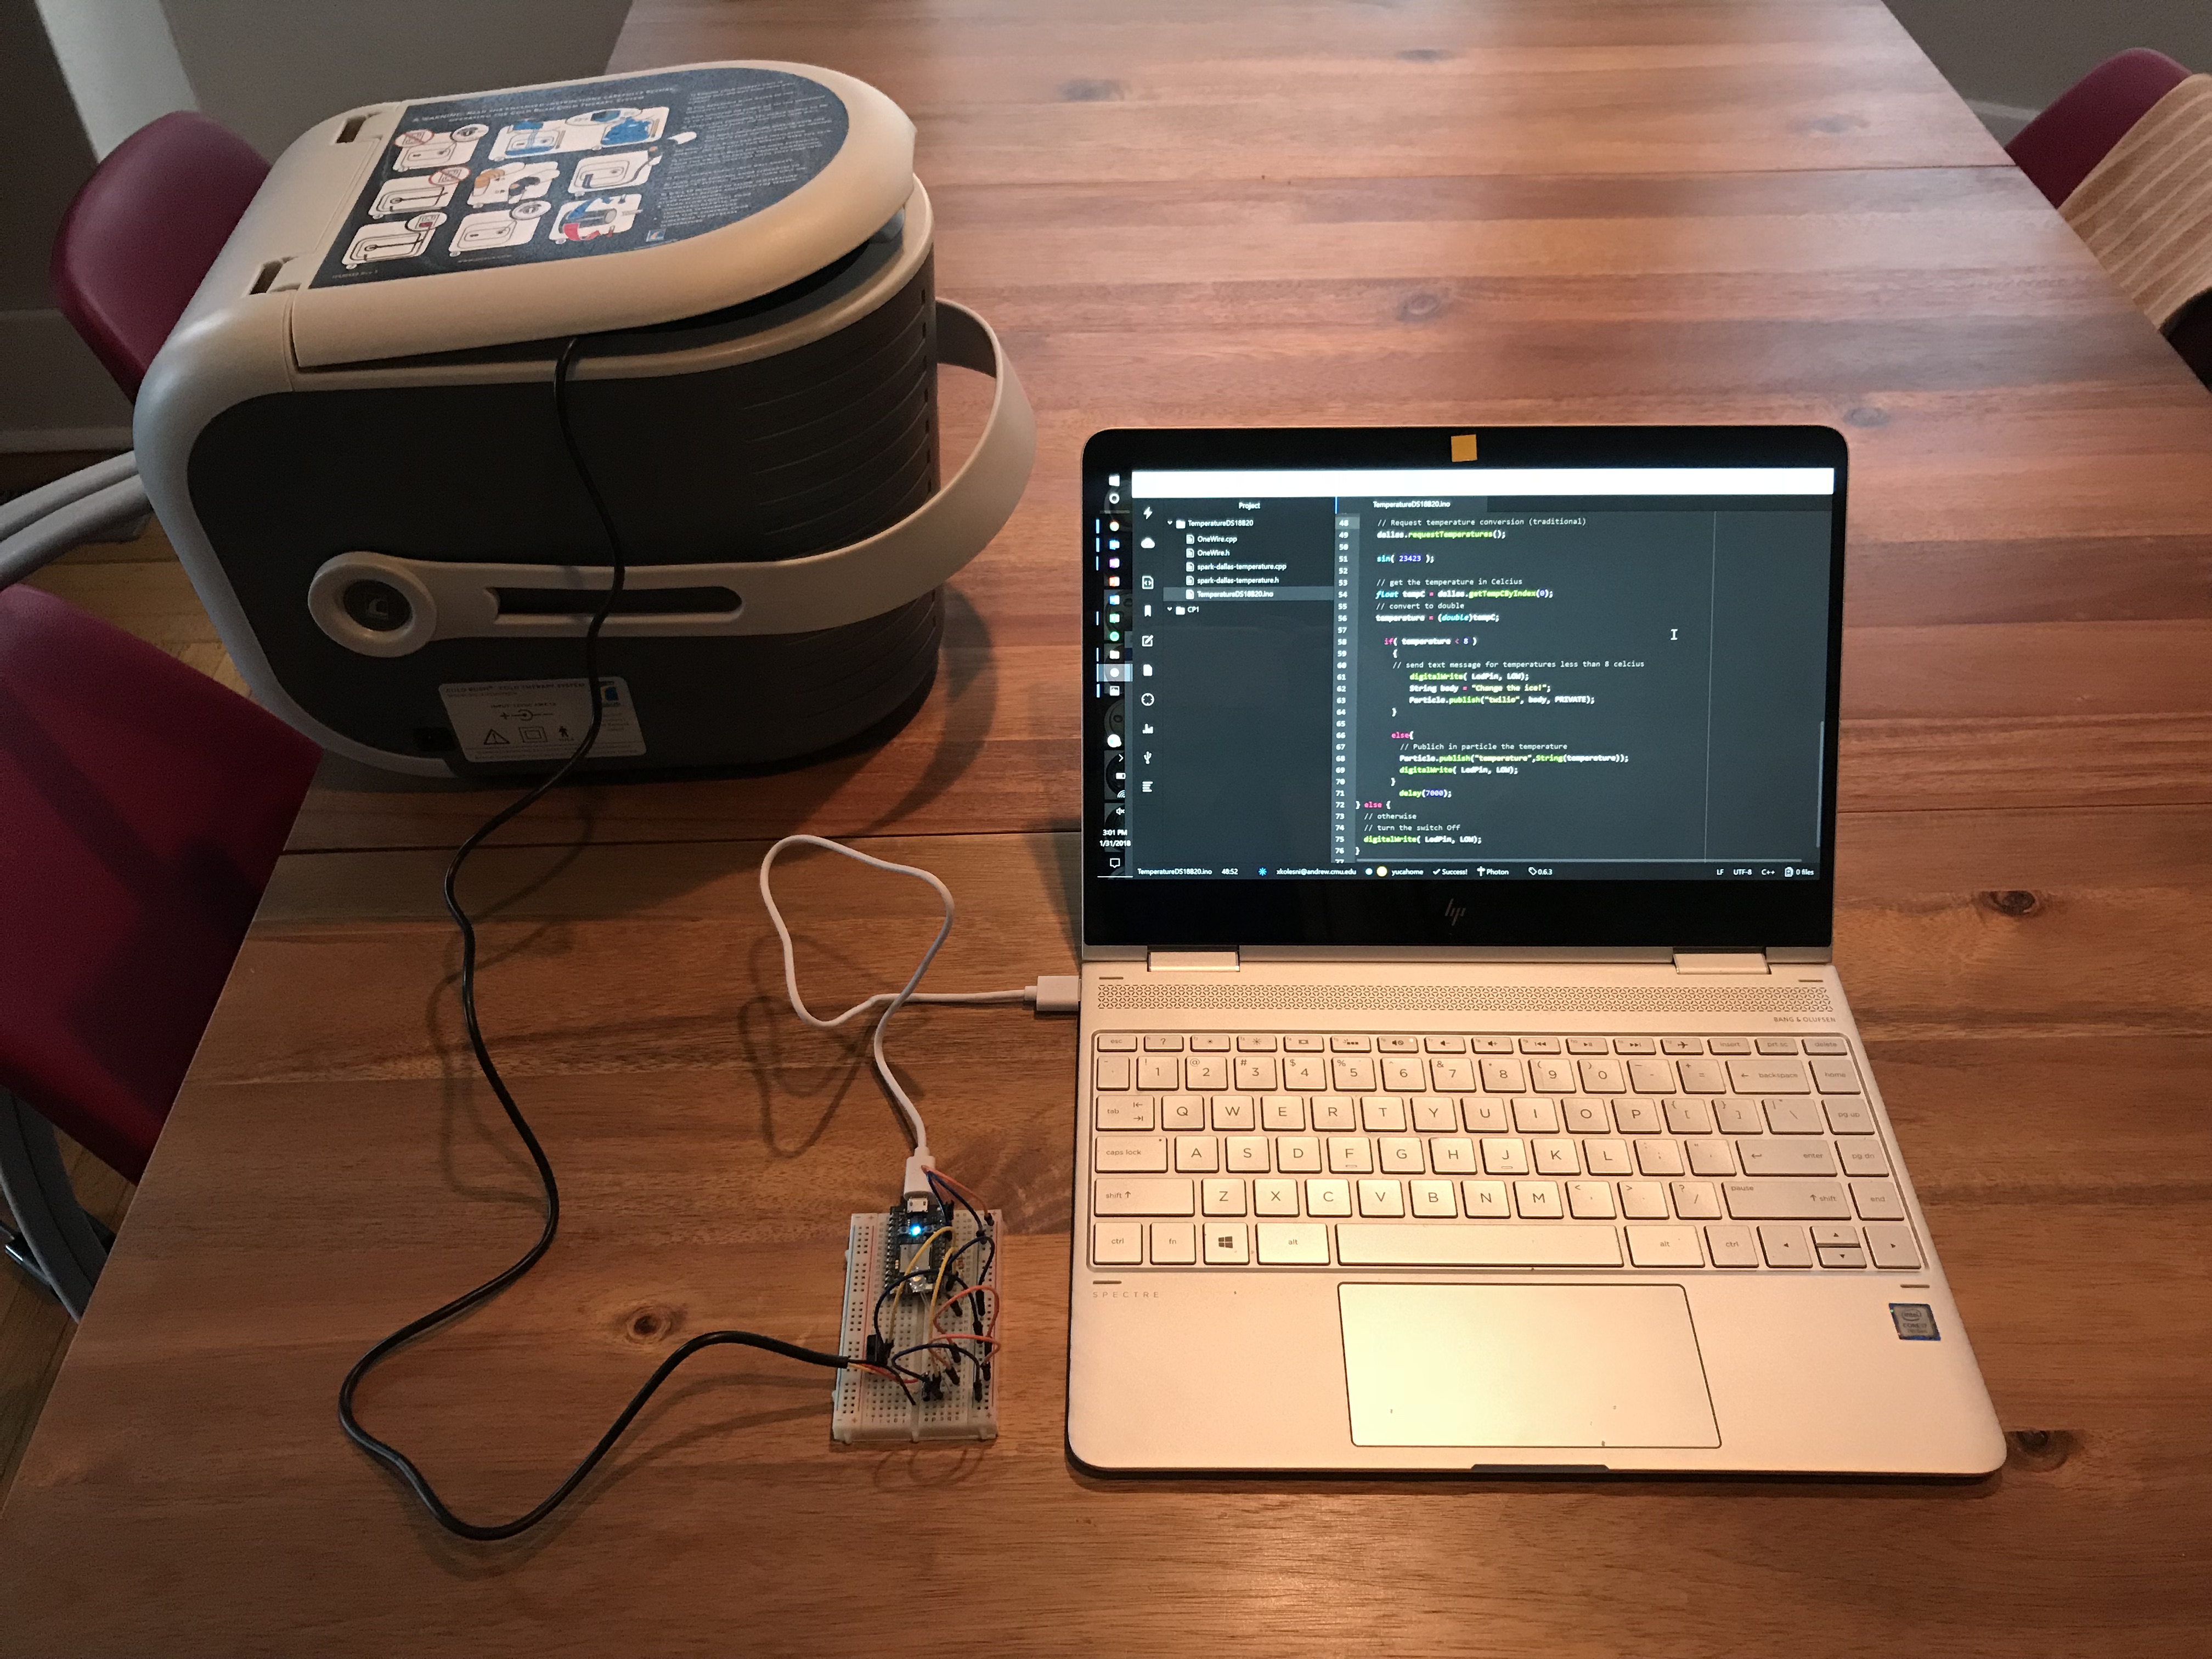
My husband had an operation last Friday for this shoulder. As part of the recovery treatment he is supposed to use an ice machine to cool down the area. Since he uses it for long periods of time, we need to change the ice frequently. I built an IoT home hack that notifies him when the water in the ice machine reaches a certain level and new ice needs to be added. Having this notification will help focus on his recovery vs on constantly monitoring the ice level of the machine.
Goal:
The goal of this project is to notify users when they need to change the ice in their ice machine. In order to achieve this, I used a temperature sensor to monitor the temperature and level of the water inside the machine. Once the ice has melted and the water levels reaches a certain point, it makes contact with the temperature sensor which then sends a text message to notify the user that they need to change the ice inside their ice machine. Having a notification, helps users spend their time efficiently vs having to worry of their ice machines.
Process:
For this project, I used the following steps:
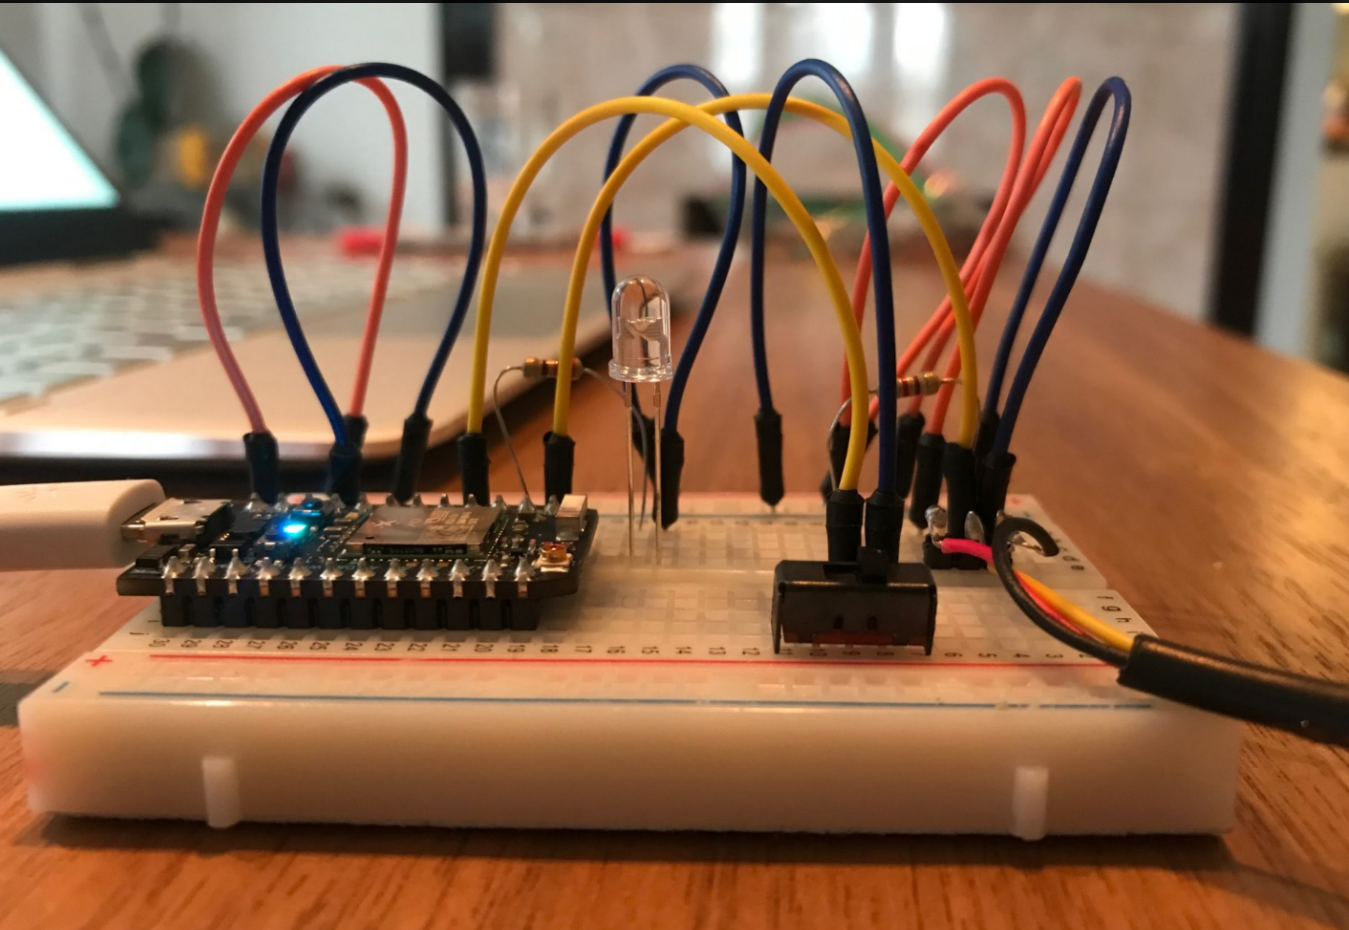
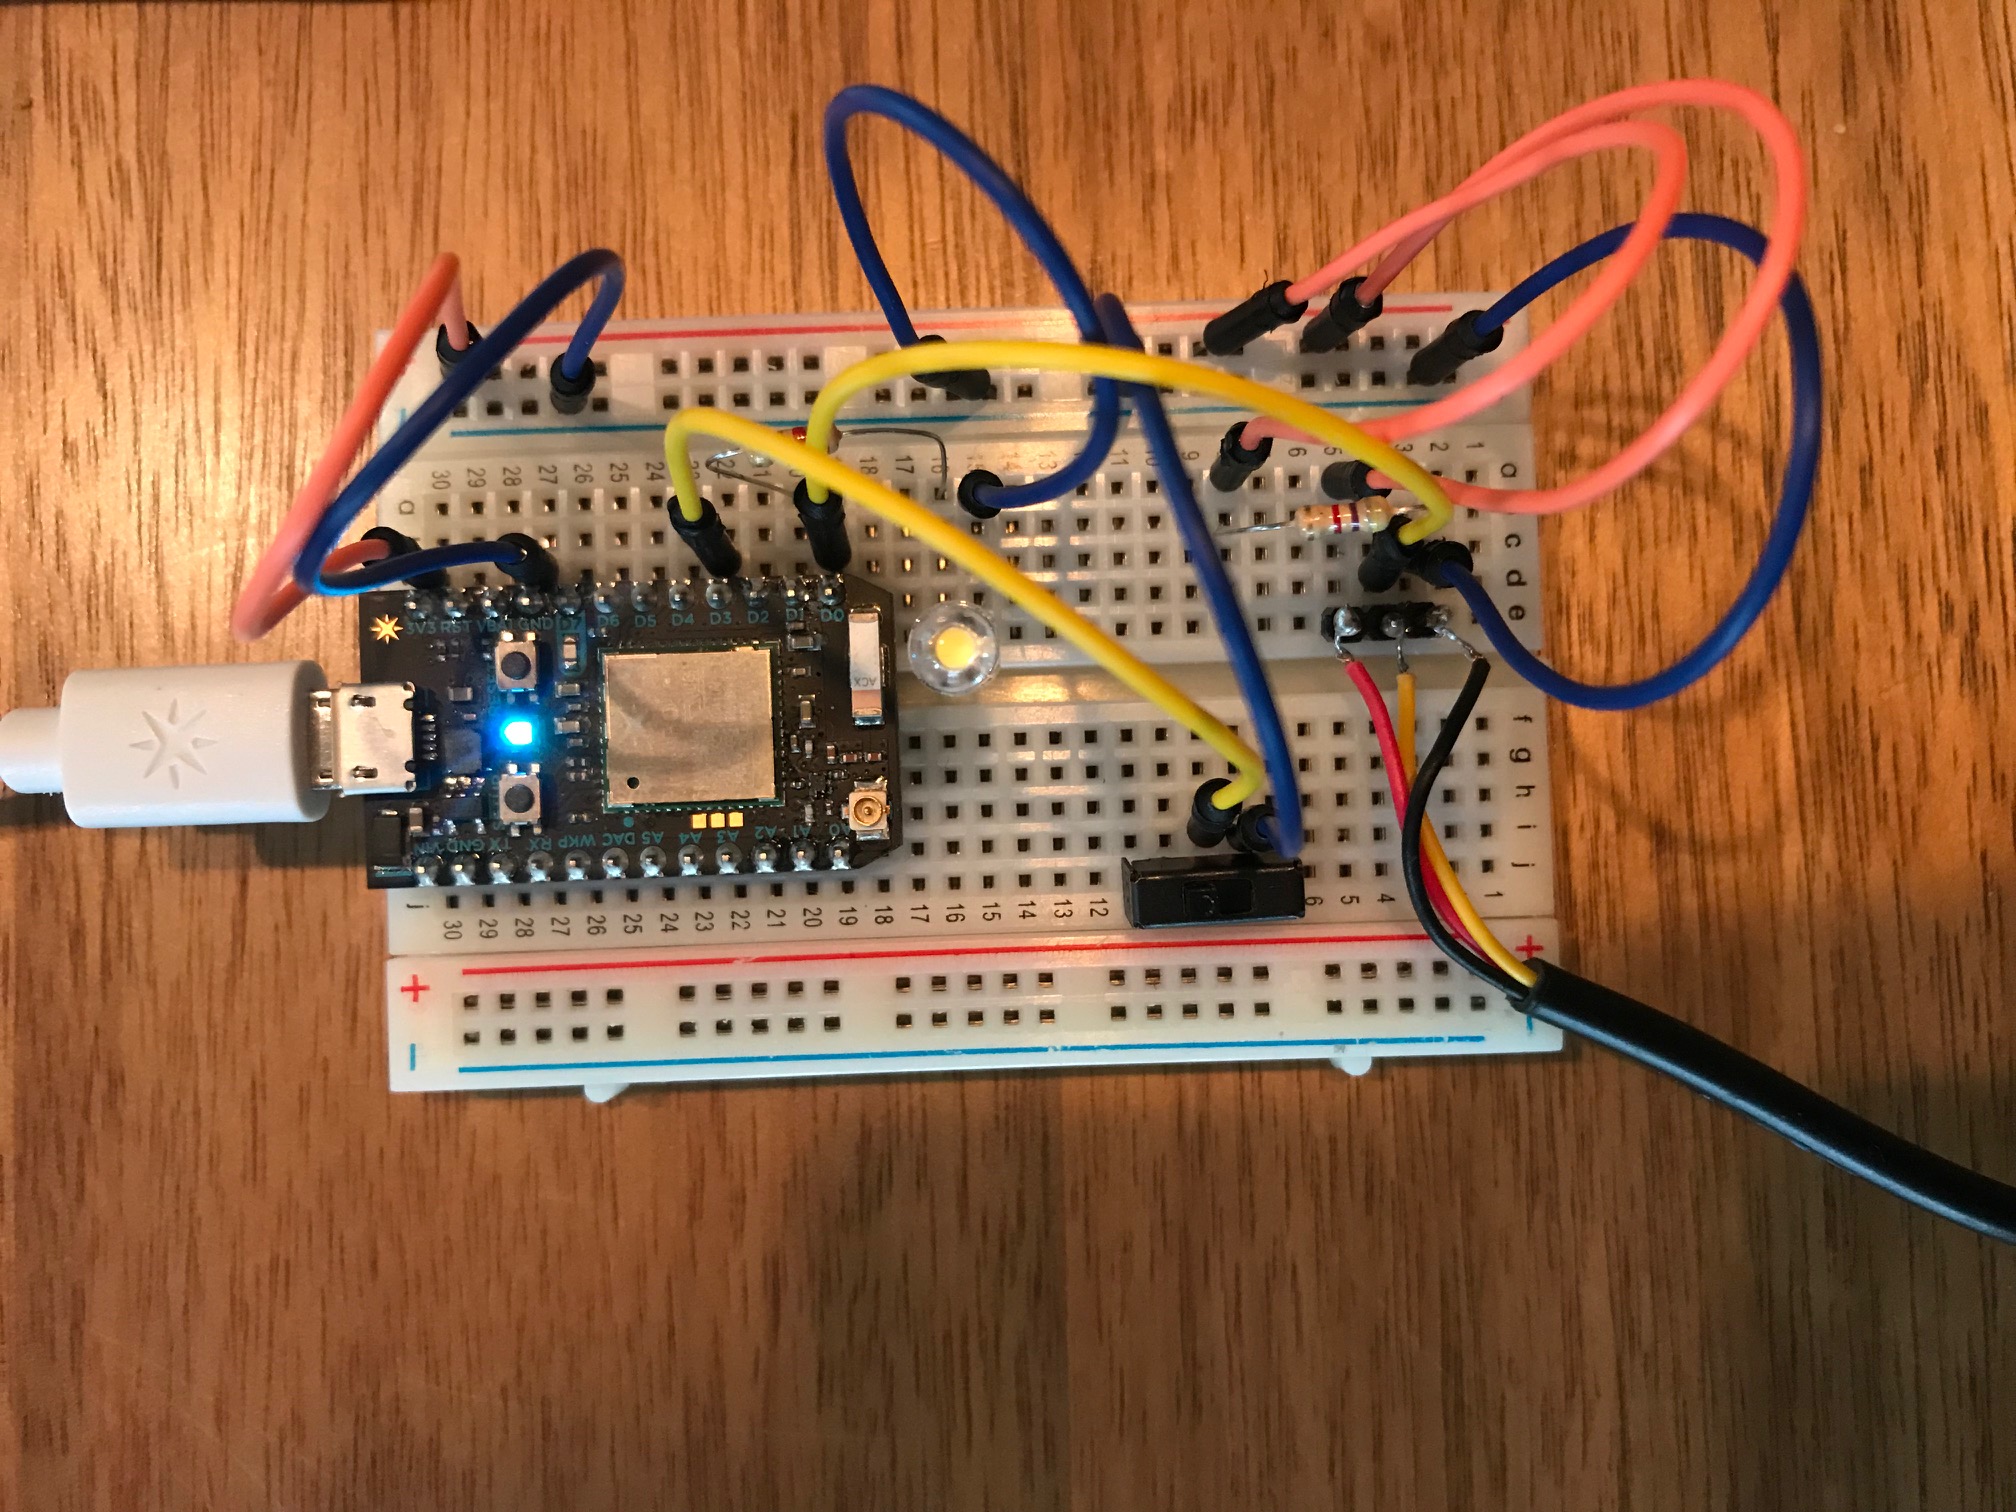
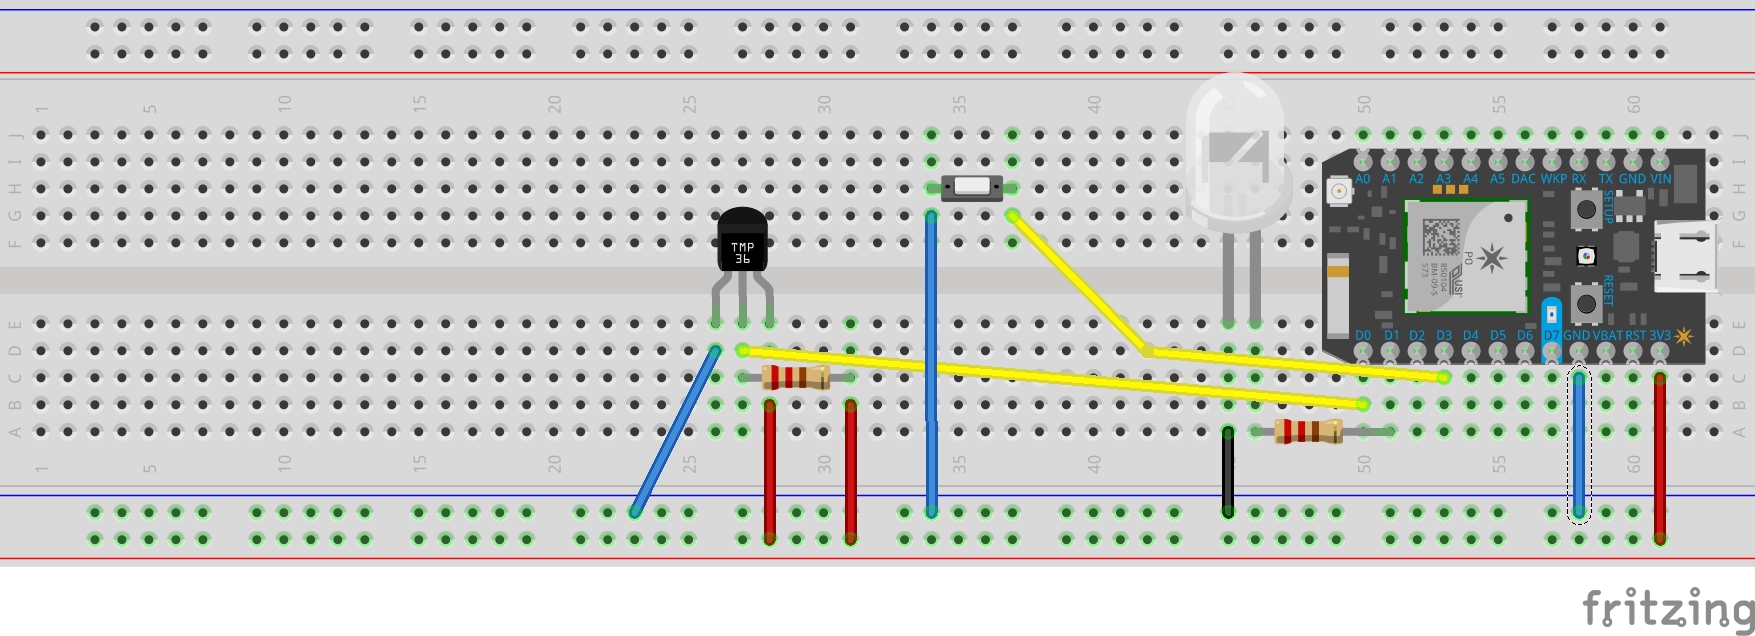
1. Understand how to use the sensor: I added the temperature sensor to the breadboard and built a code to read its temperature with the help of reference 1.
2. Build the output: I created an account with Twilio and connected it to the particle Webhook so I can send text messages when needed with the help of reference 2.
3. Add a switch as input: I added a switch as an input for my project, incorporated the additional code and tested it with the help of reference 3.
4. Incorporate an LED to confirm the flow of data: Finally added an LED light to indicate that sensor data was been recorded by particle.
Challenges:
My temperature sensor kept giving me an error which I thought was a problem with the code or circuit. Turns out it's a sensor error that is making my project send a random text when the sensor reads a temperature of -127 Celcius. I also had to understand how to leverage the “if else” statements to ensure that I get the text message at the accurate time.
Reflections:
I learned to break my steps into small components and then test them to see how they worked. From there, I could easily identify which parts were not working and needed to be checked.

Outcome:
Overall, I am happy with my working prototype since it can notify a user when the temperature drops to a certain level when the device is turned on. In order to be more accurate, I should test for the right temperature level where the user gets notified. I would also understand how I can create a workaround for the sensor error. Finally, I also had problems with stopping the text messages. As a next step, I would like to understand how to refine my code so that I can send only one text vs getting spammed with multiple texts.
// This #include statement was automatically added by the Spark IDE.
#include "OneWire.h"

// This #include statement was automatically added by the Spark IDE.
#include "spark-dallas-temperature.h"

// -----------------
// Read temperature
// -----------------

// Data wire is plugged into port D0 of Particle
// Setup a oneWire instance to communicate with any OneWire devices (not just Maxim/Dallas temperature ICs)
OneWire oneWire( D0 );
int switchPin = D3;
int LedPin = D1;

// Pass our oneWire reference to Dallas Temperature.
DallasTemperature dallas(&oneWire);

// Create a variable that will store the temperature value
double temperature = 0.0;
#include <math.h>

void setup()
{
  pinMode( switchPin , INPUT_PULLUP); // sets switch as input
  pinMode( LedPin , OUTPUT );
  // Register a Particle Core variable here
  Particle.variable("temperature", &temperature, DOUBLE);


  // setup the library
  dallas.begin();

  Serial.begin(9600);

}

void loop()
{
  int buttonState = digitalRead( switchPin );

  if( buttonState == LOW )
    {
    // turn the switch On
    digitalWrite( LedPin, HIGH);

    // Request temperature conversion (traditional)
    dallas.requestTemperatures();

    sin( 23423 );

    // get the temperature in Celcius
    float tempC = dallas.getTempCByIndex(0);
    // convert to double
    temperature = (double)tempC;

      if( temperature < 8 )
        {
        // send text message for temperatures less than 8 celcius
            digitalWrite( LedPin, LOW);
            String body = "Change the ice!";
            Particle.publish("twilio", body, PRIVATE);
        }

        else{
          // Publich in particle the temperature
          Particle.publish("temperature",String(temperature));
          digitalWrite( LedPin, LOW);
        }
          delay(7000);
} else {
  // otherwise
  // turn the switch Off
  digitalWrite( LedPin, LOW);
}
}
Overall this was an interesting project to test my circuit building and coding skills. I It was pretty time consuming project as I needed to understand the code and how it worked. Thanks to this project, I am more confident in these skills that I know I will continue to develop. I would like to further explore the texting capabilities of Twilio and learn to create loops that only happen for a certain amount of time. In the future, I could also modify this project to notify me or my husband when water is boiling.
References:
1. Tutorial on using temperature sensors and supporting libraries:
- http://diotlabs.daraghbyrne.me/3-working-with-sensors/DS18B20/
- Dallas Temperature Control Library Files (.cpp and .h files): https://github.com/tomdeboer/SparkCoreDallasTemperature/blob/master/firmware/spark-dallas-temperature.cpp
- https://github.com/tomdeboer/SparkCoreDallasTemperature/blob/master/firmware/spark-dallas-temperature.h
- The OneWire Library files(.cpp and .h files): https://github.com/Hotaman/OneWireSpark/blob/master/firmware/OneWire.cpp
2. Tutorial for creating a Twilio account and creating a Webhook: https://www.twilio.com/docs/guides/sms-mms-messages-particle-photon#sign-into-or-sign-up-for-a-twilio-account
3. Tutorial for adding switches: http://diotlabs.daraghbyrne.me/5-getting-input/switches/
Share this Project
Focused on
About
Receive a notification when you need to change the ice in your ice machine
Created
January 23rd, 2018