49713 Designing for the Internet of Things
· 18 members
A hands-on introductory course exploring the Internet of Things and connected product experiences.
Found in DioT 2019: Social Objects - Part 2
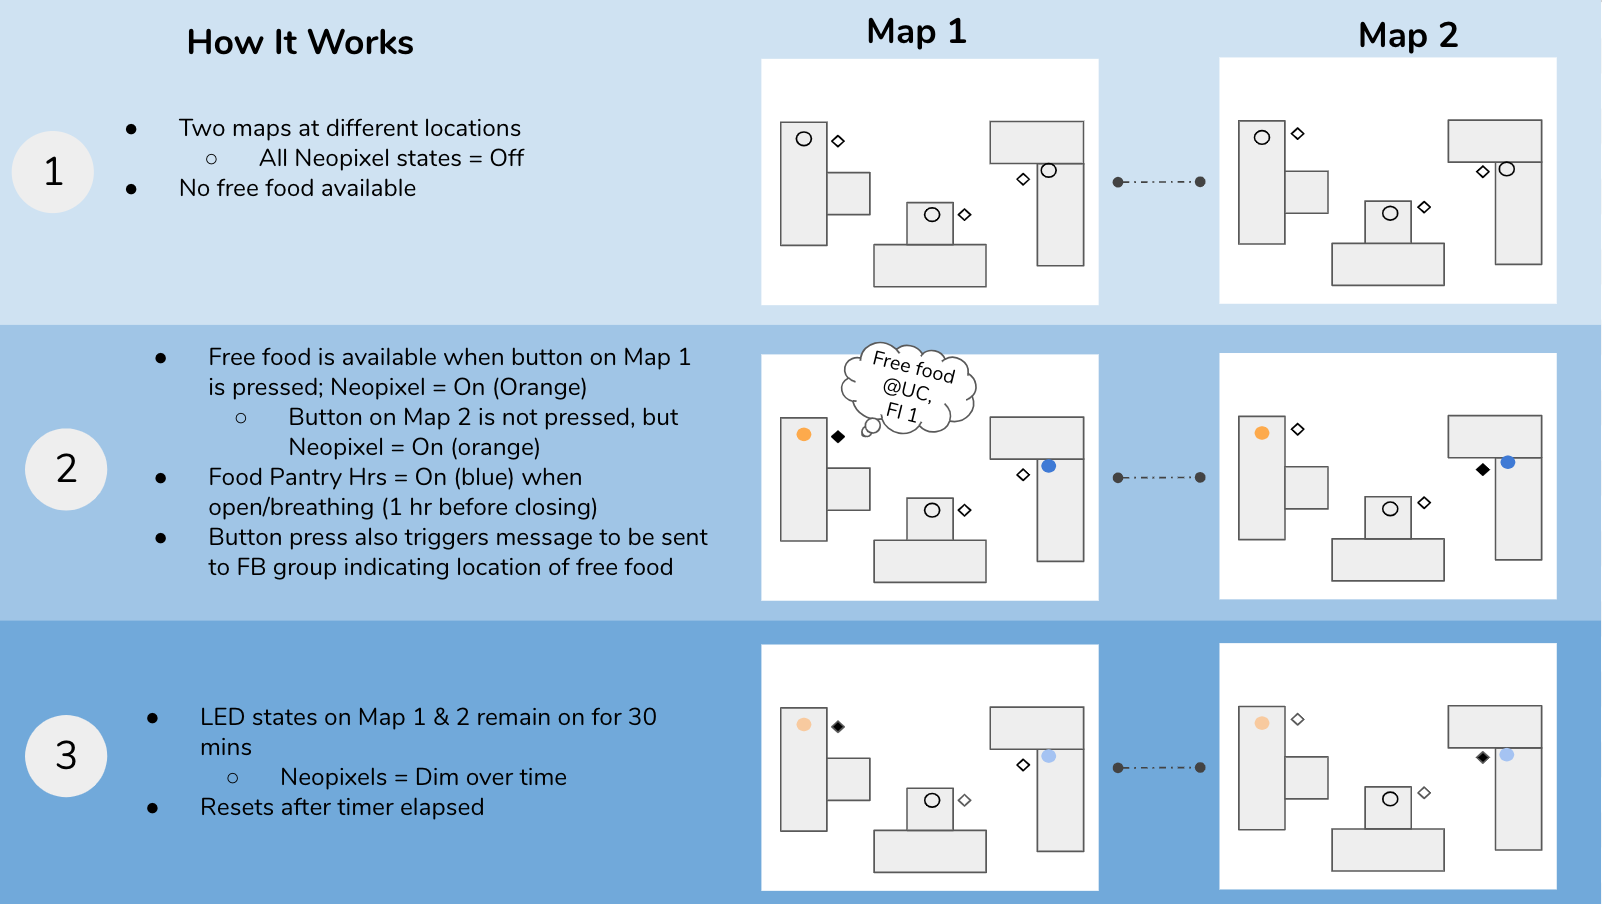
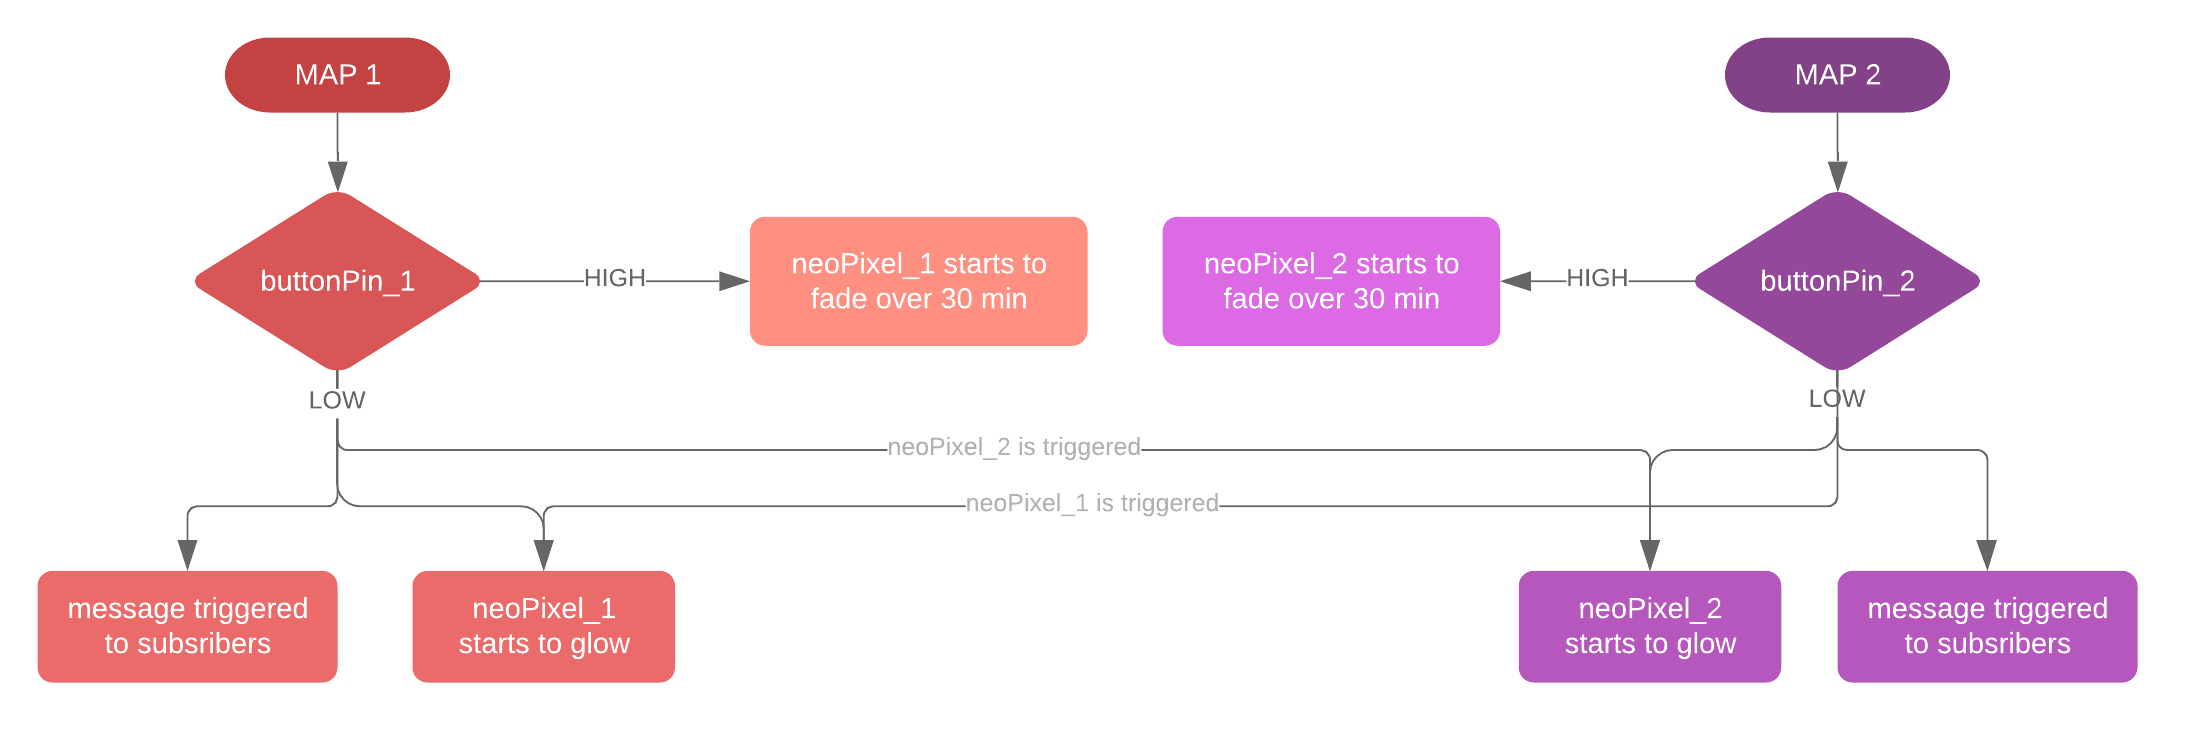
Our team is proposing an ambient map that will be placed at major buildings on CMU campus (i.e. University Center) to indicate free food opportunities and when CMU's food pantry is open and closed.
This project is only accessible by signed in users. Be considerate and think twice before sharing.
A hands-on introductory course exploring the Internet of Things and connected product experiences.
Our team is proposing an ambient map that will be placed at major buildings on CMU campus (i.e. University Center) to indicate free food opportunities and when CMU's food pantry is open and closed.
February 11th, 2019