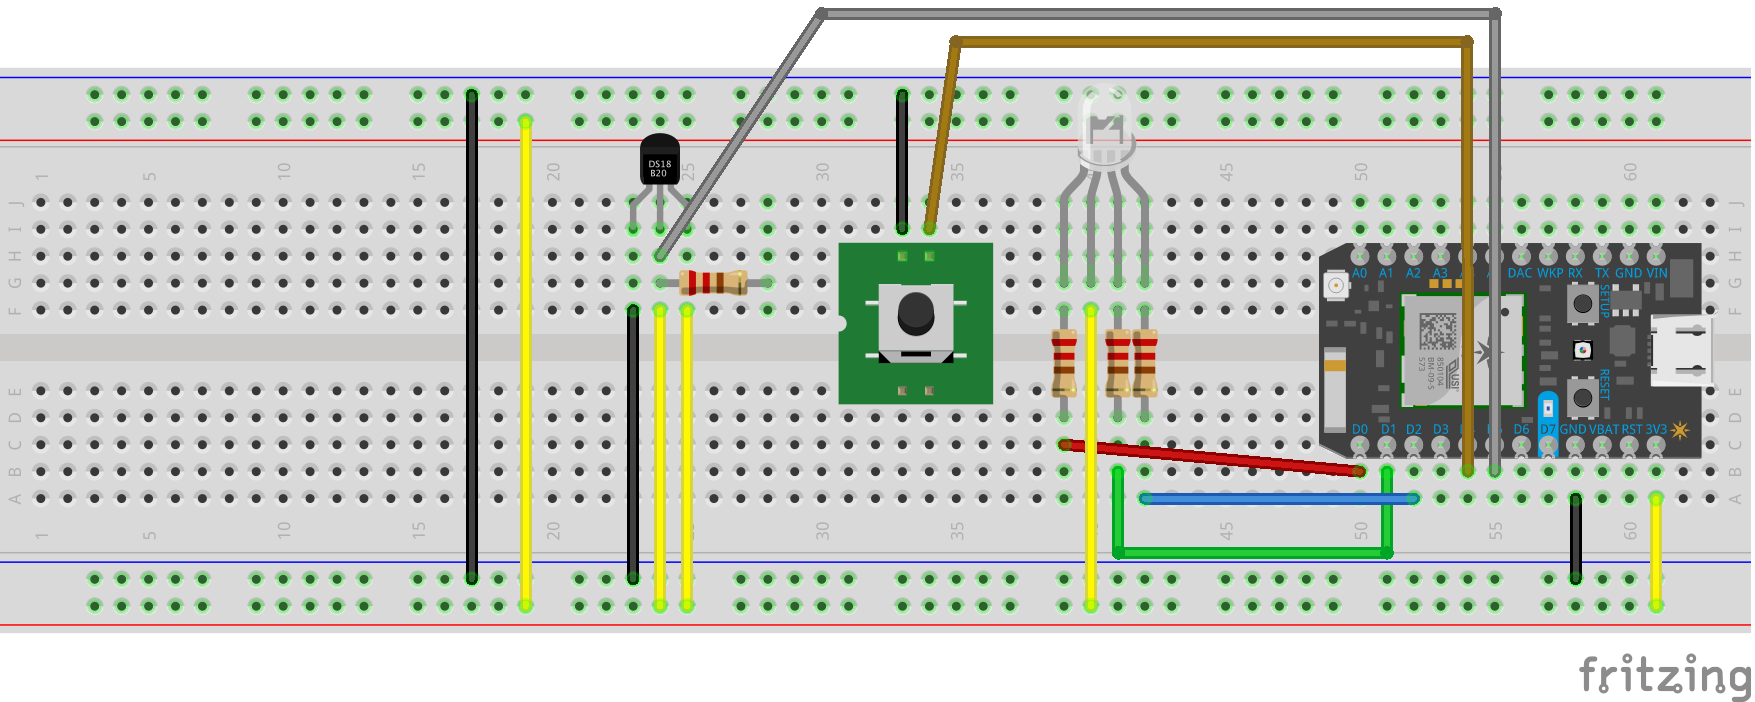
// Our button wired to D0
int buttonPin = D4;
int redPin = D0;    // RED pin of the LED to PWM pin **A0**
int greenPin = D1;  // GREEN pin of the LED to PWM pin **D0**
int bluePin = D2;   // BLUE pin of the LED to PWM pin **D1**
int redValue = 255; // Full brightness for an ANODE RGB LED is 0, and off 255
int greenValue = 255; // Full brightness for an ANODE RGB LED is 0, and off 255
int blueValue = 255; // Full brightness for an ANODE RGB LED is 0, and off 255</td>
int length = 20000; //timer length
bool timerOn = false;

// This #include statement was automatically added by the Spark IDE.
#include "OneWire.h"

// This #include statement was automatically added by the Spark IDE.
#include "spark-dallas-temperature.h"
#include <math.h>

// -----------------
// Read temperature
// -----------------

// Data wire is plugged into port 5 on the Arduino
// Setup a oneWire instance to communicate with any OneWire devices (not just Maxim/Dallas temperature ICs)
OneWire oneWire(D5 );

// Pass our oneWire reference to Dallas Temperature.
DallasTemperature dallas(&oneWire);

// Create a variable that will store the temperature value
double temperature = 0.0;
double temperatureF = 0.0;


unsigned long t = -1;

void setup()
{
  // Set up our RGB LED pins for output
  pinMode( redPin, OUTPUT);
  pinMode( greenPin, OUTPUT);
  pinMode( bluePin, OUTPUT);
  // For input, we define the
  // pushbutton as an input-pullup
  // this uses an internal pullup resistor
  // to manage consistent reads from the device
  Serial.begin(9600);
  pinMode( buttonPin , INPUT_PULLUP); // sets pin as input

  // Register a Particle variable here
  Particle.variable("temperature", &temperature, DOUBLE);
  Particle.variable("temperatureF", &temperatureF, DOUBLE);

  // setup the library
  dallas.begin();

}

void loop() {
  //create a variable for time and print it
  // find out if the button is pushed
  // or not by reading from it.
  int buttonState = digitalRead( buttonPin );
  // remember that we have wired the pushbutton to
  // ground and are using a pulldown resistor
  // that means, when the button is pushed,
  // we will get a LOW signal
  // when the button is not pushed we'll get a HIGH

  // Request temperature conversion

  dallas.requestTemperatures();

  // get the temperature in Celcius
  float tempC = dallas.getTempCByIndex(0);
  // convert to double
  temperature = (double)tempC;

  // convert to Fahrenheit
  float tempF = DallasTemperature::toFahrenheit( tempC );
  // convert to double
  temperatureF = (double)tempF;


  if( buttonState == LOW and timerOn != true)
  {
    //if the button is pushed and the timer isn't on, turn the timer on
    t = millis();
    timerOn = true;
    //and say the temperature
    Particle.publish("temperature", tempC);
    Serial.print( "Temp in C = ");
    Serial.print(tempC);
    Serial.print( "\t\t F = ");
    Serial.println( tempF );
    //then fade the LED
    ledFade(length);

  }else if(buttonState == LOW and timerOn == true and (millis()-t) >= length){
    //the time has run out, turn the led to the final Color
    setRGBColor(0,255,0);

  }else if(buttonState == HIGH){
    //otherwise, turn the timer and the LED off and set t to 0
    timerOn = false;
    setRGBColor(0,0,0);
}
  delay(500);

}

void ledFade(int z){
  //fade the LED here
  float delayTime =  z/255.0; //set the length of timer of the number of steps
  Serial.println(delayTime);
  for (int y = 0; y<= 255; y++){
      setRGBColor(0, y, 255-y);
      delay(delayTime);
    }
  }


void setRGBColor( int r, int g, int b ){
  redValue = r;
  greenValue = g;
  blueValue = b;
  analogWrite(redPin, 255 - redValue);
  analogWrite(greenPin, 255 - greenValue);
  analogWrite(bluePin, 255 - blueValue);
}
Click to Expand