49713 Designing for the Internet of Things
· 25 members
A hands-on introductory course exploring the Internet of Things and connected product experiences.
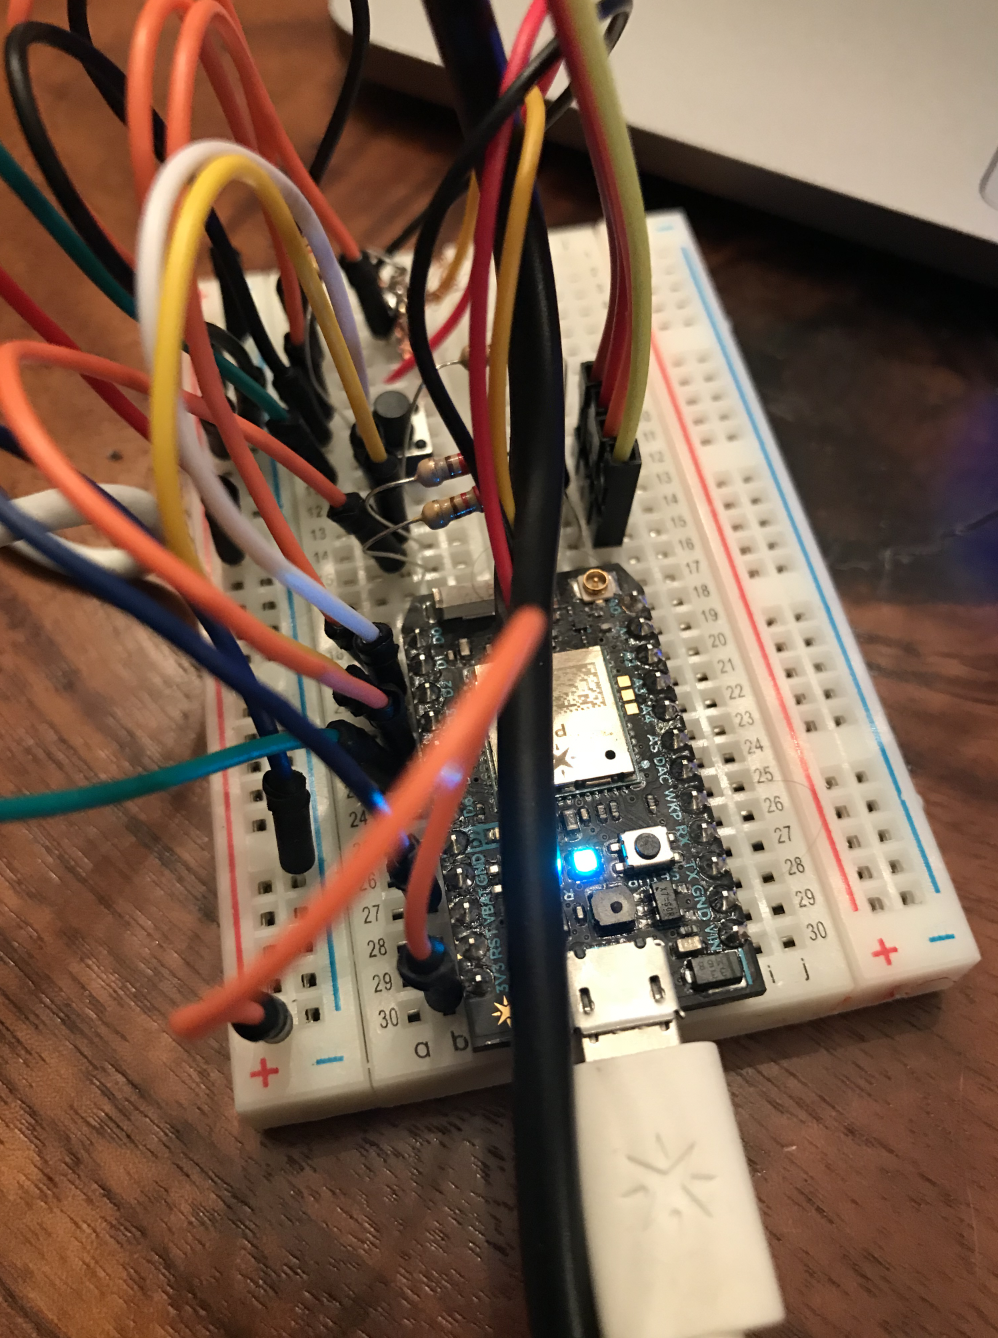
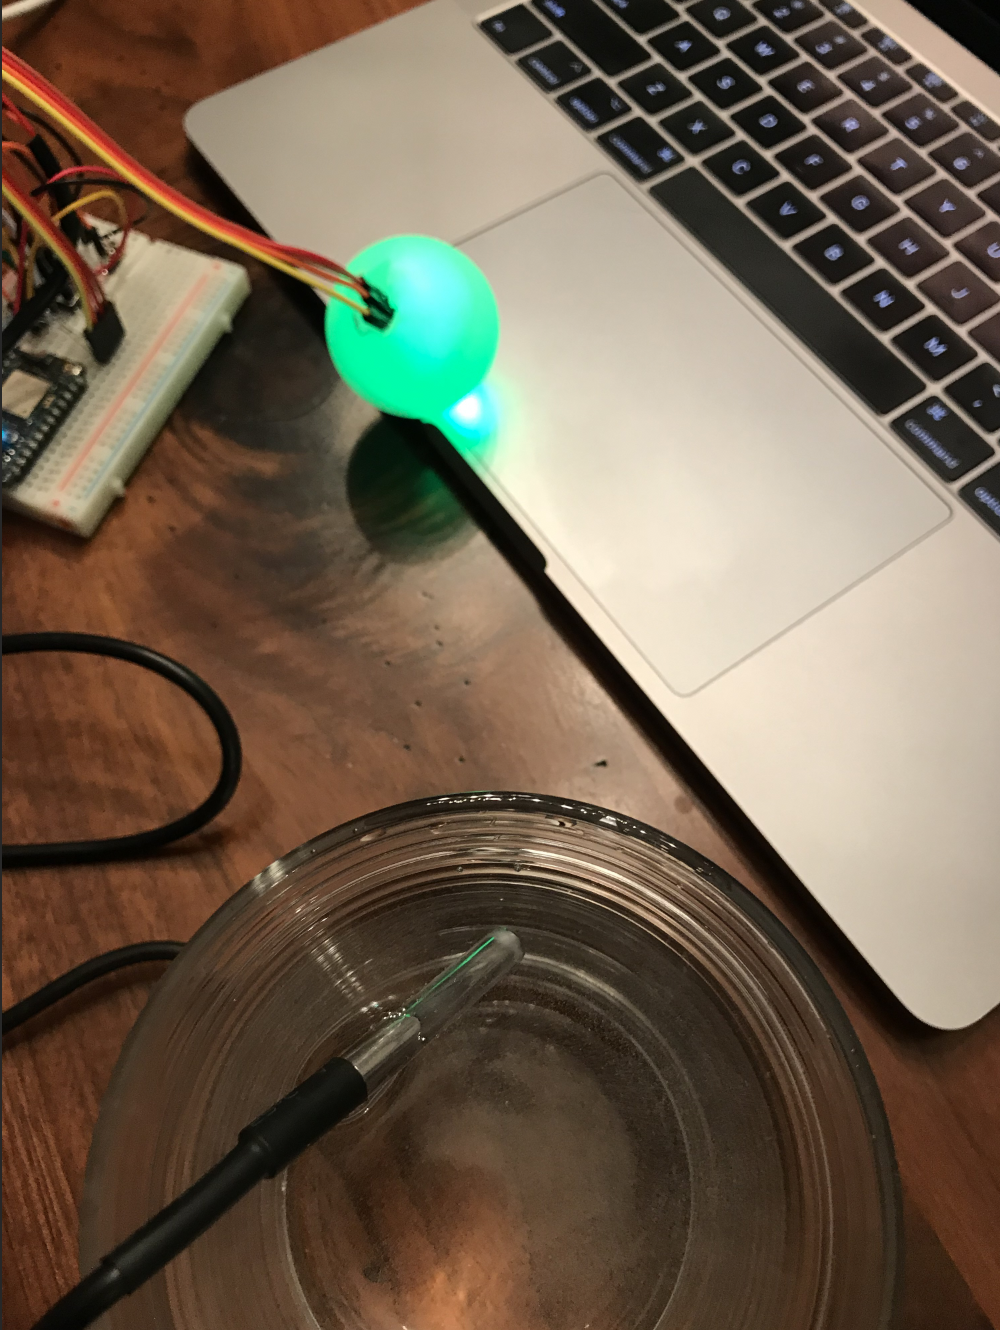
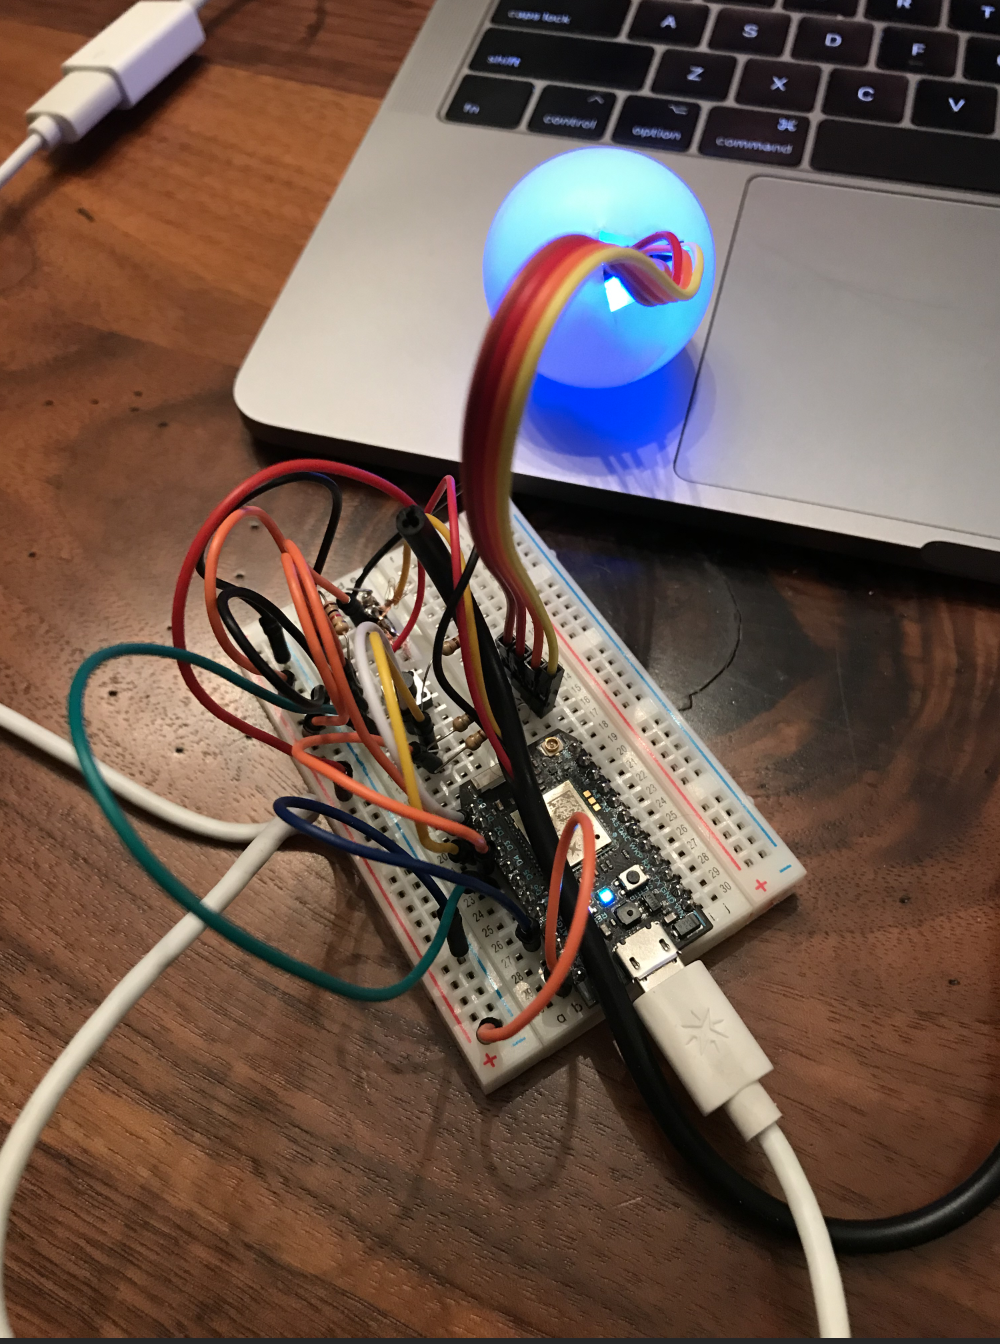
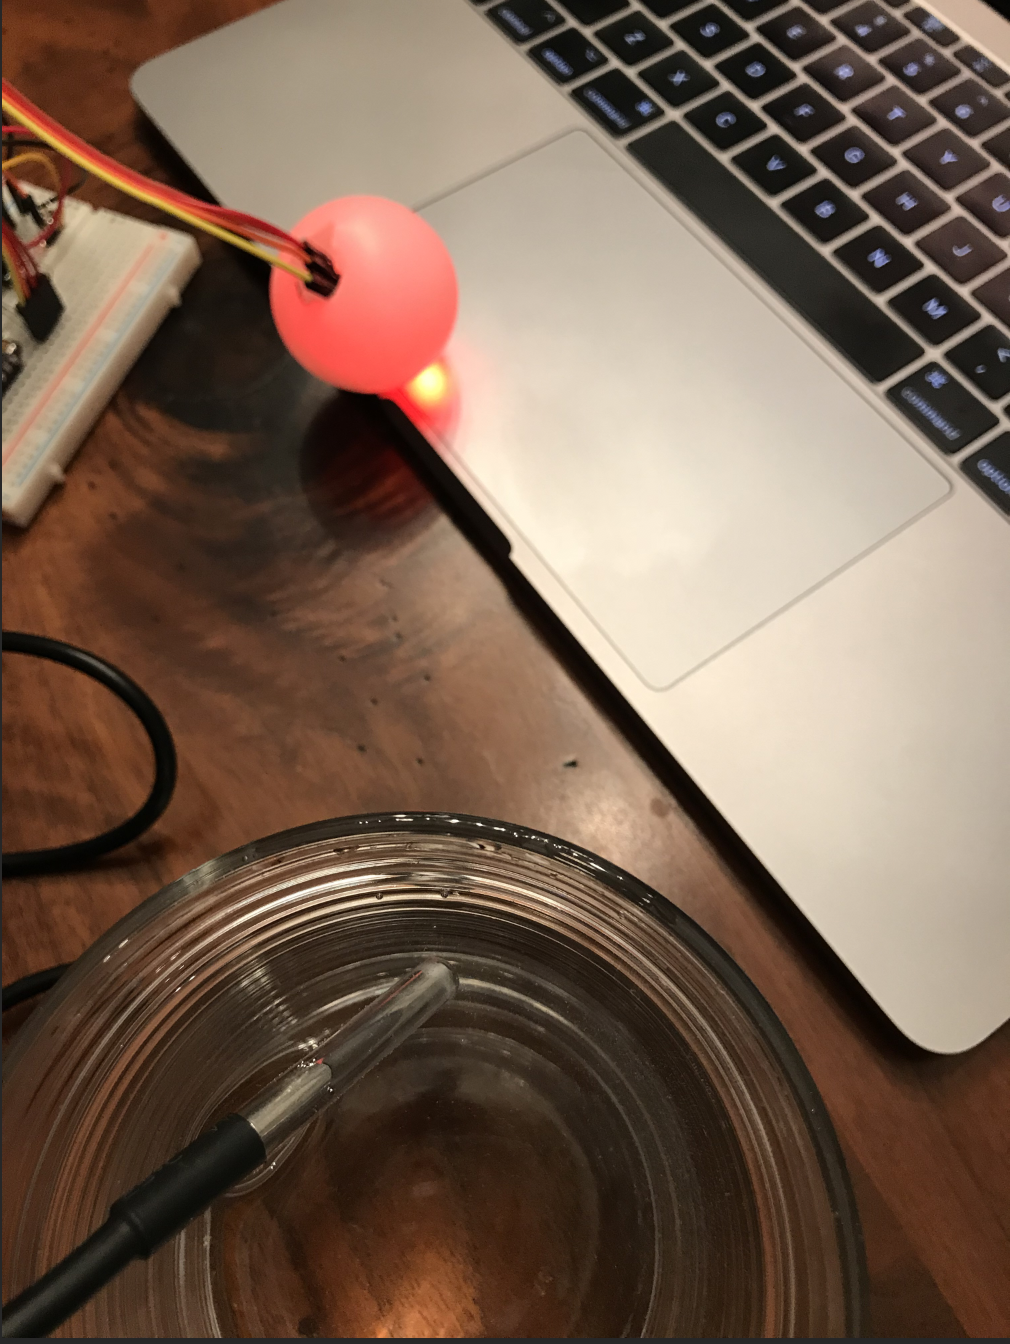
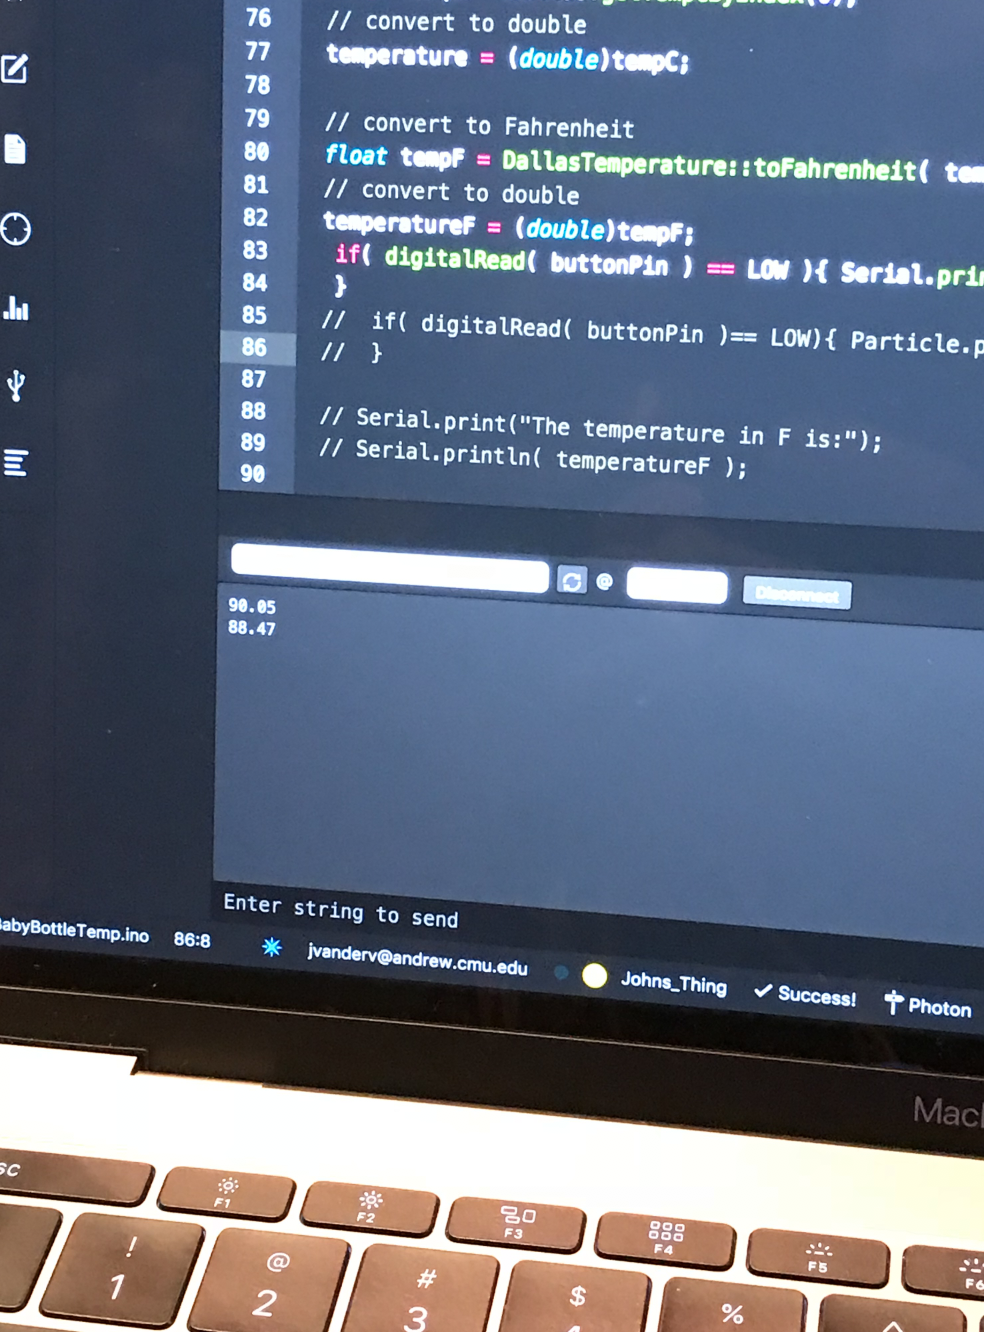
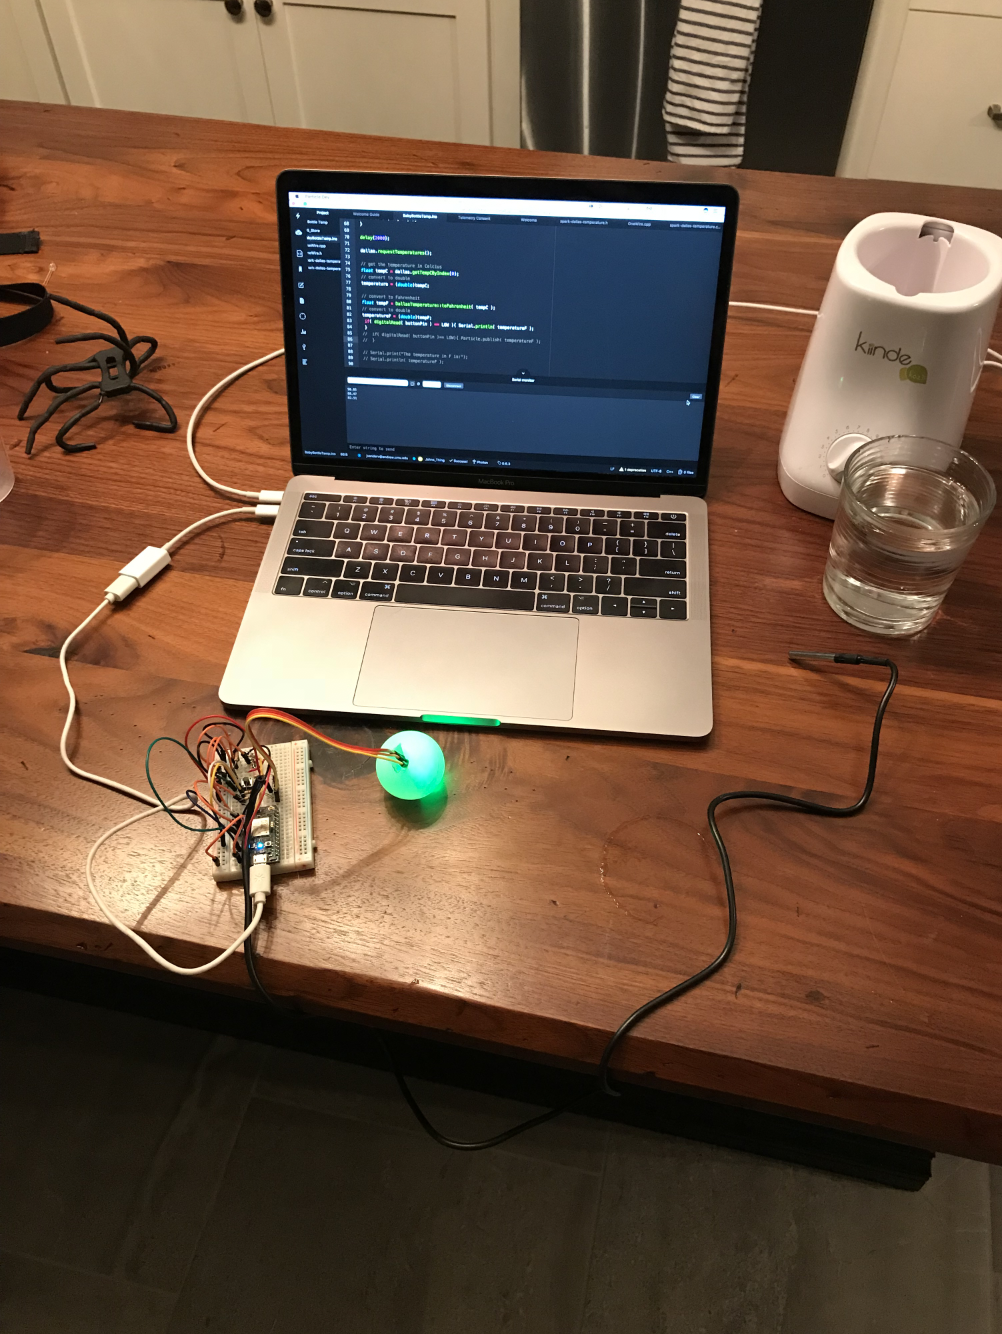
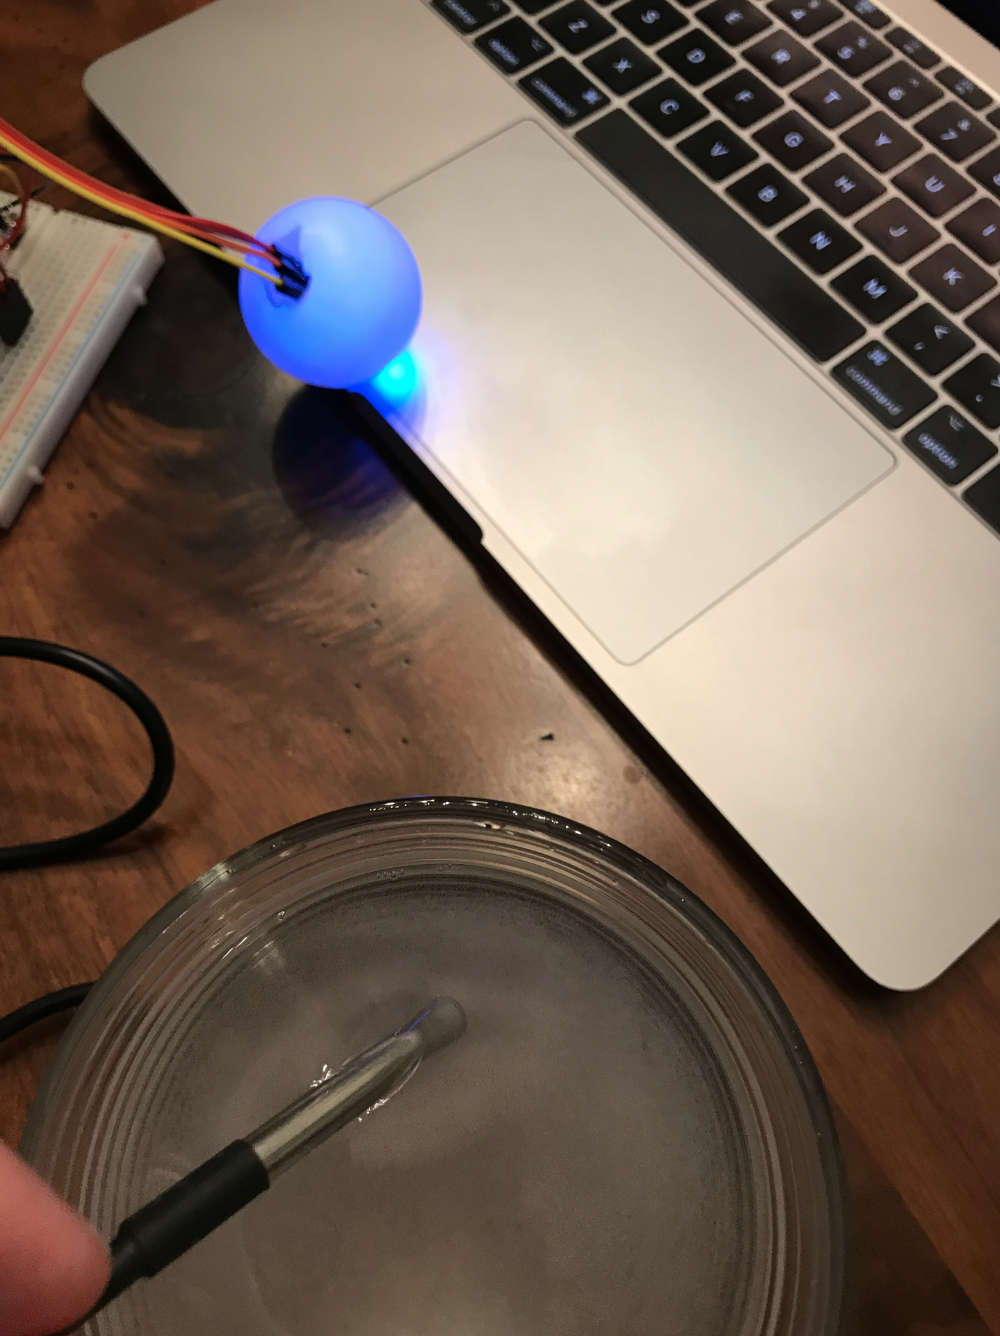
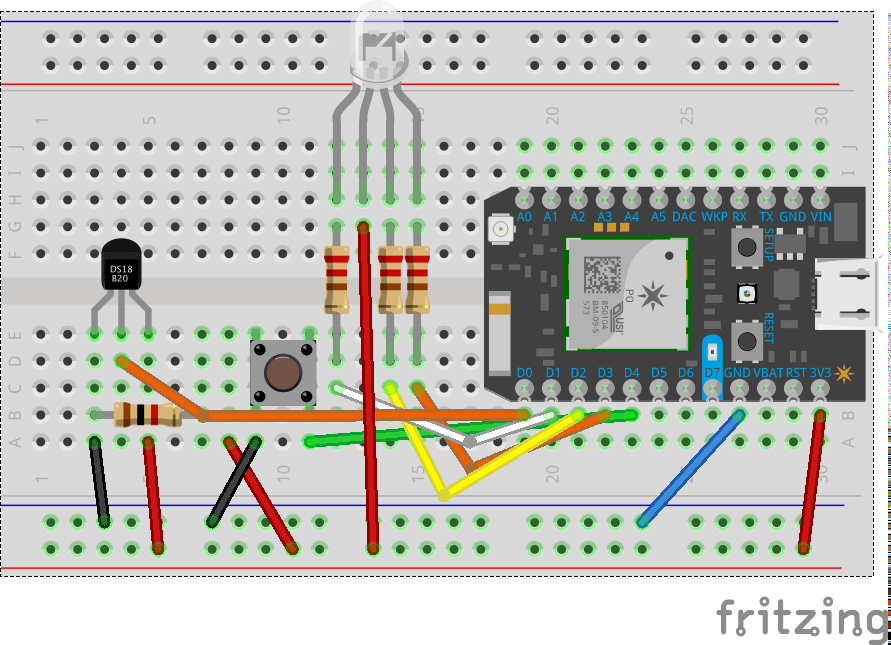
I want to create a sensor system for my wife that tells her when the bottle of formula or breastmilk is at the right temperature. We have a bottle warmer, but depending on the volume and what temperature the bottle started at it is hard to know when it will be at the right temperature. I hope to make a sensor that inserts into the bottle and sends a text and indicates through an LED when it is at the right temperature.
A hands-on introductory course exploring the Internet of Things and connected product experiences.
I want to create a sensor system for my wife that tells her when the bottle of formula or breastmilk is at the right temperature. We have a bottle warmer, but depending on the volume and what temperature the bottle started at it is hard to know when it will be at the right temperature. I hope to make a sensor that inserts into the bottle and sends a text and indicates through an LED when it is at the right temperature.
January 24th, 2018