Interactive First Impressions: Planter Installation
Made by Tarika Jain
Found in DioT 2019: Internet of Plants · UNLISTED (SHOWN IN POOLS)
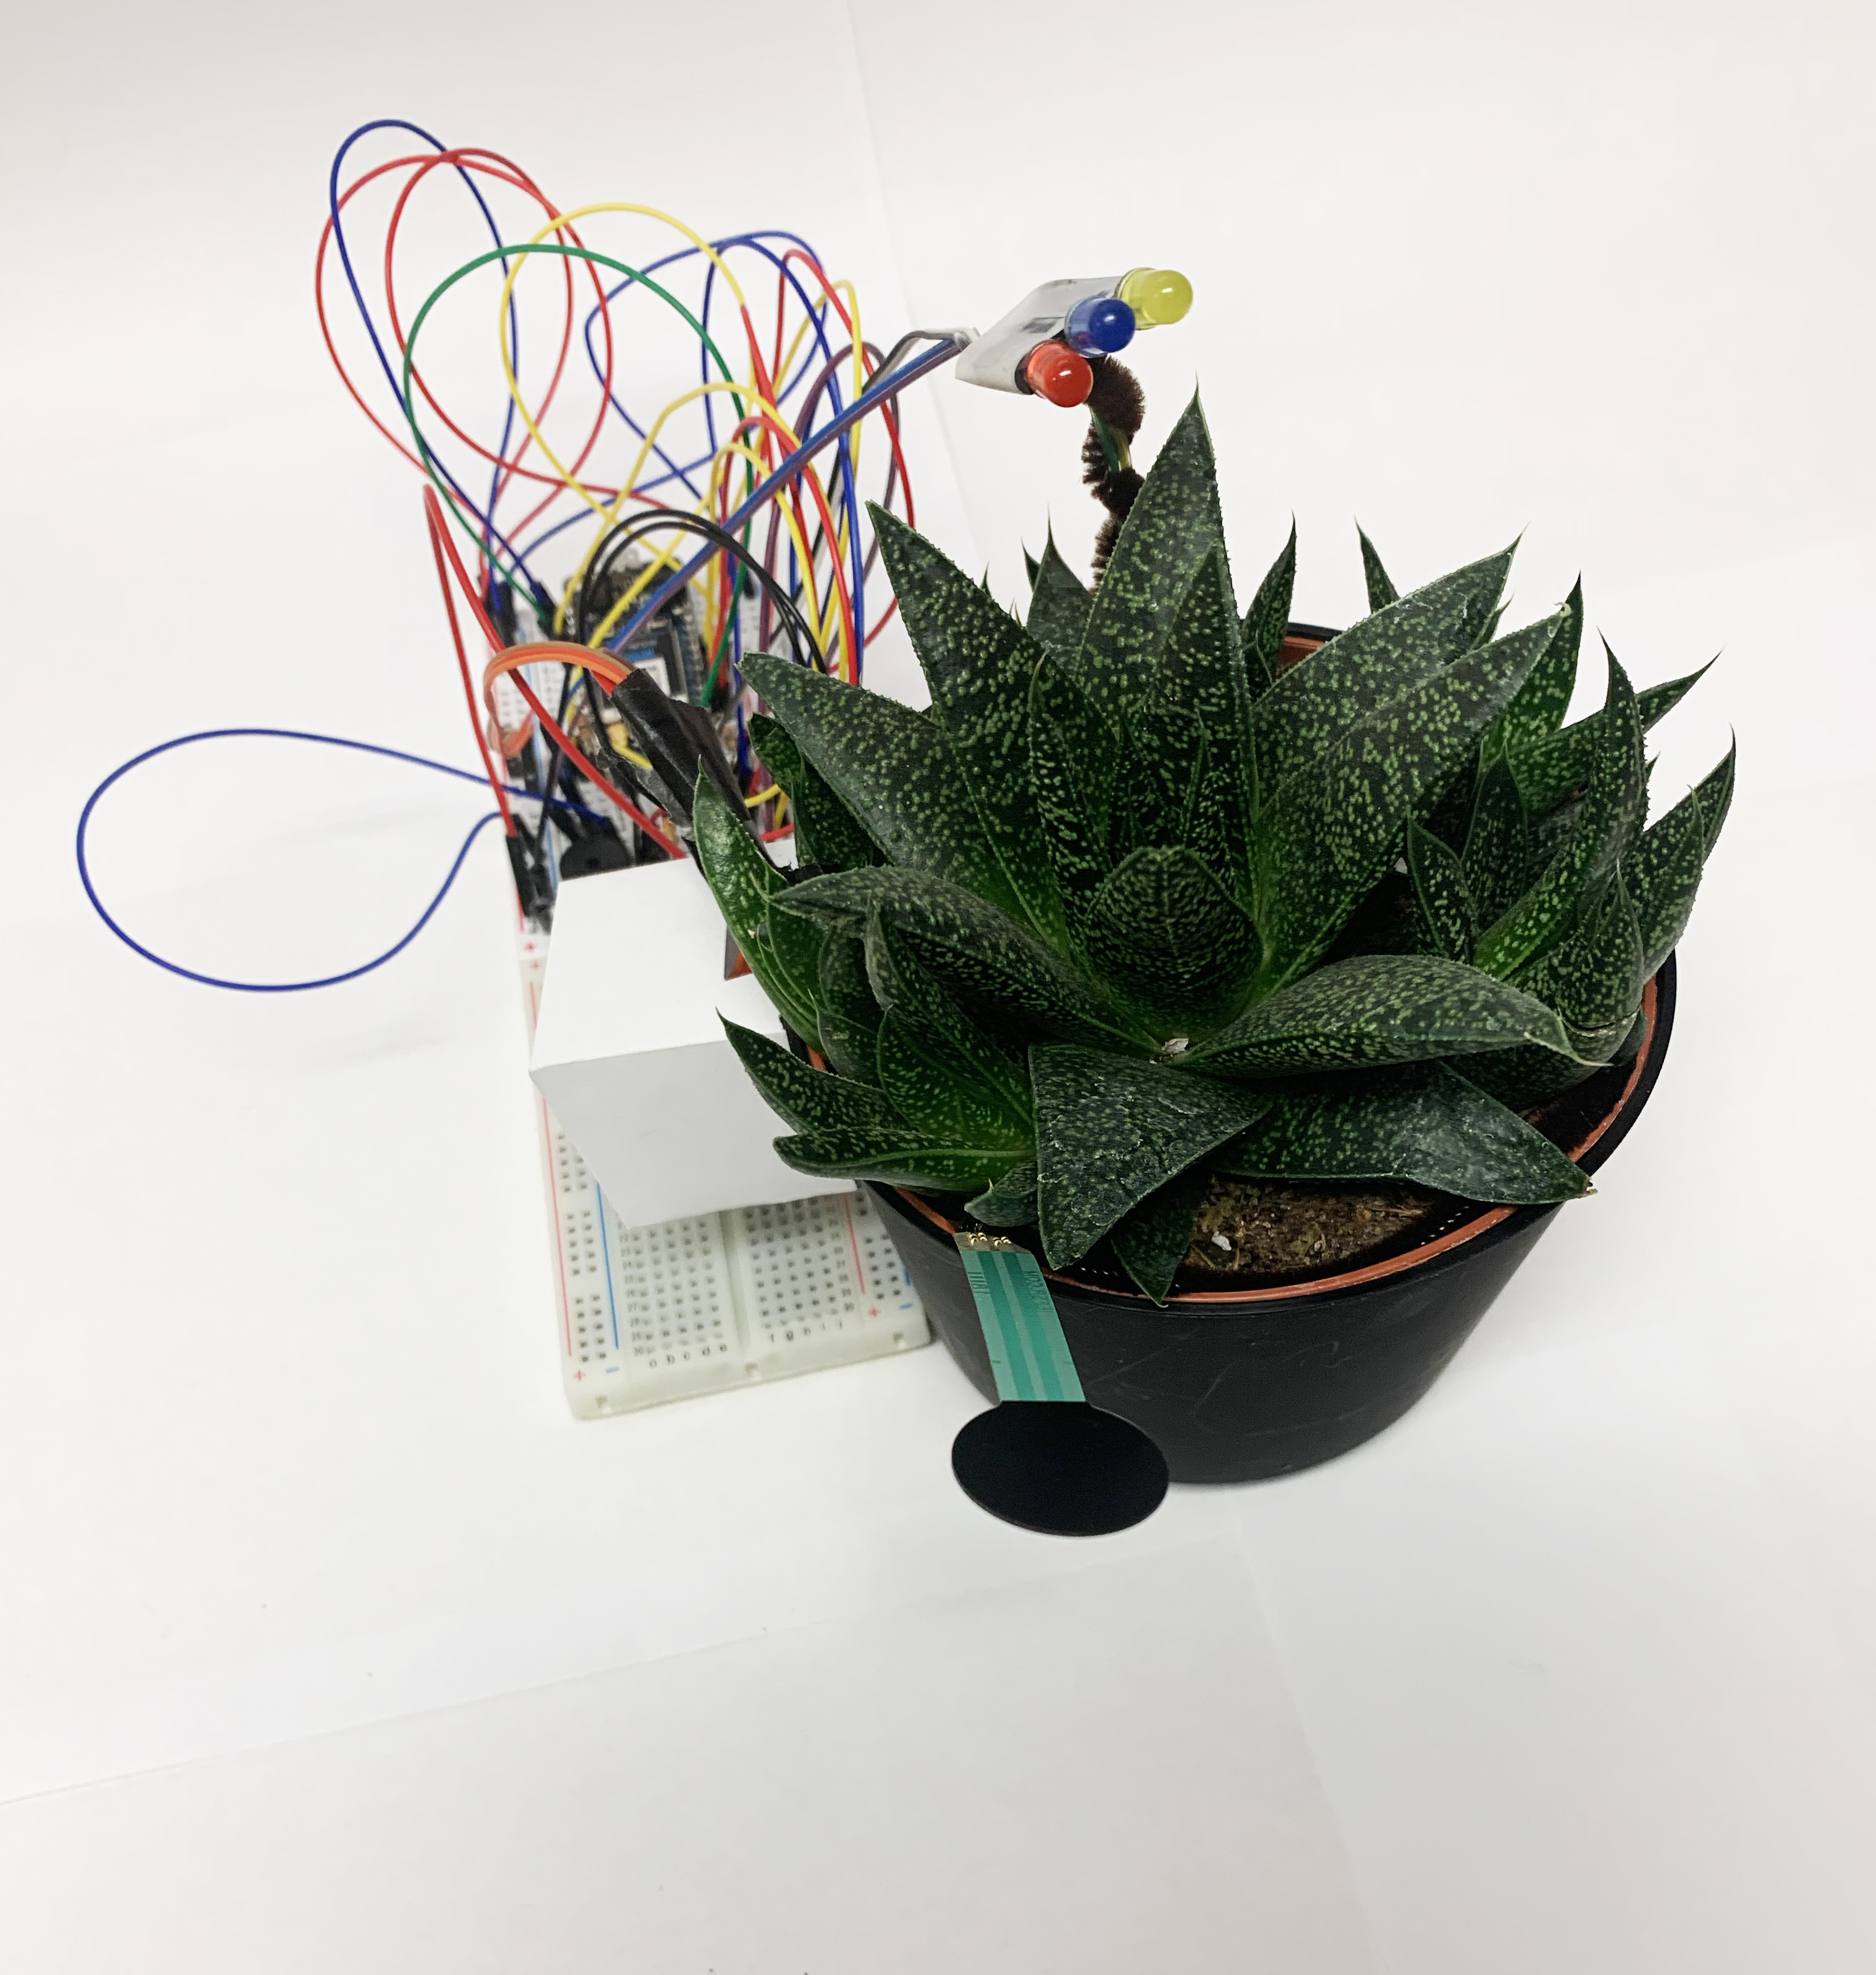
An interactive outdoor herb planter installation with each planter that becomes more responsive as you move closer to it. Ideally, this would be installed next to the main door to allow for maximum interaction and create positive ambient experience as the first impression when someone approaches the house.
0
Solution
An interactive outdoor planter installation with each planter that becomes more responsive as you move closer to it. Ideally, this would be installed next to the main door to allow for maximum interaction and create positive ambient experience as the first impression when someone approaches the house. Each planter’s purpose is two fold:
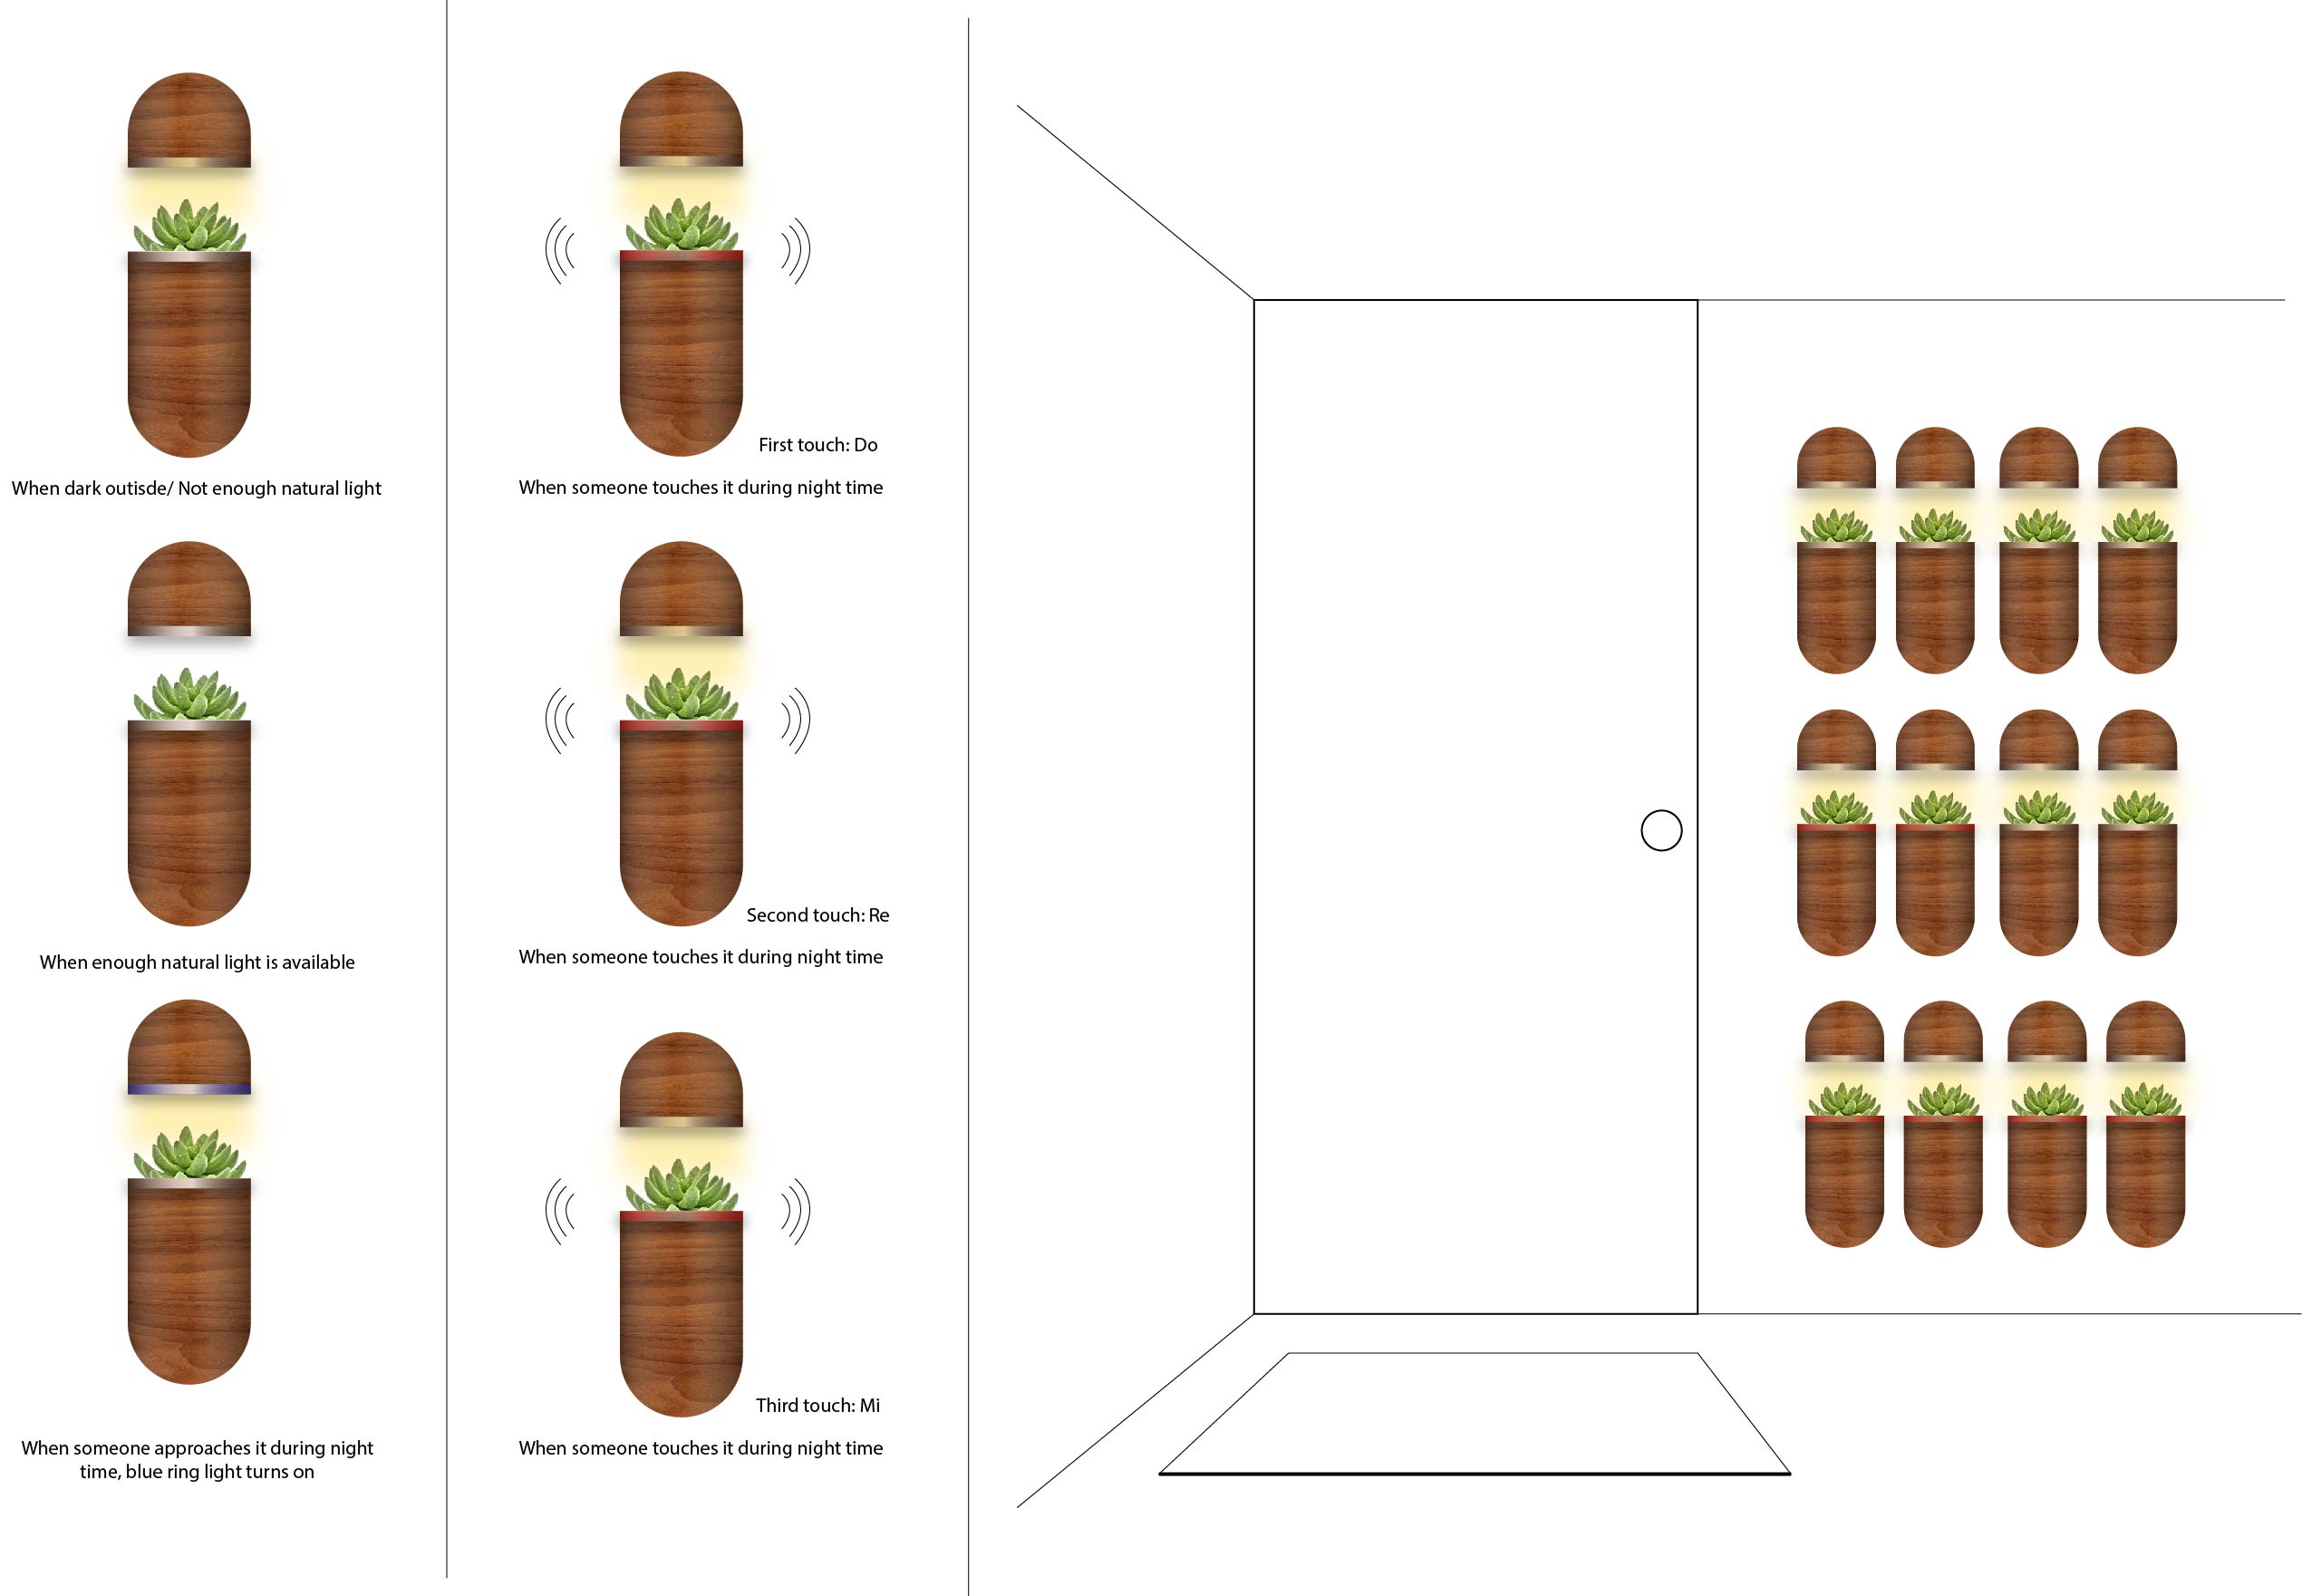
- To provide the plant just the right amount of incandescent light for its optimal growth. When there is no lighting around the planter, high intensity yellow lighting will provide plant light and it’ll decrease with increase in natural light around it. (Photo-resistor).
- An interactive planter: When a person gets close to the planter, it will glow blue light (Motion sensor) and with a complete installation in place, the person can essentially wave his hand over multiple plants at once and experience a range of pixelated colored formations taking place. If the person touches the planter, it makes a note sound like ‘do/re/mI/fa/so/la/ti/do’ that is set to change in order with every touch (An interactive planter-keyboard: FSR Sensor and Speaker Pin) in addition to a red light that glows around the edge of the planter. Finally, it will send a “Hope you enjoyed the music” message if you touch it.
Briefly describe the solution you produced. Include a video if appropriate, image and/or illustrate with a workflow diagram
Approach
Having multiple plants surrounding the house and specially the entrance enhance the outdoor space and creates a calming, fresh experience. Many people have such a setting around their house but it’s and historically, they have decorated it with lights of all sorts to create an enchanting experience. The space right outside the door however is not very interactive and therefore I decided make people’s waiting time outside the house a little more enjoyable using my interactive planter installation which emits light and sound if and when the user decides to interact with it.
Process
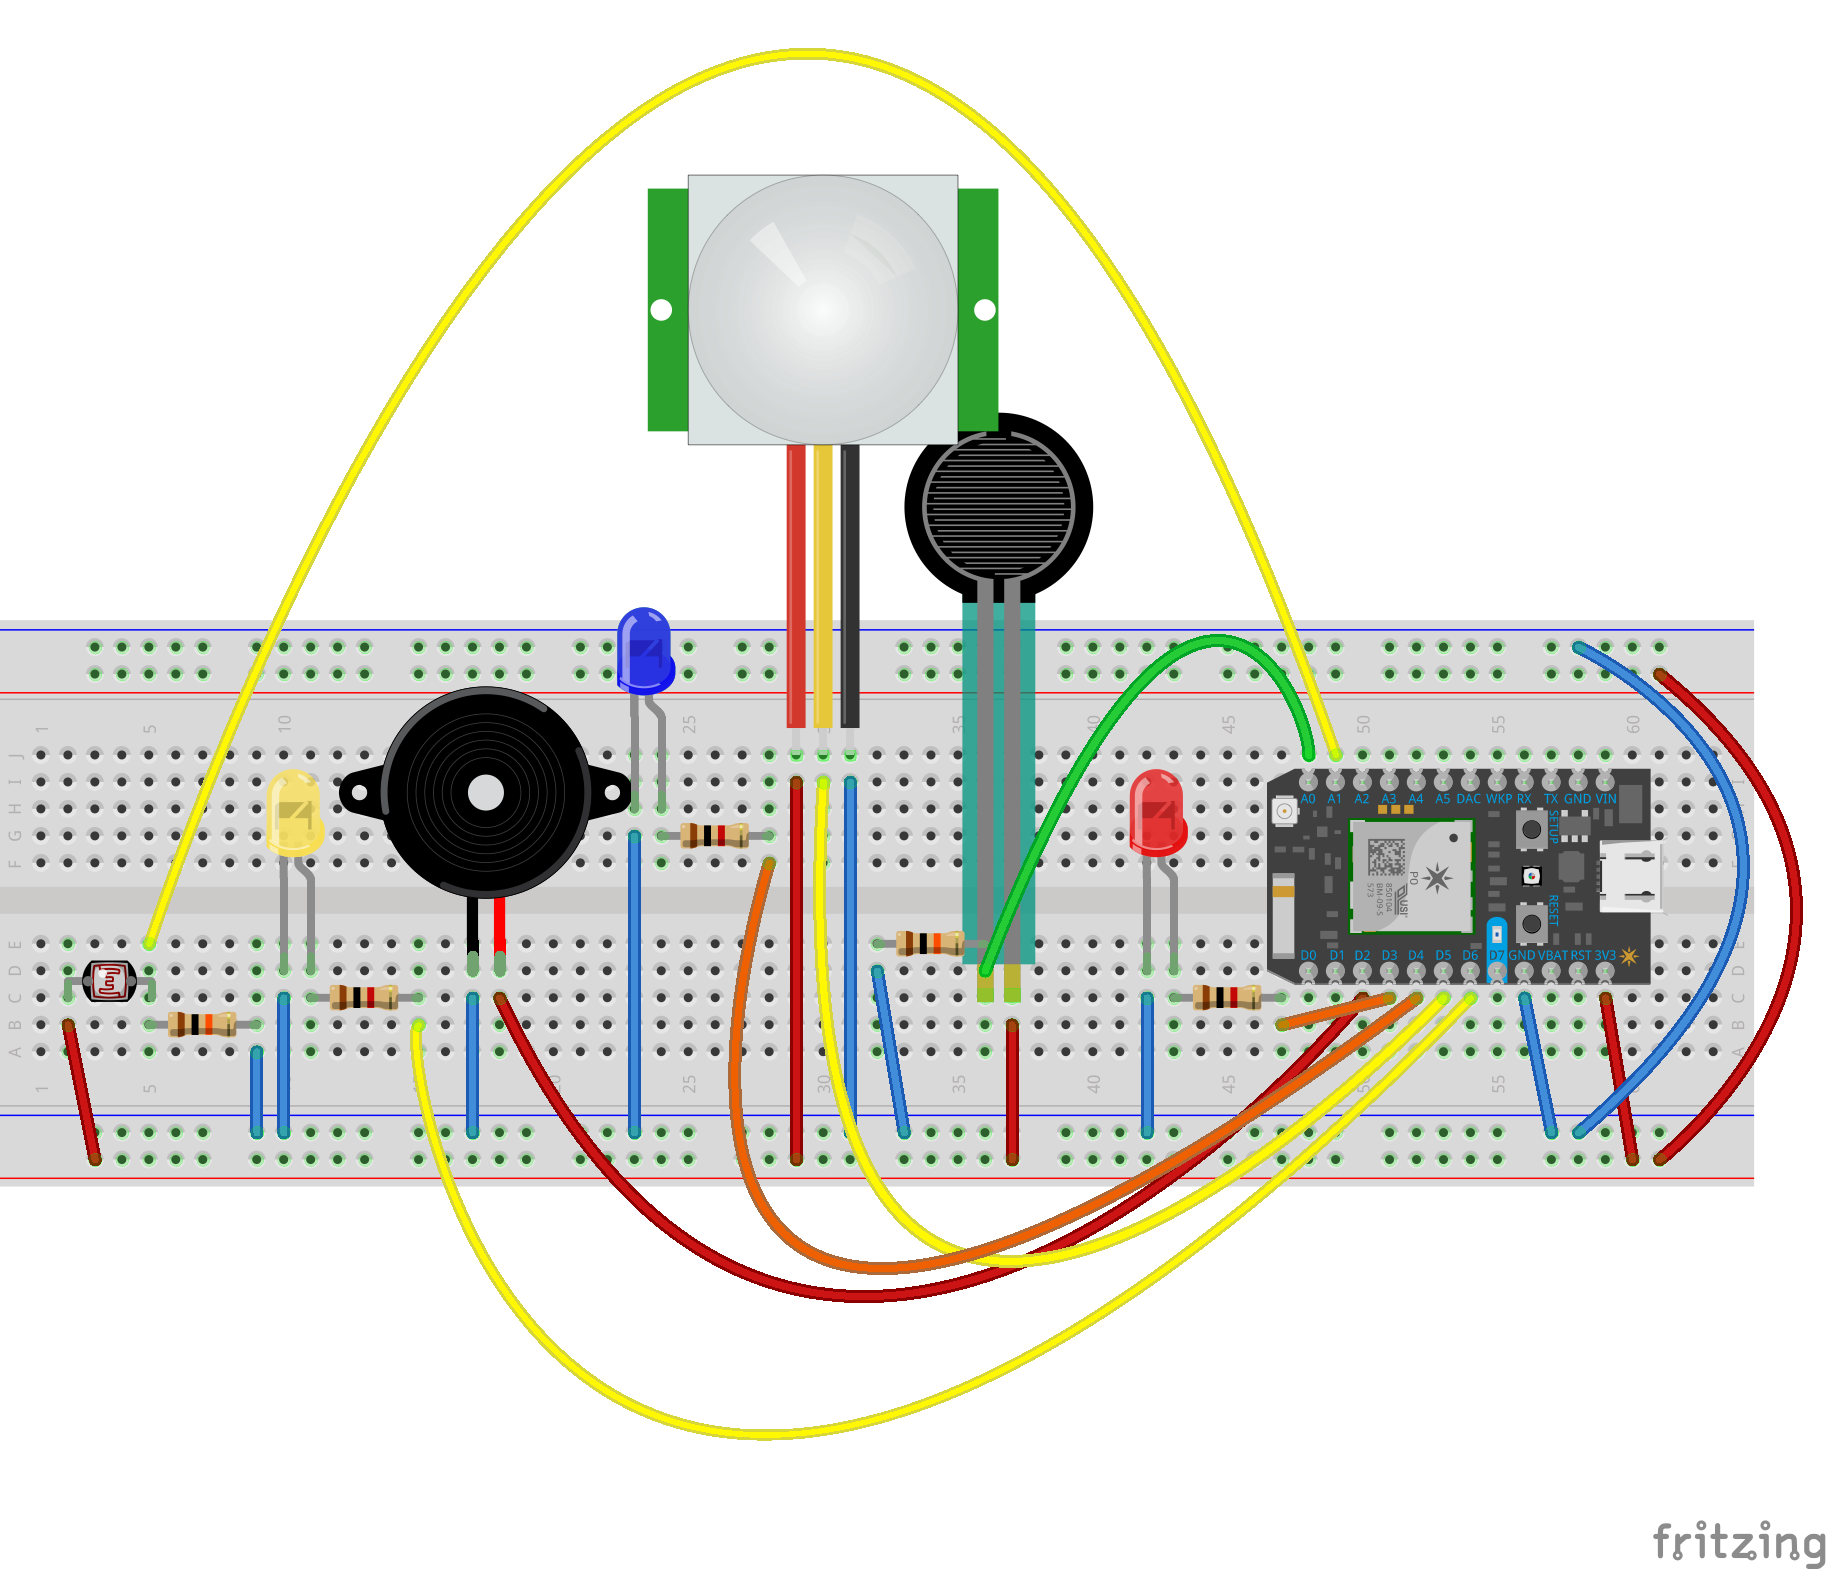
As this was my first time working with sensors and coding, first step was to work with basic sensors such as FSR, flex, Photoresistor sensors and use online sources for code references and try to get smooth feedback from them after integration.
Then I conceptualized the idea of an interactive planter installation to improve the waiting experience at the door, outside the house. To achieve this goal, I played with multiple melodies for the Piezo pin and finally decided to make the melody itself customizable i.e play anything you want using the keyboard like interaction. I had difficulties incorporating a loop for notes to repeat in order and start over after the eighth note which I overcame eventually. I also incorporated a PIR motion sensor to detect and trigger blue light to glow when someone comes in close vicinity with the plant which was very difficult to calibrate and get accurate results. While I troubleshooted a lot, the PIR sensor is still quite glitchy.
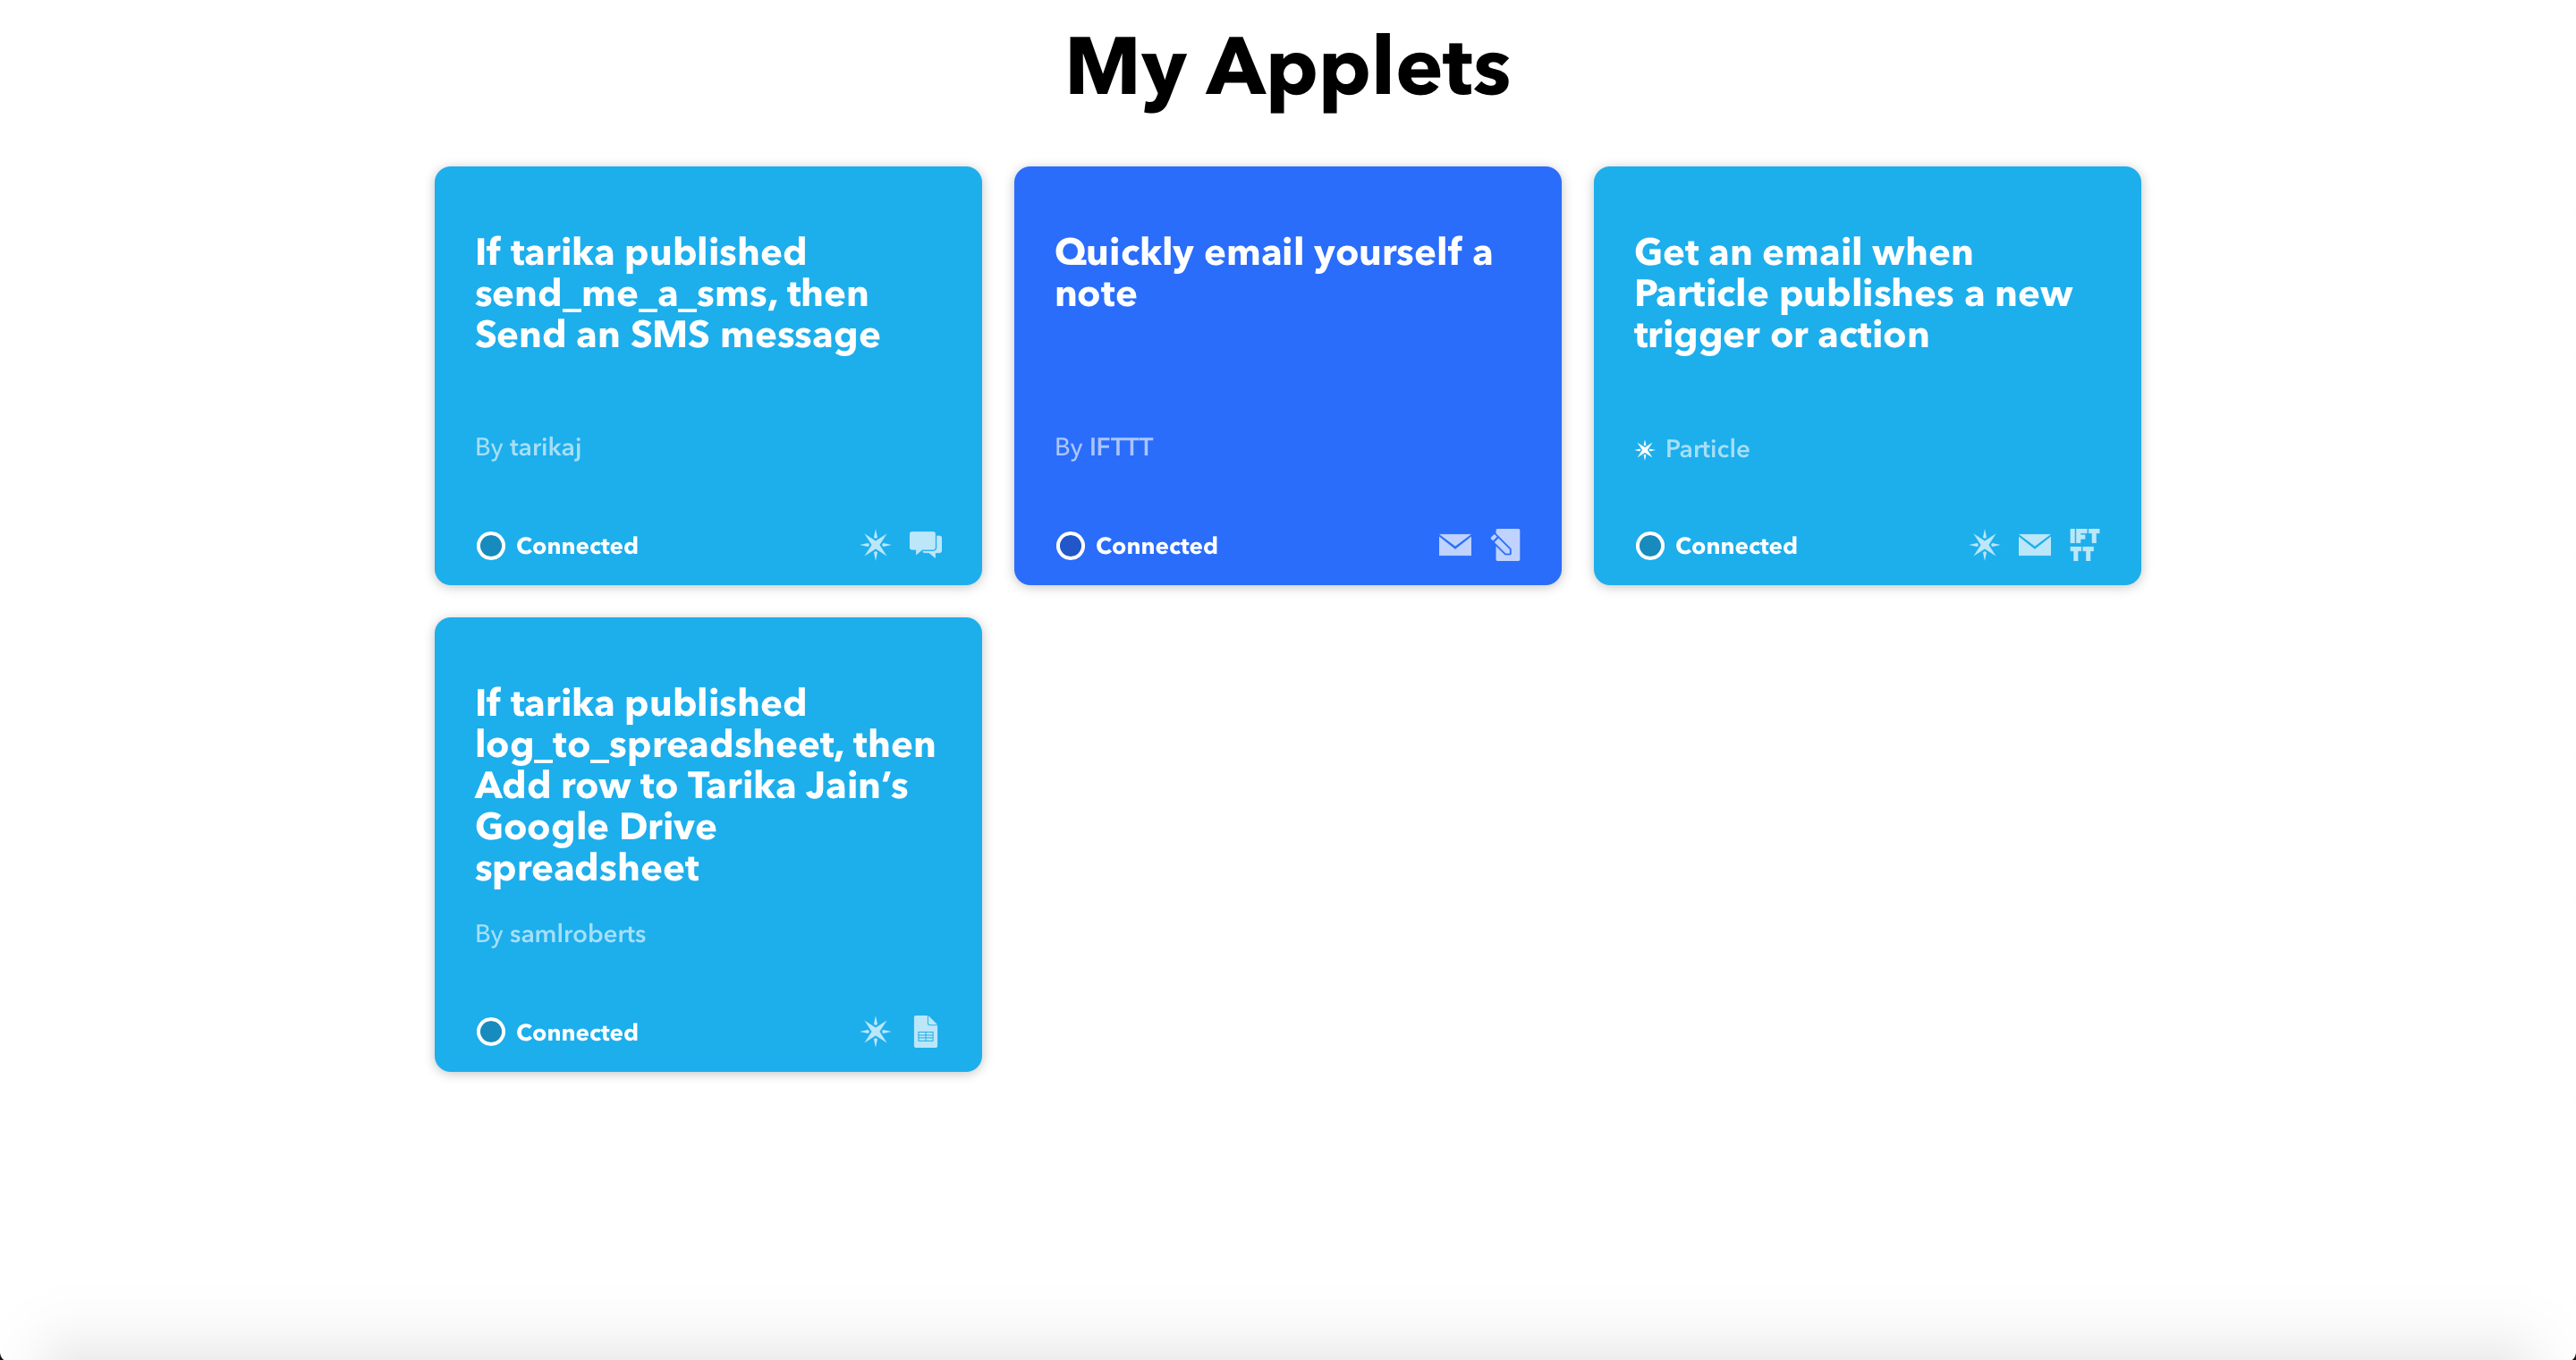
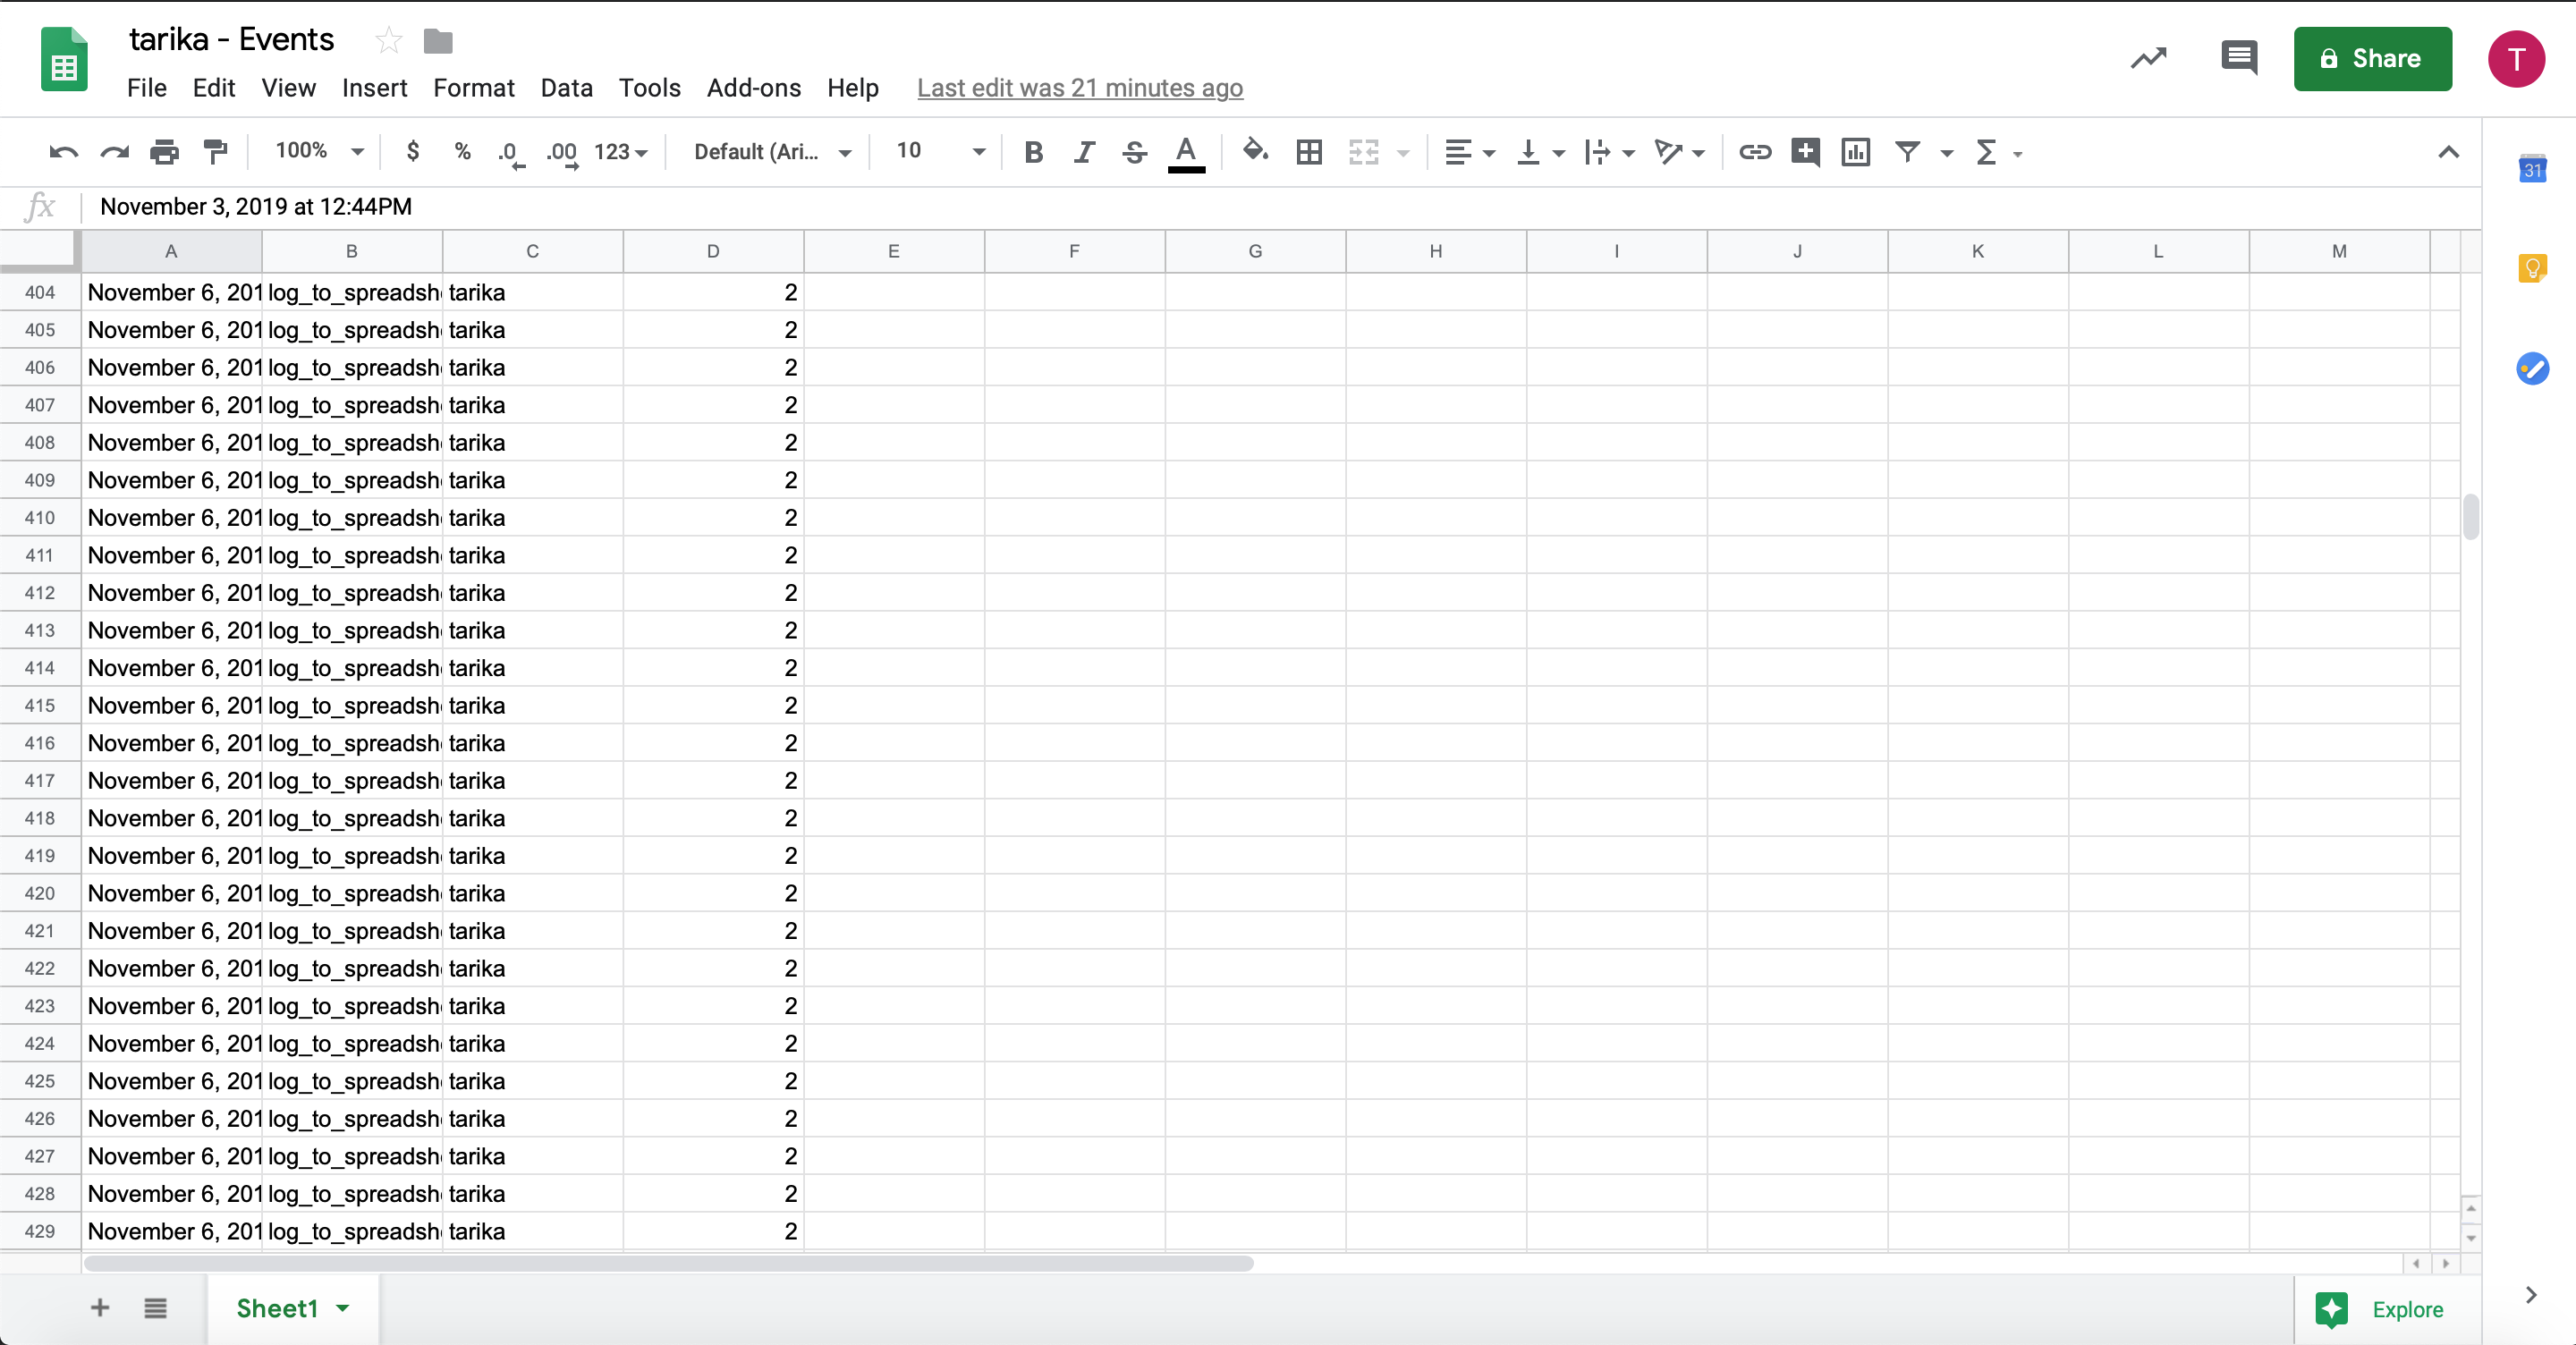
Once all sensors were set up correctly, I linked them to IFTTT to log each trigger from the Piezo onto google sheets and further sent alerts via SMS to my phone with a message saying "Hope you enjoyed the music".
int ledYPin = D6;               // Defined a pin for the yellow LED
int ledYState = LOW;            // Create a variable to store the LED brightness.

int photoCellPin = A1;          // Defined a pin for the photo cell, Connected a 10K Ohm                                 resistor to it
int photoCellReading = 0;       // Created a variable to hold the light reading

int ledBPin = D4;               // Defined a pin for the Blue LED - was green
int PIRPin = D5;              // Input pin (for PIR sensor)
int pirState = LOW;             //Started by assuming no motion is detected
int val = 0;                    // variable for reading the pin status
int calibrateTime = 10000;      // Calibration wait time

int fsrAPin = A0;                 // Input pin (for fsr sensor)
int fsrAReading = 0;              // Created a variable to hold the FSR reading

int speakerPin = D2;            // Output pin (for speaker sensor)
int counter = 0;                // Created a counter variable to keep track of the
                                 amount of times the speaker pin plays a note
int countermod = 0;             // Created a countermod variable that keeps track of
                                  when the counter reaches 8 played notes

int melody[] = {1760,1976,1047,1175,1319,1397,1568,3520};   // created an array for the                                                                notes in the melody:
int noteDurations[] = {4,8,8,4,4,4,4,4 };                 // note durations: 4 = quarter                                                             note, 8 = eighth note

int ledRPin = D3;               //Defined a pin for the red LED


//
void setup()
{

  pinMode(ledYPin, OUTPUT);         // Set the yellow LED for output
  pinMode(photoCellPin, OUTPUT);    // Set the photoCellPin for output

  // Created cloud variables of type integer
  Particle.variable("light", &photoCellReading, INT);   // called 'light' mapped to
                                                           photoCellReading
  Particle.variable("countermod", &countermod, INT);    // called 'countermod' mapped to                                                           countermod
  Particle.variable("forcea", &fsrAReading, INT);         // called 'force' mapped to                                                                fsrReading

  pinMode(ledBPin, OUTPUT);     // Set the blue LED for output
  pinMode(ledRPin, OUTPUT);     // Set the red LED for output

  pinMode(PIRPin, INPUT);       // declared PIR sensor as input
  pinMode(speakerPin, OUTPUT);  // declared speakerPin as output
  pinMode(fsrAPin, INPUT);       // declared fsrPin as input
  playNotes();                  //declared playNotes as an output ???
}


void loop()
{

  photoCellReading = analogRead( photoCellPin );    // Use analogRead to read the
                                                       photo cell reading

  if (photoCellReading < 1500)                      //if value of photoCellReading is                                                         less than 1500
  {
      digitalWrite(ledYPin, HIGH);                  //then, switch on yellow LED pin
      delay(1000);
  }
      digitalWrite(ledYPin, LOW);                   //else, don't switch on the yellow
                                                      LED pin

  if (calibrated())                                 // if the sensor is calibrated
  {
    readTheSensor();                                // get the data from the sensor
    reportTheData();                                // report it out, if the state has
                                                       changed
  }

    fsrAReading = analogRead(fsrAPin);           // Use analogRead to read the fsr                                                 reading, This gives us a value from 0 to 4095
    delay(100);

 if (fsrAReading >1000)
 {
   digitalWrite(ledRPin, HIGH);
   tone(speakerPin, melody[counter%8],800);        //for speaker output
   countermod = counter %8;
   counter++;
   delay(250);
   digitalWrite(ledRPin, LOW);
 }

log_to_spreadsheet();                               //Defined log_to_spreadsheet to log                                                data to google sheets from Piezo trigger
delay(1000);

send_me_a_sms();               //Defined send_me_a_sms to send message "Hope you enjoyed                                 the music" when Piezo is triggered
delay(1000);

}

void readTheSensor()
{
    val = digitalRead(PIRPin);
}

bool calibrated()
{
    return millis() - calibrateTime > 0;
}

void setLED(int state)
{
    digitalWrite(ledBPin, state);
}

void reportTheData()
{
  // if the sensor reads high
  // or there is no motion
  if (val == HIGH) {

    // the current state is no motion/just changed
    // particle publish for event is detected
    if (pirState == LOW) {
      // Just turned on
      Particle.publish("designingiot/s19/motion", "detected");
      // Update the current state
      pirState = HIGH;
      setLED( pirState ); }
  }
    else
    {
    if (pirState == HIGH) {
      // Just turned of
      // Update the current state
      Particle.publish("designingiot/s19/motion", "ended");

      pirState = LOW;
      setLED( pirState );

      delay(1000);
    }
}
}


    void playNotes()
{
    // iterate over the notes of the melody:
    for (int thisNote = 0; thisNote < 8; thisNote++)
    {

      // to calculate the note duration, take one second
      // divided by the note type.
      //quarter note = 1000 / 4, eighth note = 1000/8
      int noteDuration = 1000/noteDurations[thisNote];
      tone(speakerPin, melody[thisNote],noteDuration);

      // minimum time set in between to distinguish the notes
      // the note's duration
      int pauseBetweenNotes = noteDuration * 1.00;
      delay(pauseBetweenNotes);
      // stop the tone playing:
      noTone(speakerPin);
    }

}


int last_published = -1;            // store the time when last published

void log_to_spreadsheet(  ){        //log in google sheets each time Piezo is triggered

if( last_published + 6000 < millis() ){         // check if 1 minute has elapsed
Particle.publish( "log_to_spreadsheet", String( speakerPin ) );
last_published = millis();
	}

}

void send_me_a_sms(  ){                    //send a message each time Piezo is triggered

if( last_published + 6000 < millis() ){     // check if 1 minute has elapsed
Particle.publish( "send_me_a_sms", String( speakerPin ) );
last_published = millis();

	}

}
Next Steps
1. I would like to either find a better way to get more accurate results from the PIR motion sensor or I might change it with another kind of sensor that performs similar functionality i.e. sense when there is motion around it and output.
2. I ran short of the Analog input pins(only 5-6 on Particle Argon) so I integrated all notes to one FSR touch but I would like to assign each of the 8 notes to 8 different FSR sensors in order to truly create a keyboard-like interaction. Also, I would like to reduce the amount of force that needs to be put on the FSR to trigger action and make it more subtle, easy to trigger sound from.
3. I would like to add a safety element at the bottom of this planter where backup keys can be stored. This is so that when someone touches that section, a message is sent to the owner asking to confirm if he knows where the back-up keys are and if they are in safe hands.
4. Finally, I would like to design form around it and make multiples of this to achieve the desired installation.
References
1. To navigate the sensors available, their circuit diagrams: https://diotlabs.daraghbyrne.me/docs/
2. For code guidance: https://github.com/daraghbyrne/DesigningIoT
Share this Project
This project is only listed in this pool. Be considerate and think twice before sharing.
Found In
Courses
49713 Designing for the Internet of Things
· 16 members
A hands-on introductory course exploring the Internet of Things and connected product experiences.
Focused on
About
An interactive outdoor herb planter installation with each planter that becomes more responsive as you move closer to it. Ideally, this would be installed next to the main door to allow for maximum interaction and create positive ambient experience as the first impression when someone approaches the house.
Created
November 6th, 2019