
49-713 Designing for the Internet of Things
· 26 members
A hands-on introductory course exploring the Internet of Things and connected product experiences.
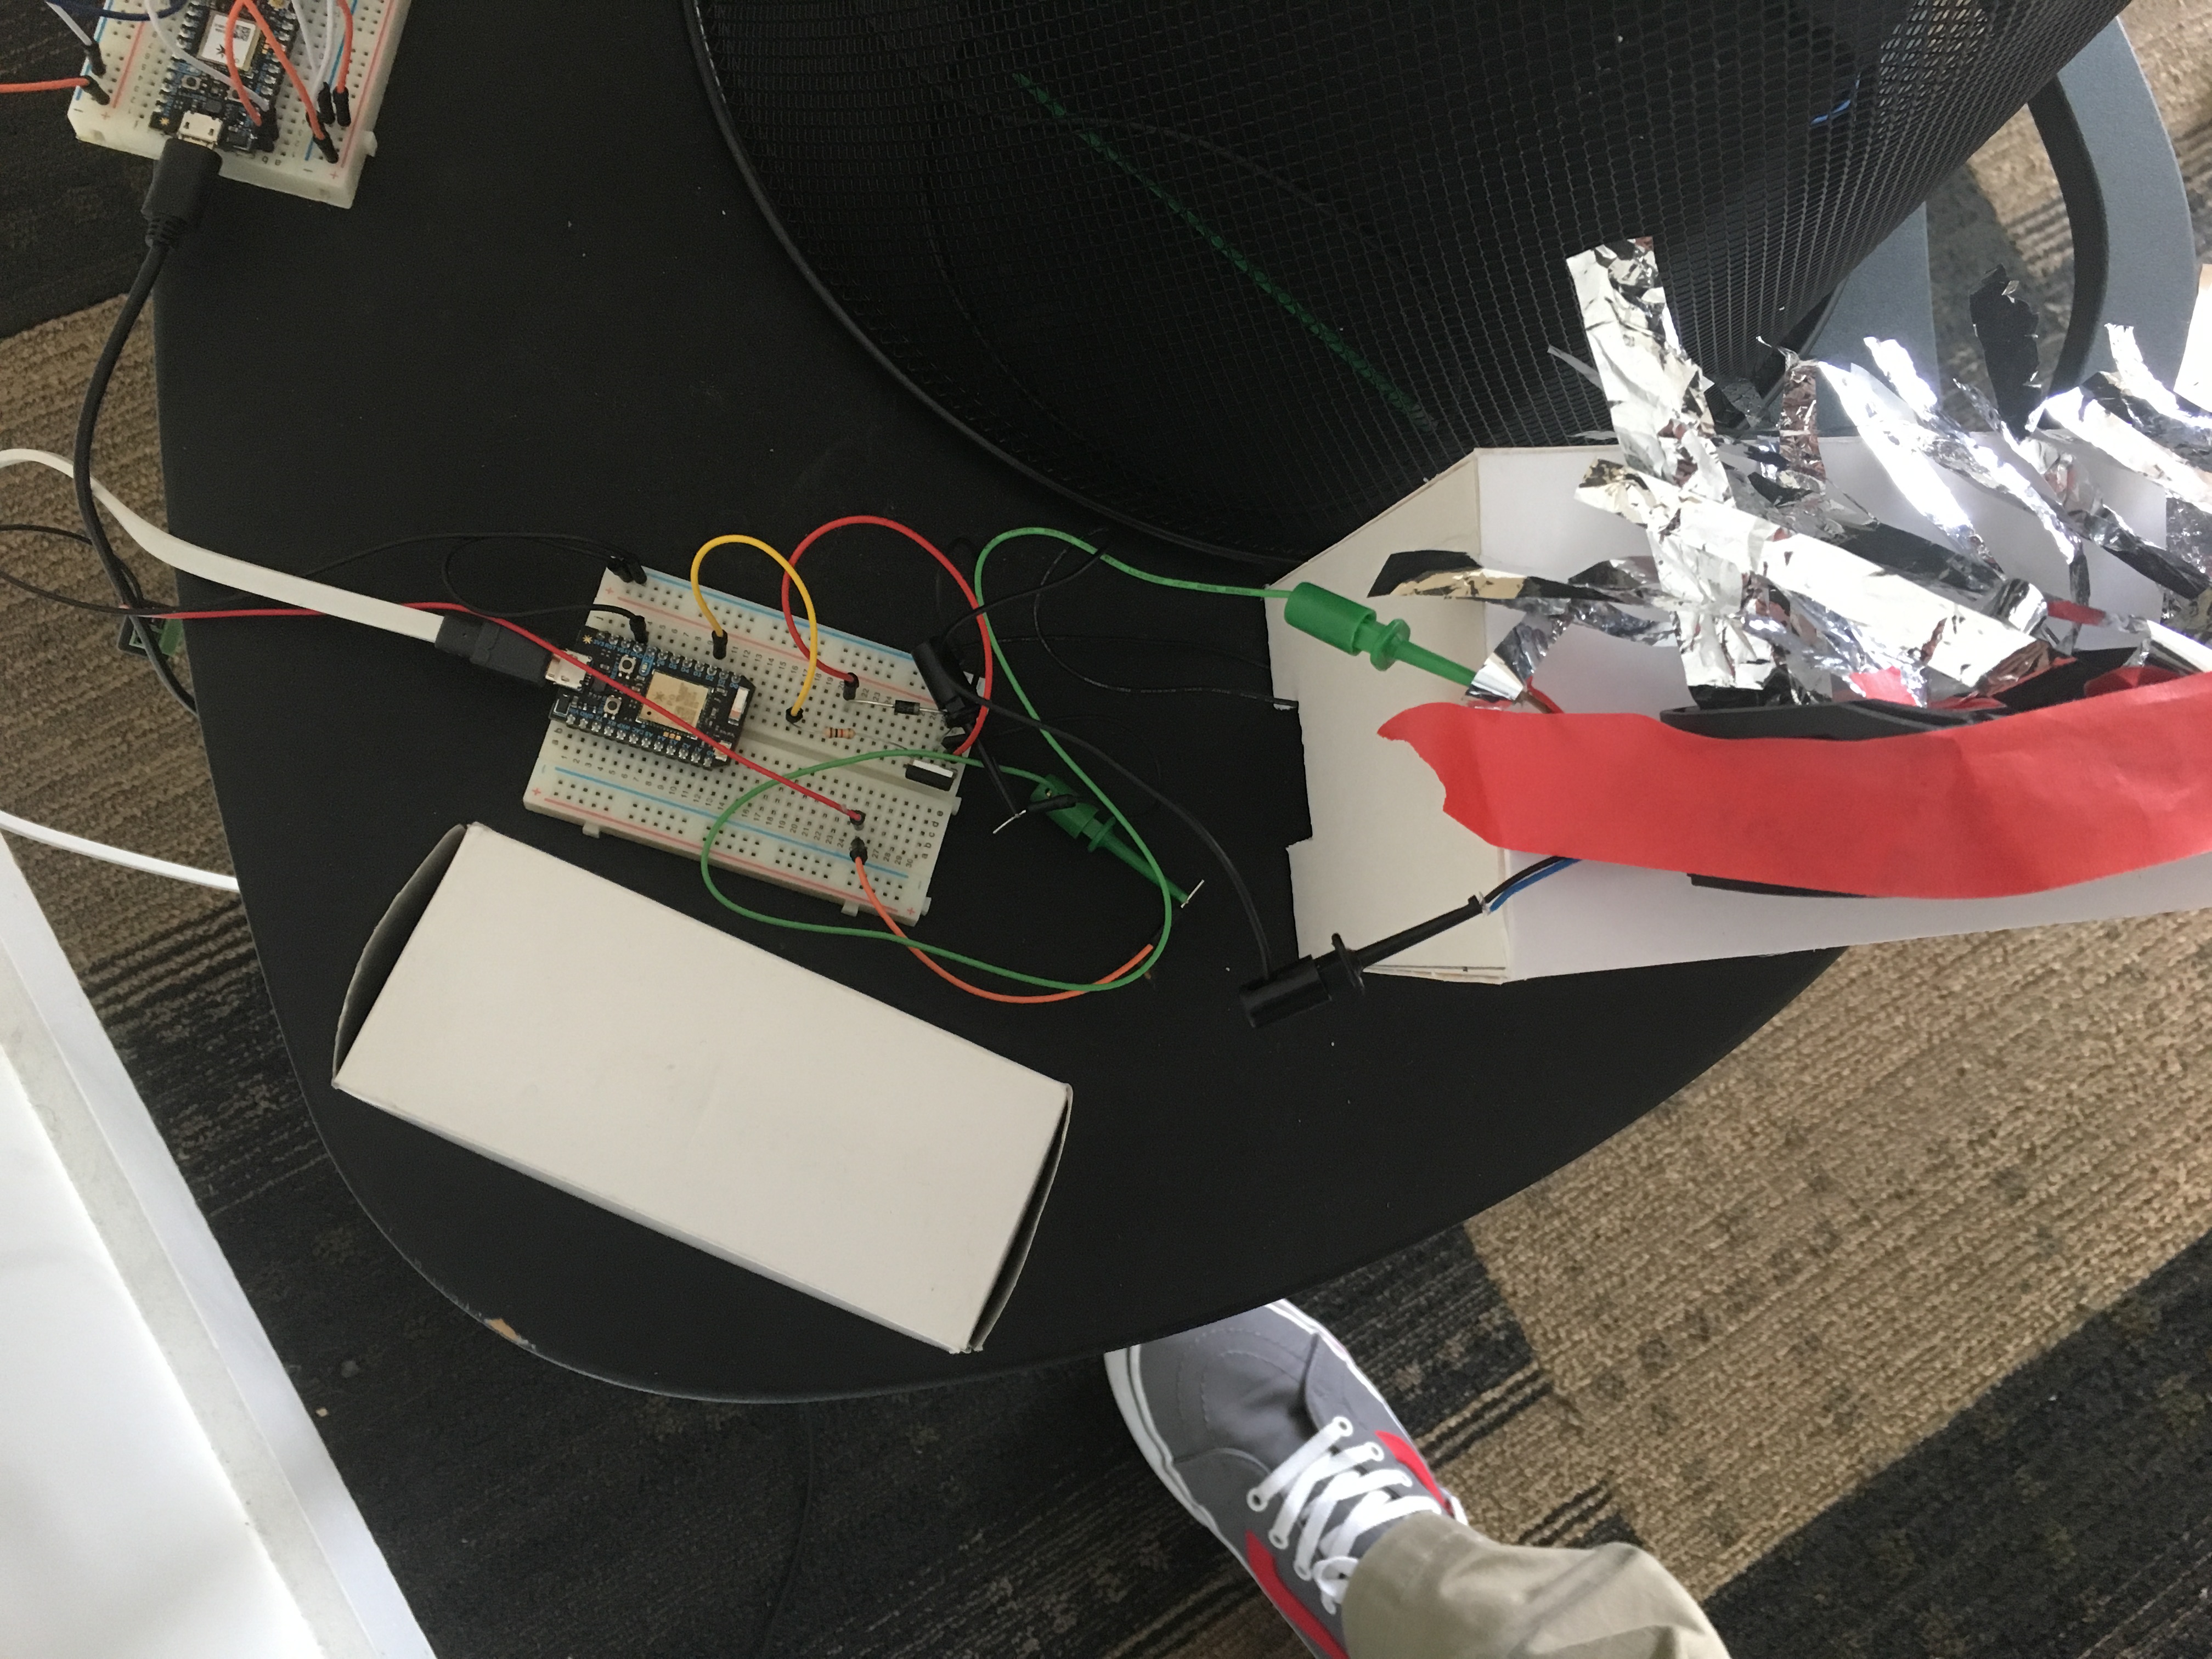
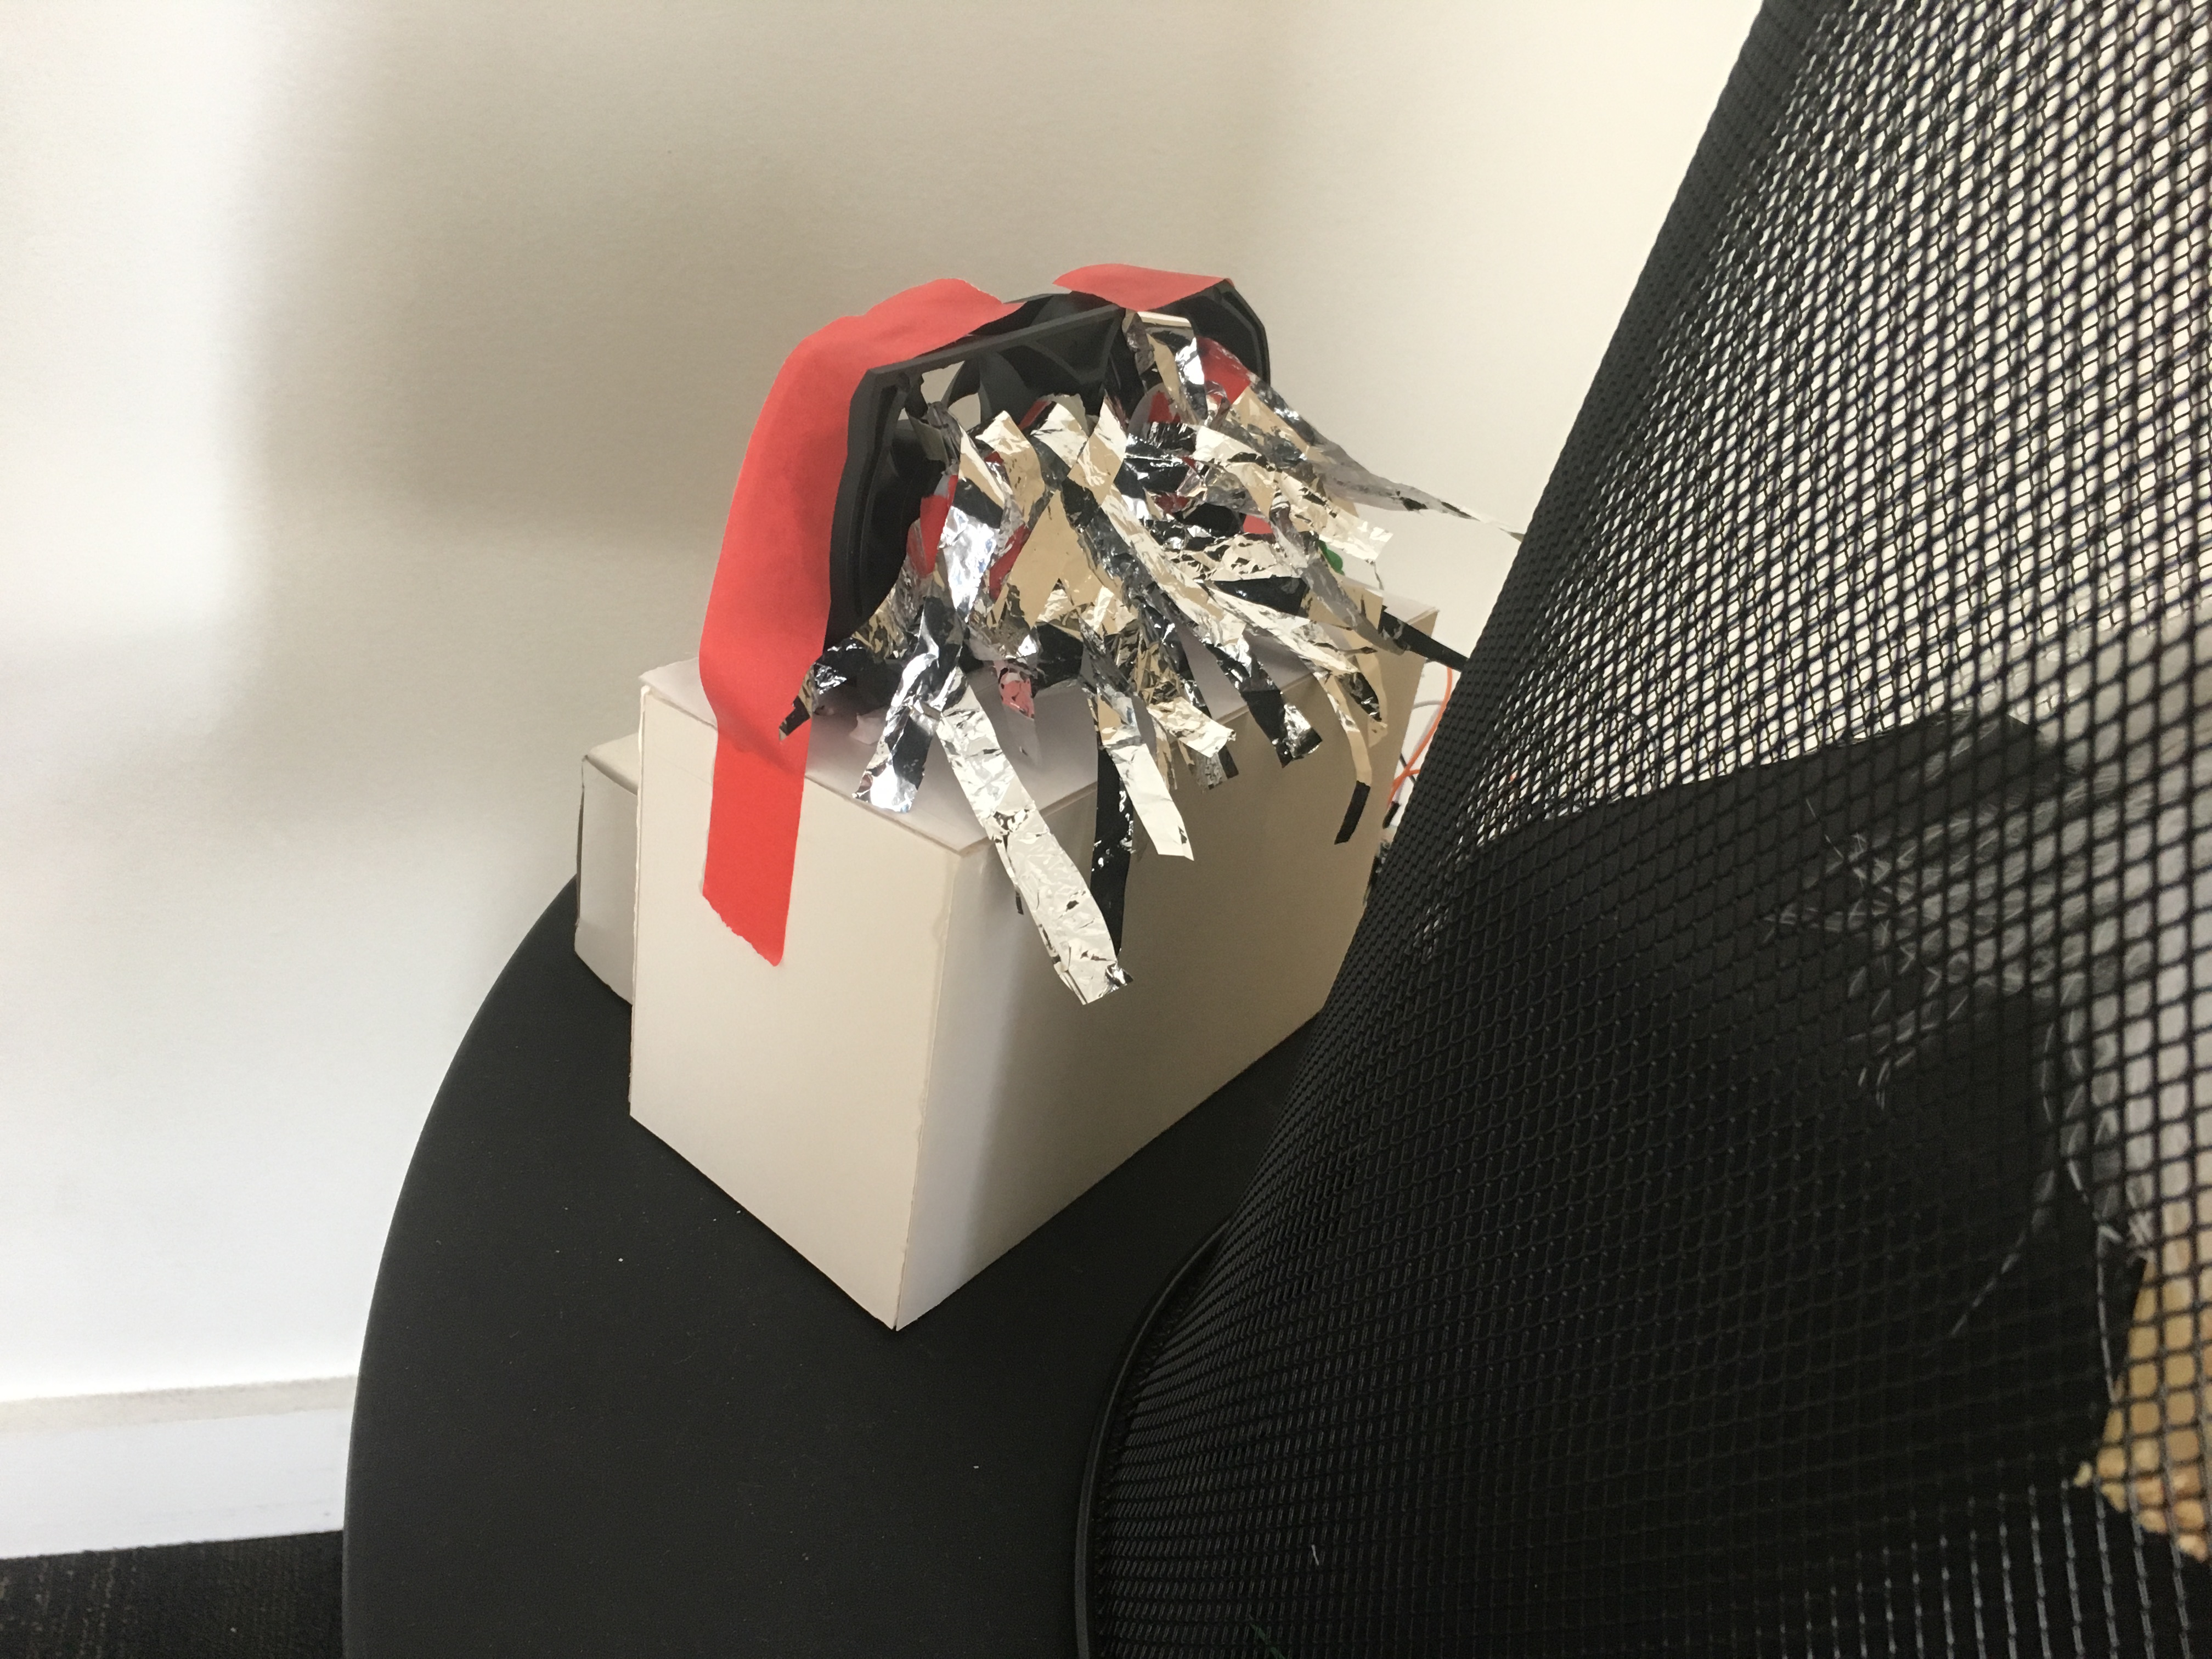
Our ambient device is a symbolic representation of panic in response to messages around banning people from the United States based on their religion and country of origin.

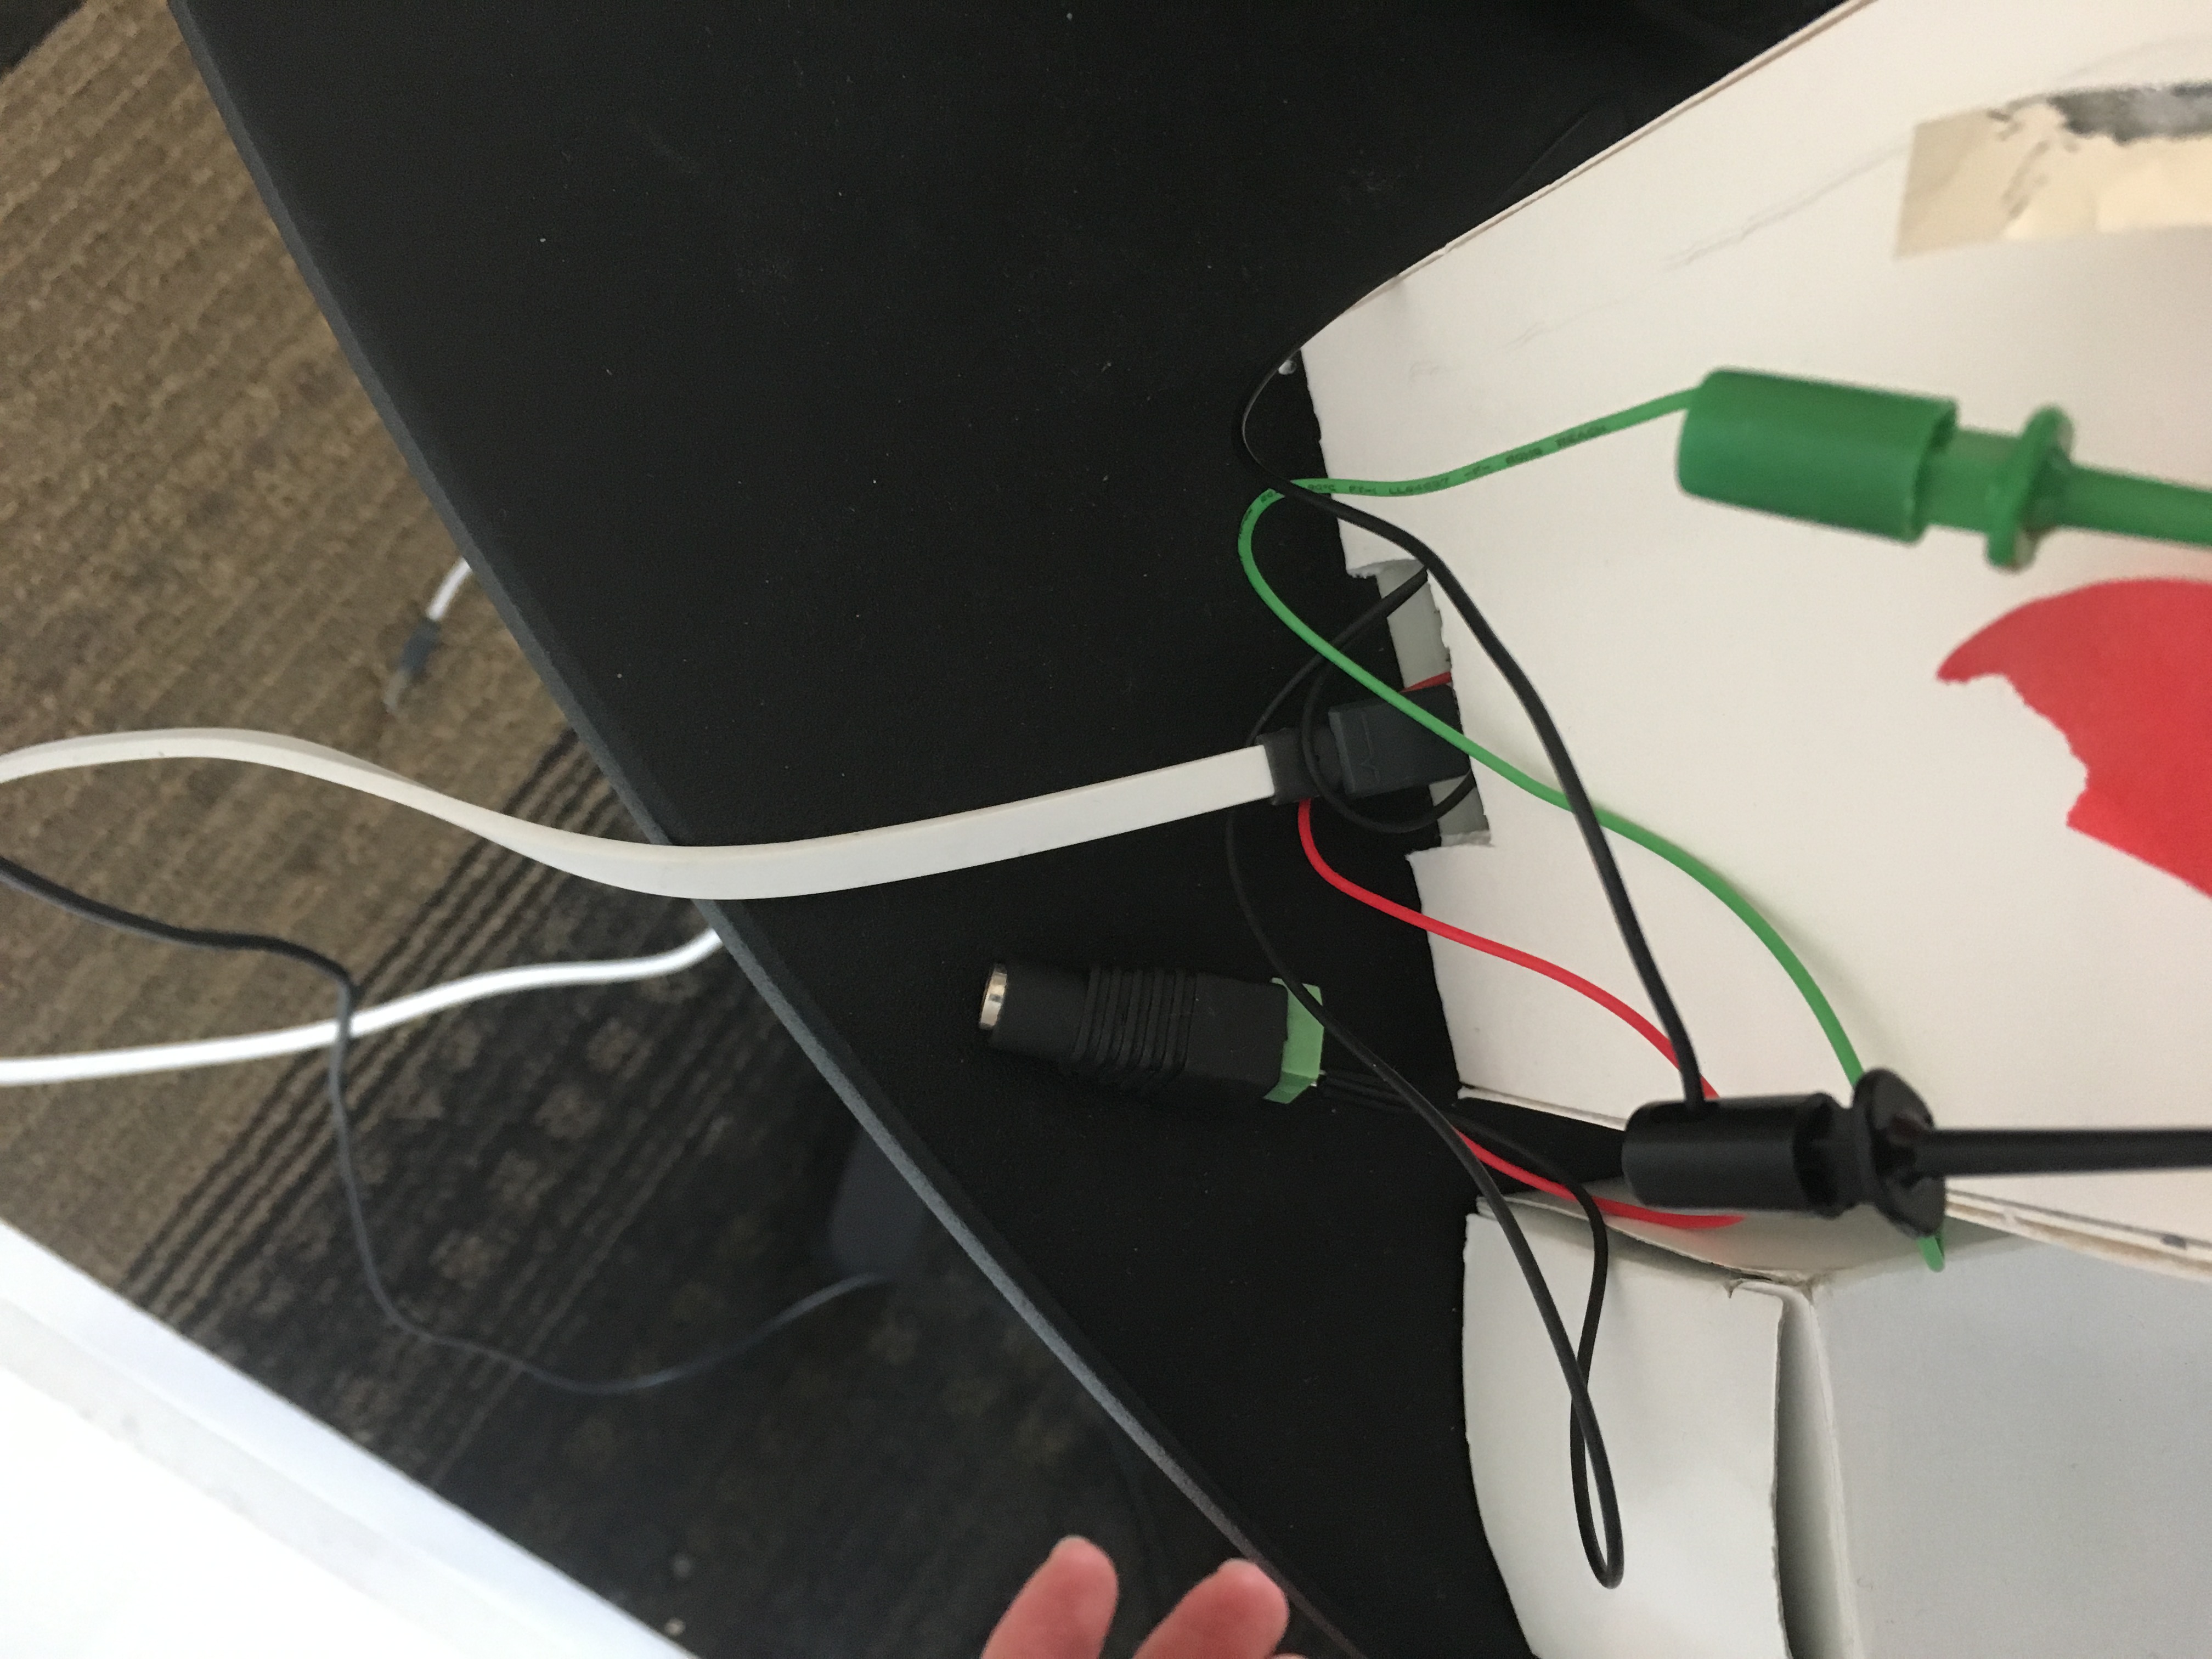
We started by selecting the components we would use. From a box of various motors and sensors we picked up a fan, 2 servo motors and a DC motor. We also grabbed a space blanket, which makes a pleasant crinkly noise.
While exploring the movement of the various motors we recognized a certain anthropomorphism of the two servo motors moving in tandem as they closely resemble either arms or wings. This movement embodies a lot of emotion, either happy or panic.
We wanted to make our device socially relevant and the topic that elicits the most emotion from us is new legislation banning muslims from the U.S..
Panicked Audio
Flapping Wings
Simulated Wind
Controls
Housing and Effects
The key to the code, was making sure it was in sync with the other photons. We did that by subscribing all motors to the same ifttt.com event and adjusting the delays or "wing flaps" on all of the codes such that they would finish at the same time.
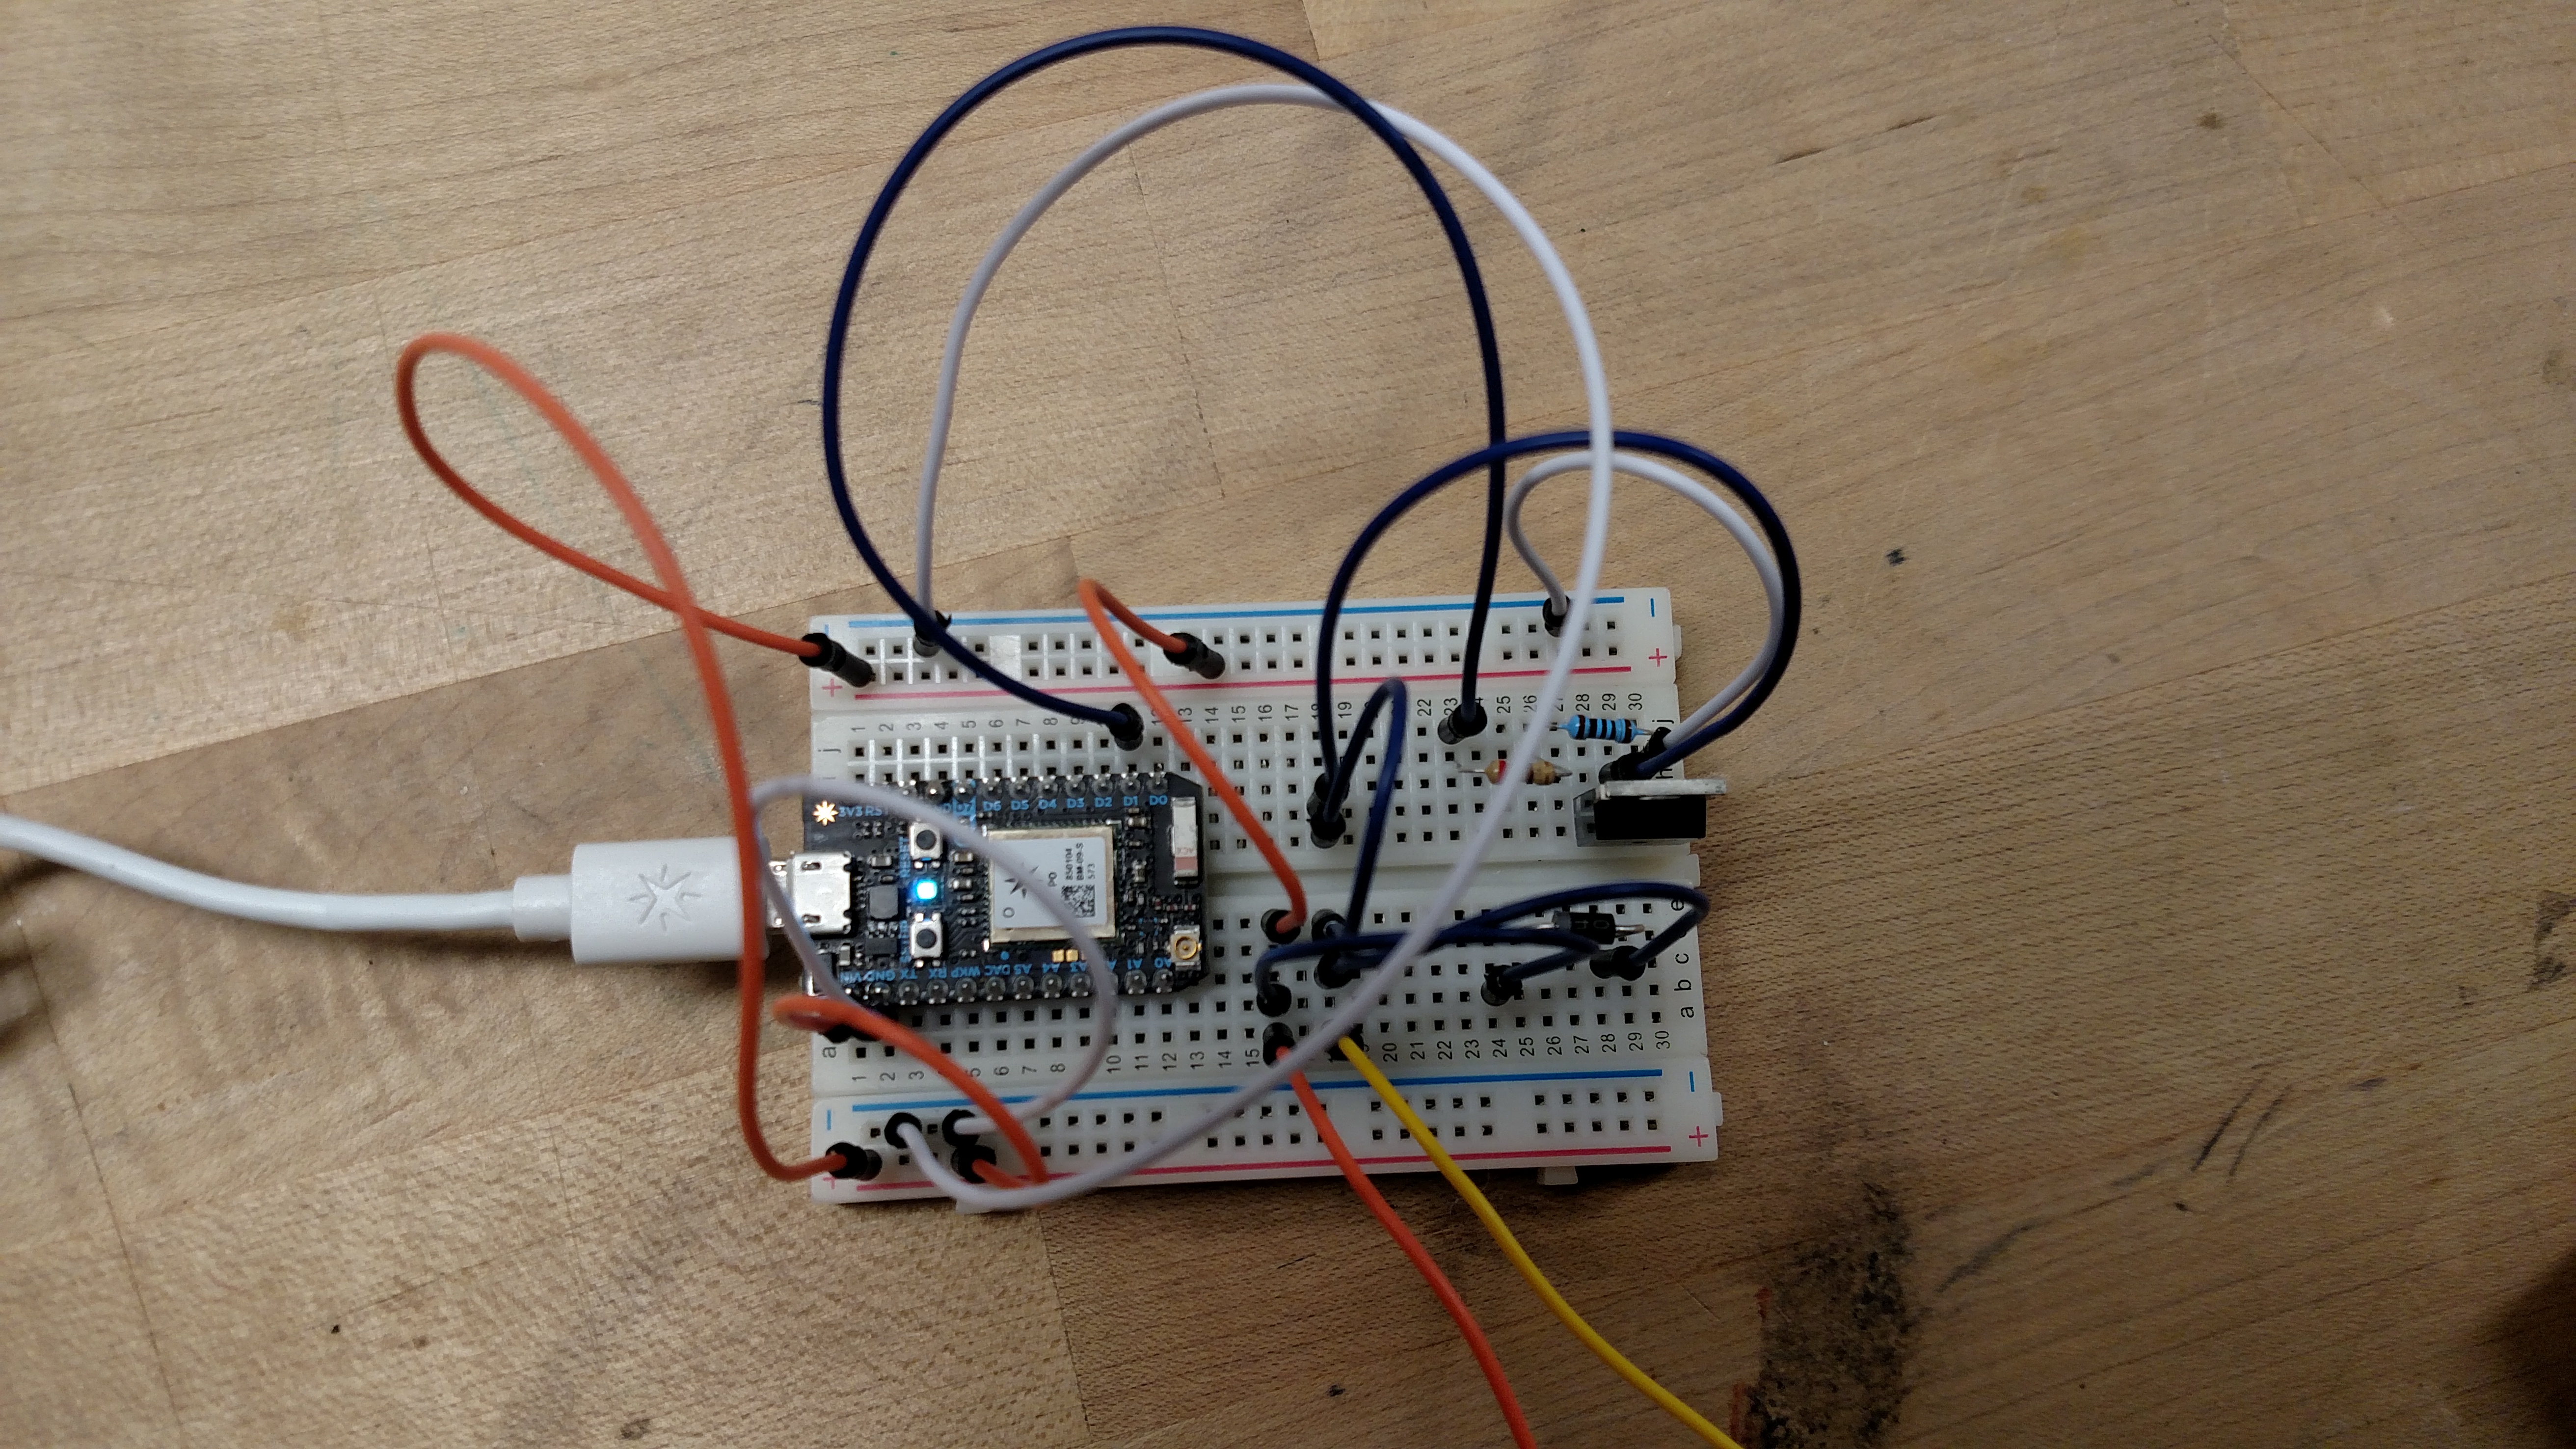
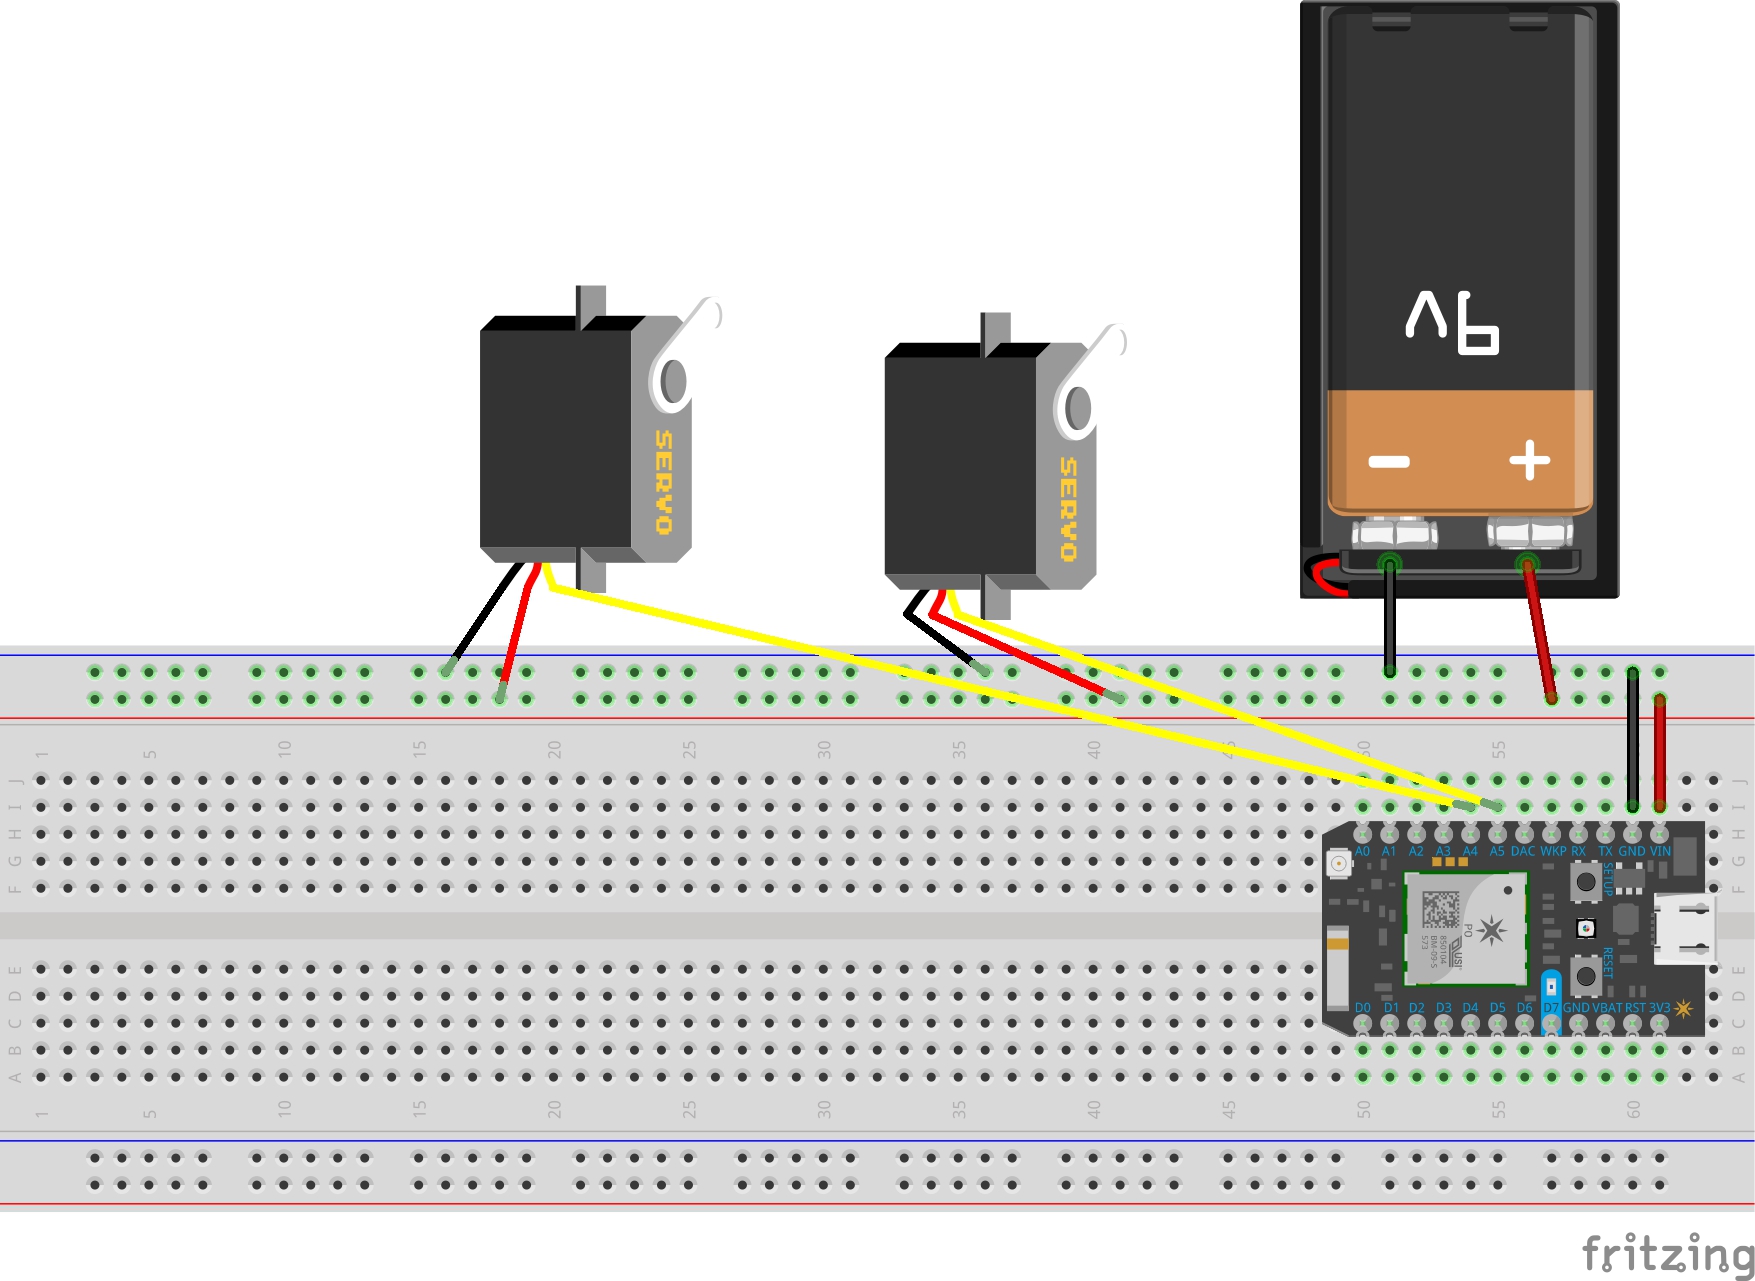
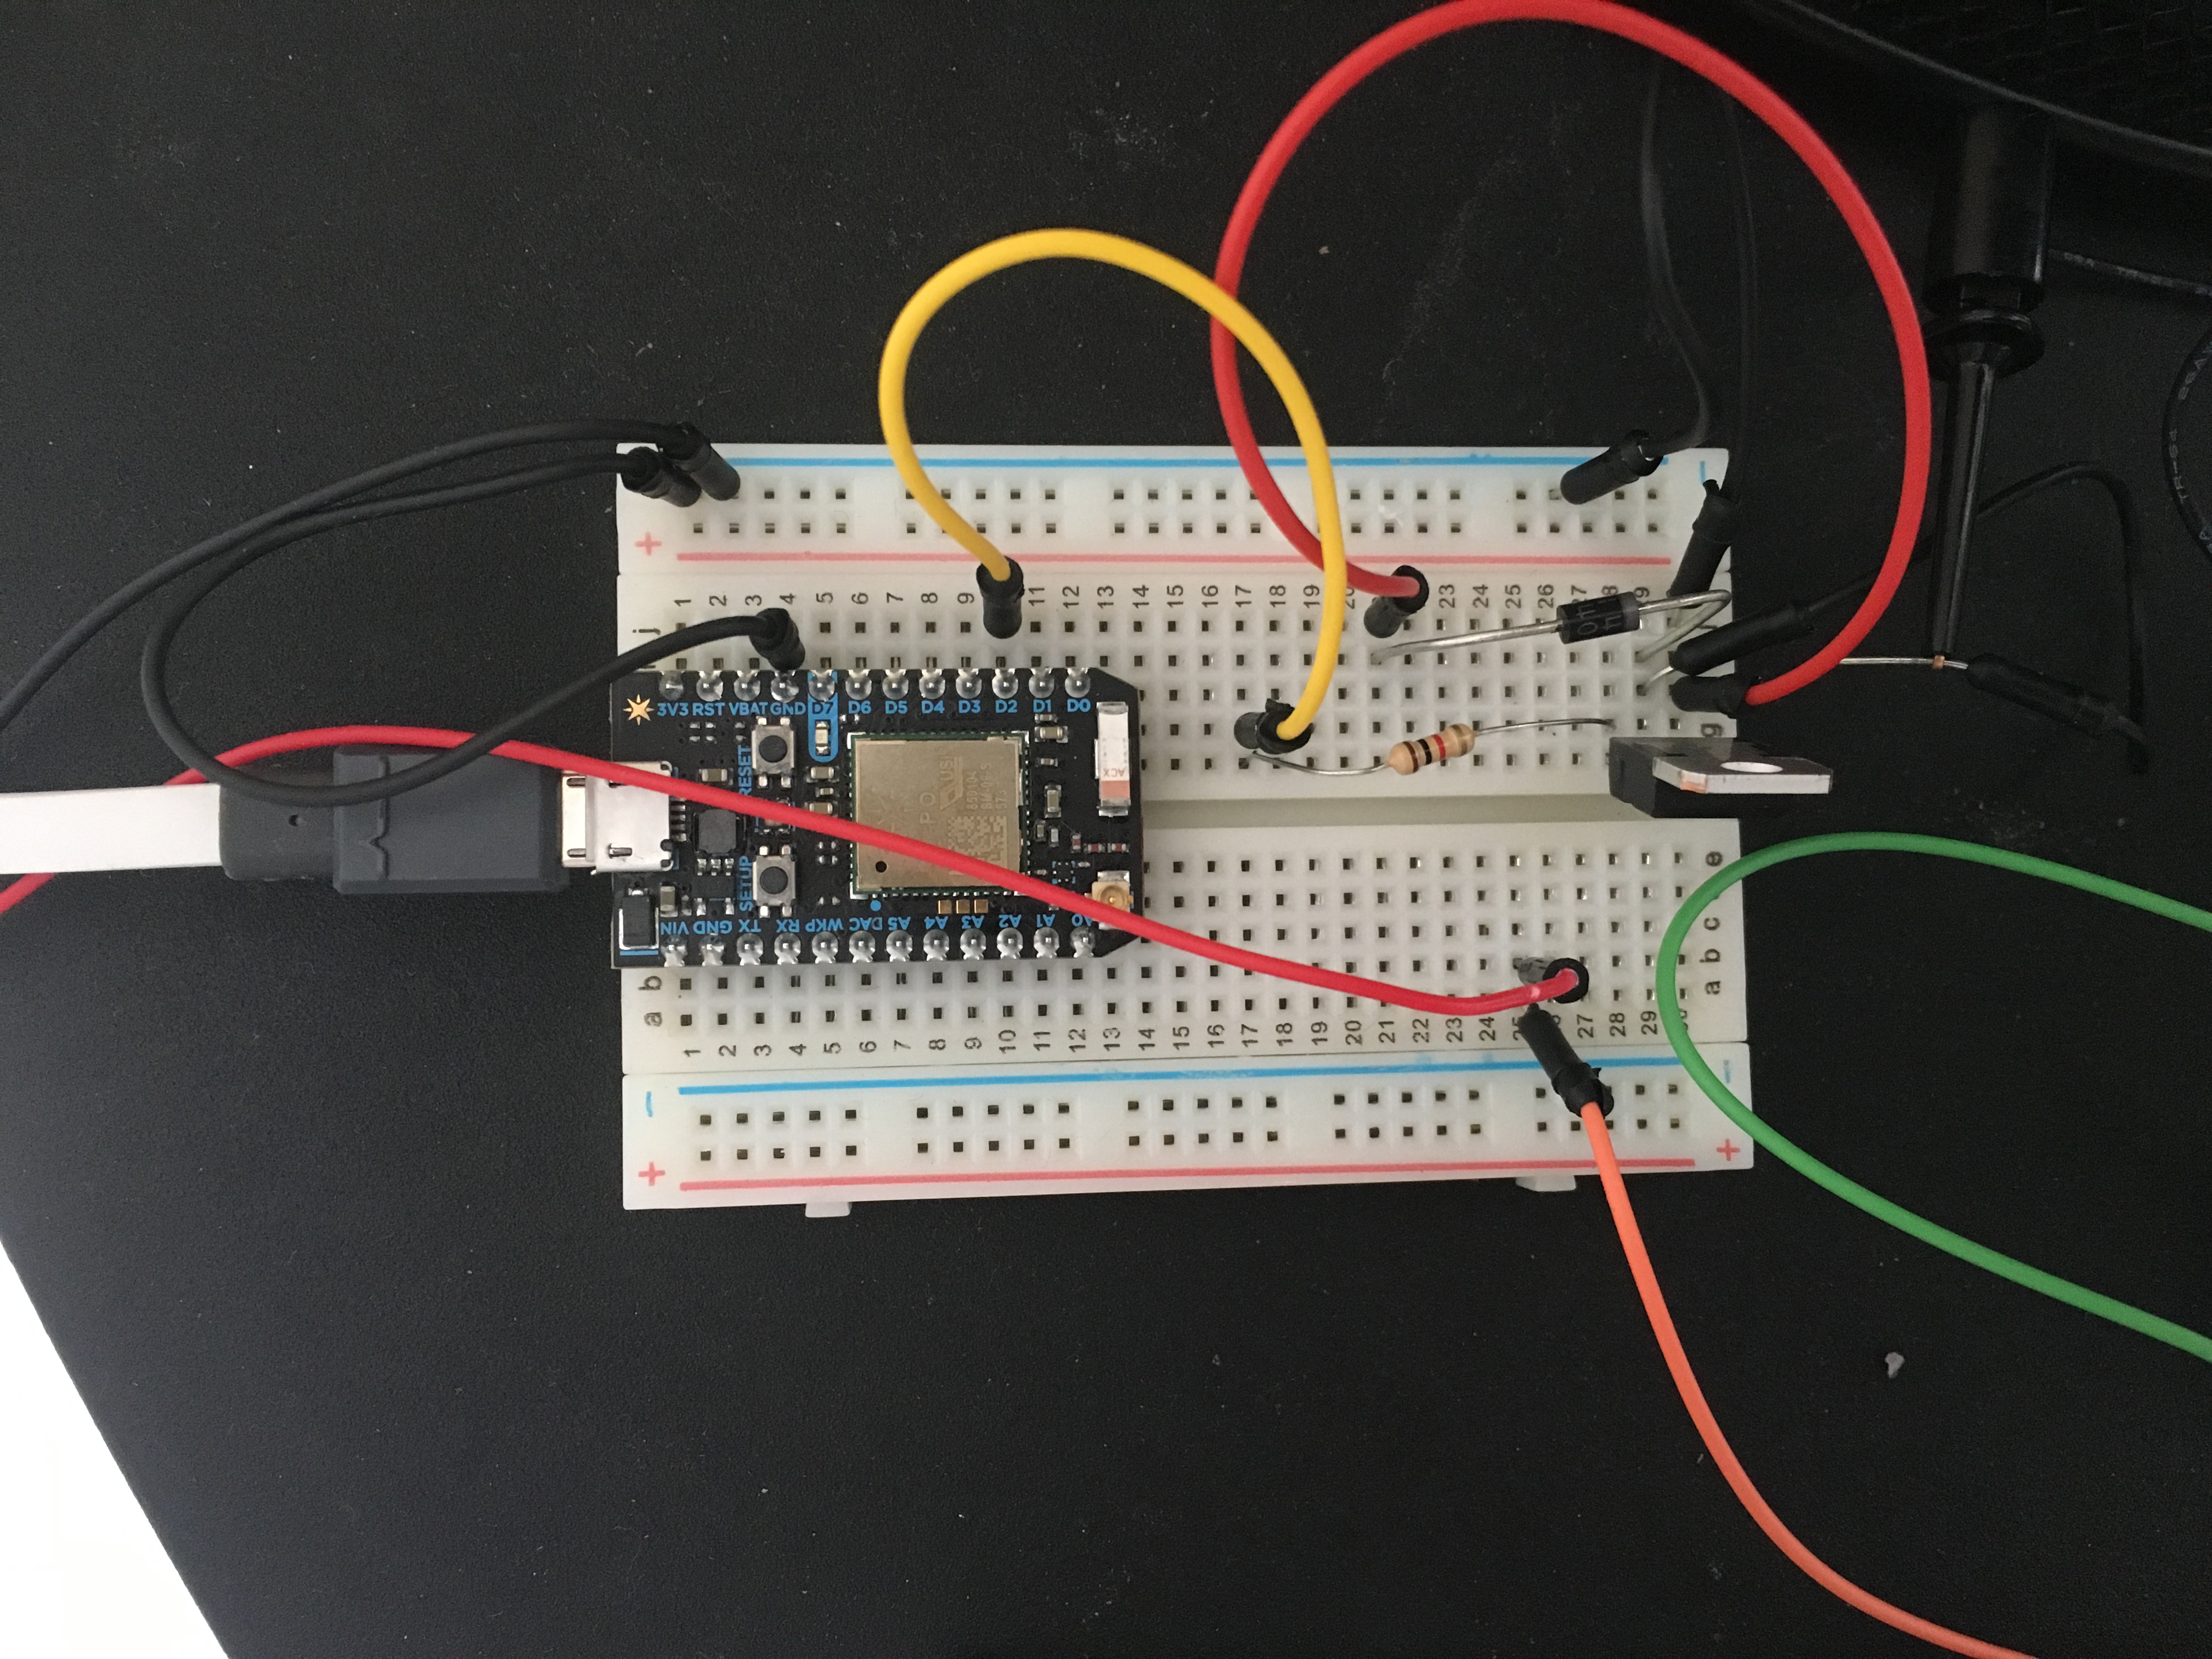
Two things to note about the breadboard:
See the Arduino source code & breadboard instructions for more details.
int motorPin = D1;


void setup()
{
  pinMode(motorPin, OUTPUT);
  Particle.subscribe("muslimban", myHandler);
}

int i = 0;

void myHandler(const char *event, const char *data)
{
  analogWrite(motorPin, 50);
  delay(1000);
  analogWrite(motorPin, 100);
  delay(1000);
  analogWrite(motorPin, 150);
  delay(1000);
  analogWrite(motorPin, 200);
  delay(2000);
  analogWrite(motorPin, 255);
  delay(3000);
  analogWrite(motorPin, 0);
}int servoPin1 = A4;
int servoPin2 = A5;
Servo myServo1;
Servo myServo2;
int servoPos1 = 0;
int servoPos2 = 180;
int angle = 0;
int wing_speed_up = 7;
int wing_speed_down = 3;
int wing_up = 120;
int wing_down = 70;
int fly_permission = 0;
void setup() {
myServo1.attach( A4 );
myServo2.attach( A5 );
Particle.function("myServo1", servoControl1);
Particle.function("myServo2", servoControl2);
Particle.subscribe("melikey", event_driven);
Particle.variable( "servoPos1" , &servoPos1 , INT );
Particle.variable( "servoPos2" , &servoPos2 , INT );
}
void loop() {
if(fly_permission == 1)
{
delay(3000);
for (int i=1; i < 12; i++)
{
for(angle = wing_down; angle < wing_up; angle++)
{
myServo1.write(angle);
myServo2.write(180 - angle);
delay(wing_speed_up);
}
for(angle = wing_up; angle > wing_down; angle--)
{
myServo1.write(angle);
myServo2.write(180 - angle);
delay(wing_speed_down);
}
}
int servoControl1(String command)
{
int newPos1 = command.toInt();
servoPos1 = constrain( newPos1, 0 , 180);
myServo1.write( servoPos1 );
return 0;
}
int servoControl2(String command)
{
int newPos2 = command.toInt();
servoPos2 = constrain( newPos2, 0 , 180);
myServo2.write( servoPos2 );
return 0;
}
void event_driven(const char *event, const char *data)
{
fly_permission = 1;
}/*The code is meant to turn on the fan in the #MuslimBan ambient device. The
ambient device turns on a fan that turns taunt a caged bird. The bird flaps
its wings and there is a sound caused by a dc motor that promotes anxiousness.
The different devices are triggered by an event.
*/
int controlpin = D2; //Controls the fan
int monitorlight = D7; //Light for testing
const int pwr_off = 0; //Sets analog signal to 0
int on_time = 3000; //This was originally use to learn how to control and wire the fan
int off_time = 1000; //This was originally use to learn how to control and wire the fan
int fan_on = 0; //This variable triggers the code action to take place when the event occurs
int pwr_cmd = 100; //how fast the fan spins
int fan_time = 9000; //how long the fan spins in ms
void setup()
{
pinMode(controlpin, OUTPUT); //Sets up the the fan control pin
pinMode(monitorlight, OUTPUT); //The light on the photon is set up for testing
Particle.subscribe("melikey",event_driven); //This is the name of the event that triggers all the devices
}
void loop()
{
if (fan_on == 1) //fan_on variable is changed when the event is triggered
{
//This segment of code is used to make test and make the original circuit, it was replaced by the fan_control fuction
/*digitalWrite(monitorlight, HIGH);
digitalWrite(controlpin, HIGH);
delay(on_time);
digitalWrite(monitorlight, LOW);
digitalWrite(controlpin, LOW);
delay(off_time);*/
fan_control(pwr_cmd,fan_time); //fan function take power level and time on
fan_on = 0; //change the intializing variable so that the fan only turns on once.
}
else{}
}
void fan_control(int pwr_lvl, int duration)
{
int pwr_cmd = map(pwr_lvl, 0, 100, 0, 255); //maps the 0-100% to the analog values required
analogWrite(controlpin, pwr_cmd); // Writes the power of the fan
delay(duration); // How long will the fan will be turned on
analogWrite(controlpin, pwr_off); // Turns off the fan
}
void event_driven(const char *event, const char *data)
{
fan_on = 1;
}A hands-on introductory course exploring the Internet of Things and connected product experiences.
Our ambient device is a symbolic representation of panic in response to messages around banning people from the United States based on their religion and country of origin.
February 7th, 2017