49-713 Designing for the Internet of Things
· 26 members
A hands-on introductory course exploring the Internet of Things and connected product experiences.
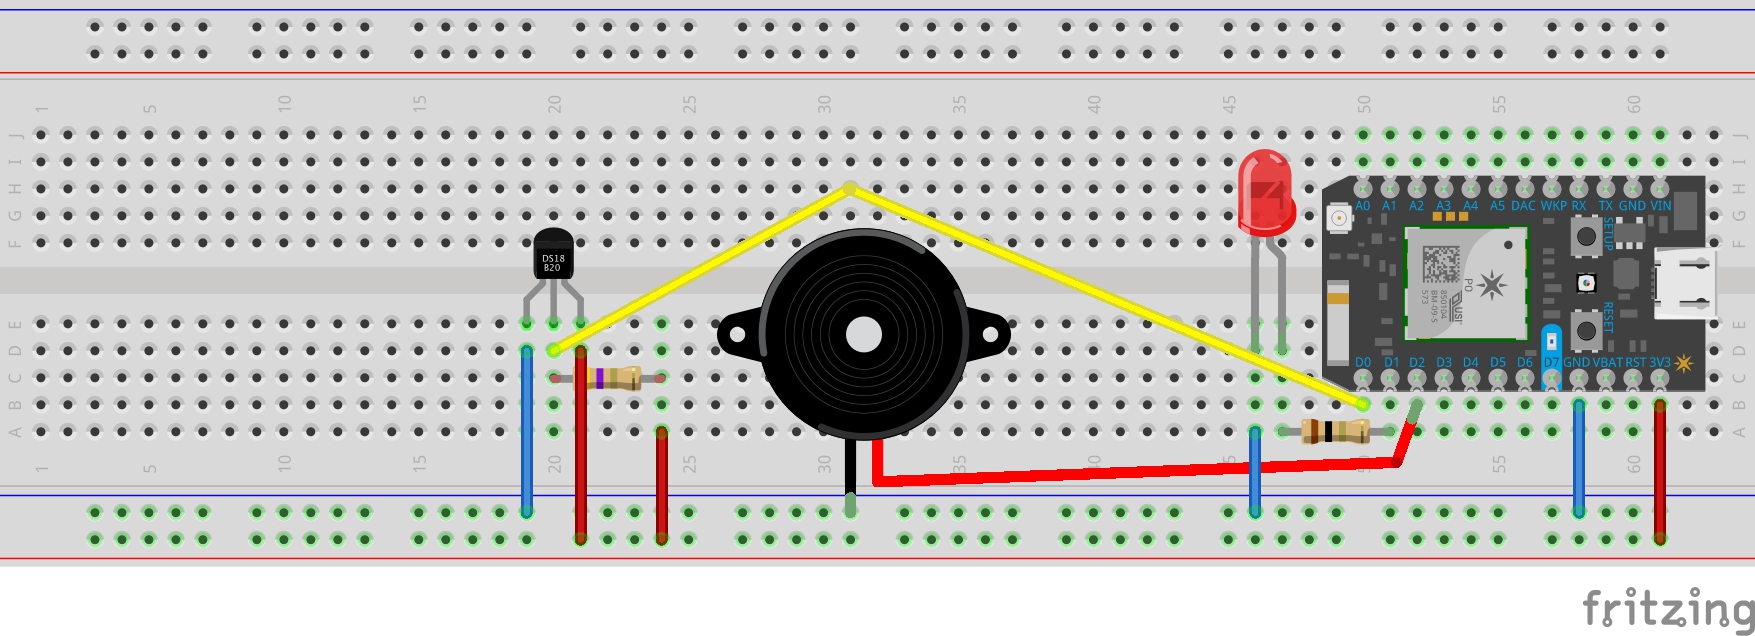
My goal is to create an IoT product that senses the temperature of a room and has the ability to turn on a fan to keep the room at a consistent comfortable temperature.

The basics needed for this appliance to work are a temperature sensor and a fan. Since attaching a fan would be above my current skill set, the components used are a temperature sensor, a LED, and a piezo buzzer. The LED and piezo buzzer go off when the fan would start in the real scenario.
For the code, I started with the sample code in the tutorials for the temperature sensor and the LED. In the beginning, I was completely lost on the coding aspect of this project. I went to office hours and Joseph explained to me that there can only be one void setup and one void loop for an entire code. After office hours, I was able to condense my code into one void setup and one void loop and write the simple code to have the LED and piezo buzzer turn on when the temperature was above 73 degrees.
A hands-on introductory course exploring the Internet of Things and connected product experiences.
My goal is to create an IoT product that senses the temperature of a room and has the ability to turn on a fan to keep the room at a consistent comfortable temperature.
February 1st, 2017