49-713 Designing for the Internet of Things
· 26 members
A hands-on introductory course exploring the Internet of Things and connected product experiences.
Knok Knok
Hua Fan
Until now, apartment dwellers have had a difficult time protecting their homes. Unable to permanently install security systems has left their belongings and themselves vulnerable. Knok Knok is a smart home security solution with a goal being to help people monitor their home and notify potential dangers. Knok Knok will be installed on the door and will detect whether there are suspicious activities outside. If there are people wondering outside the door, they will trigger Knok Knok’s alarm and all the data will be registered online.
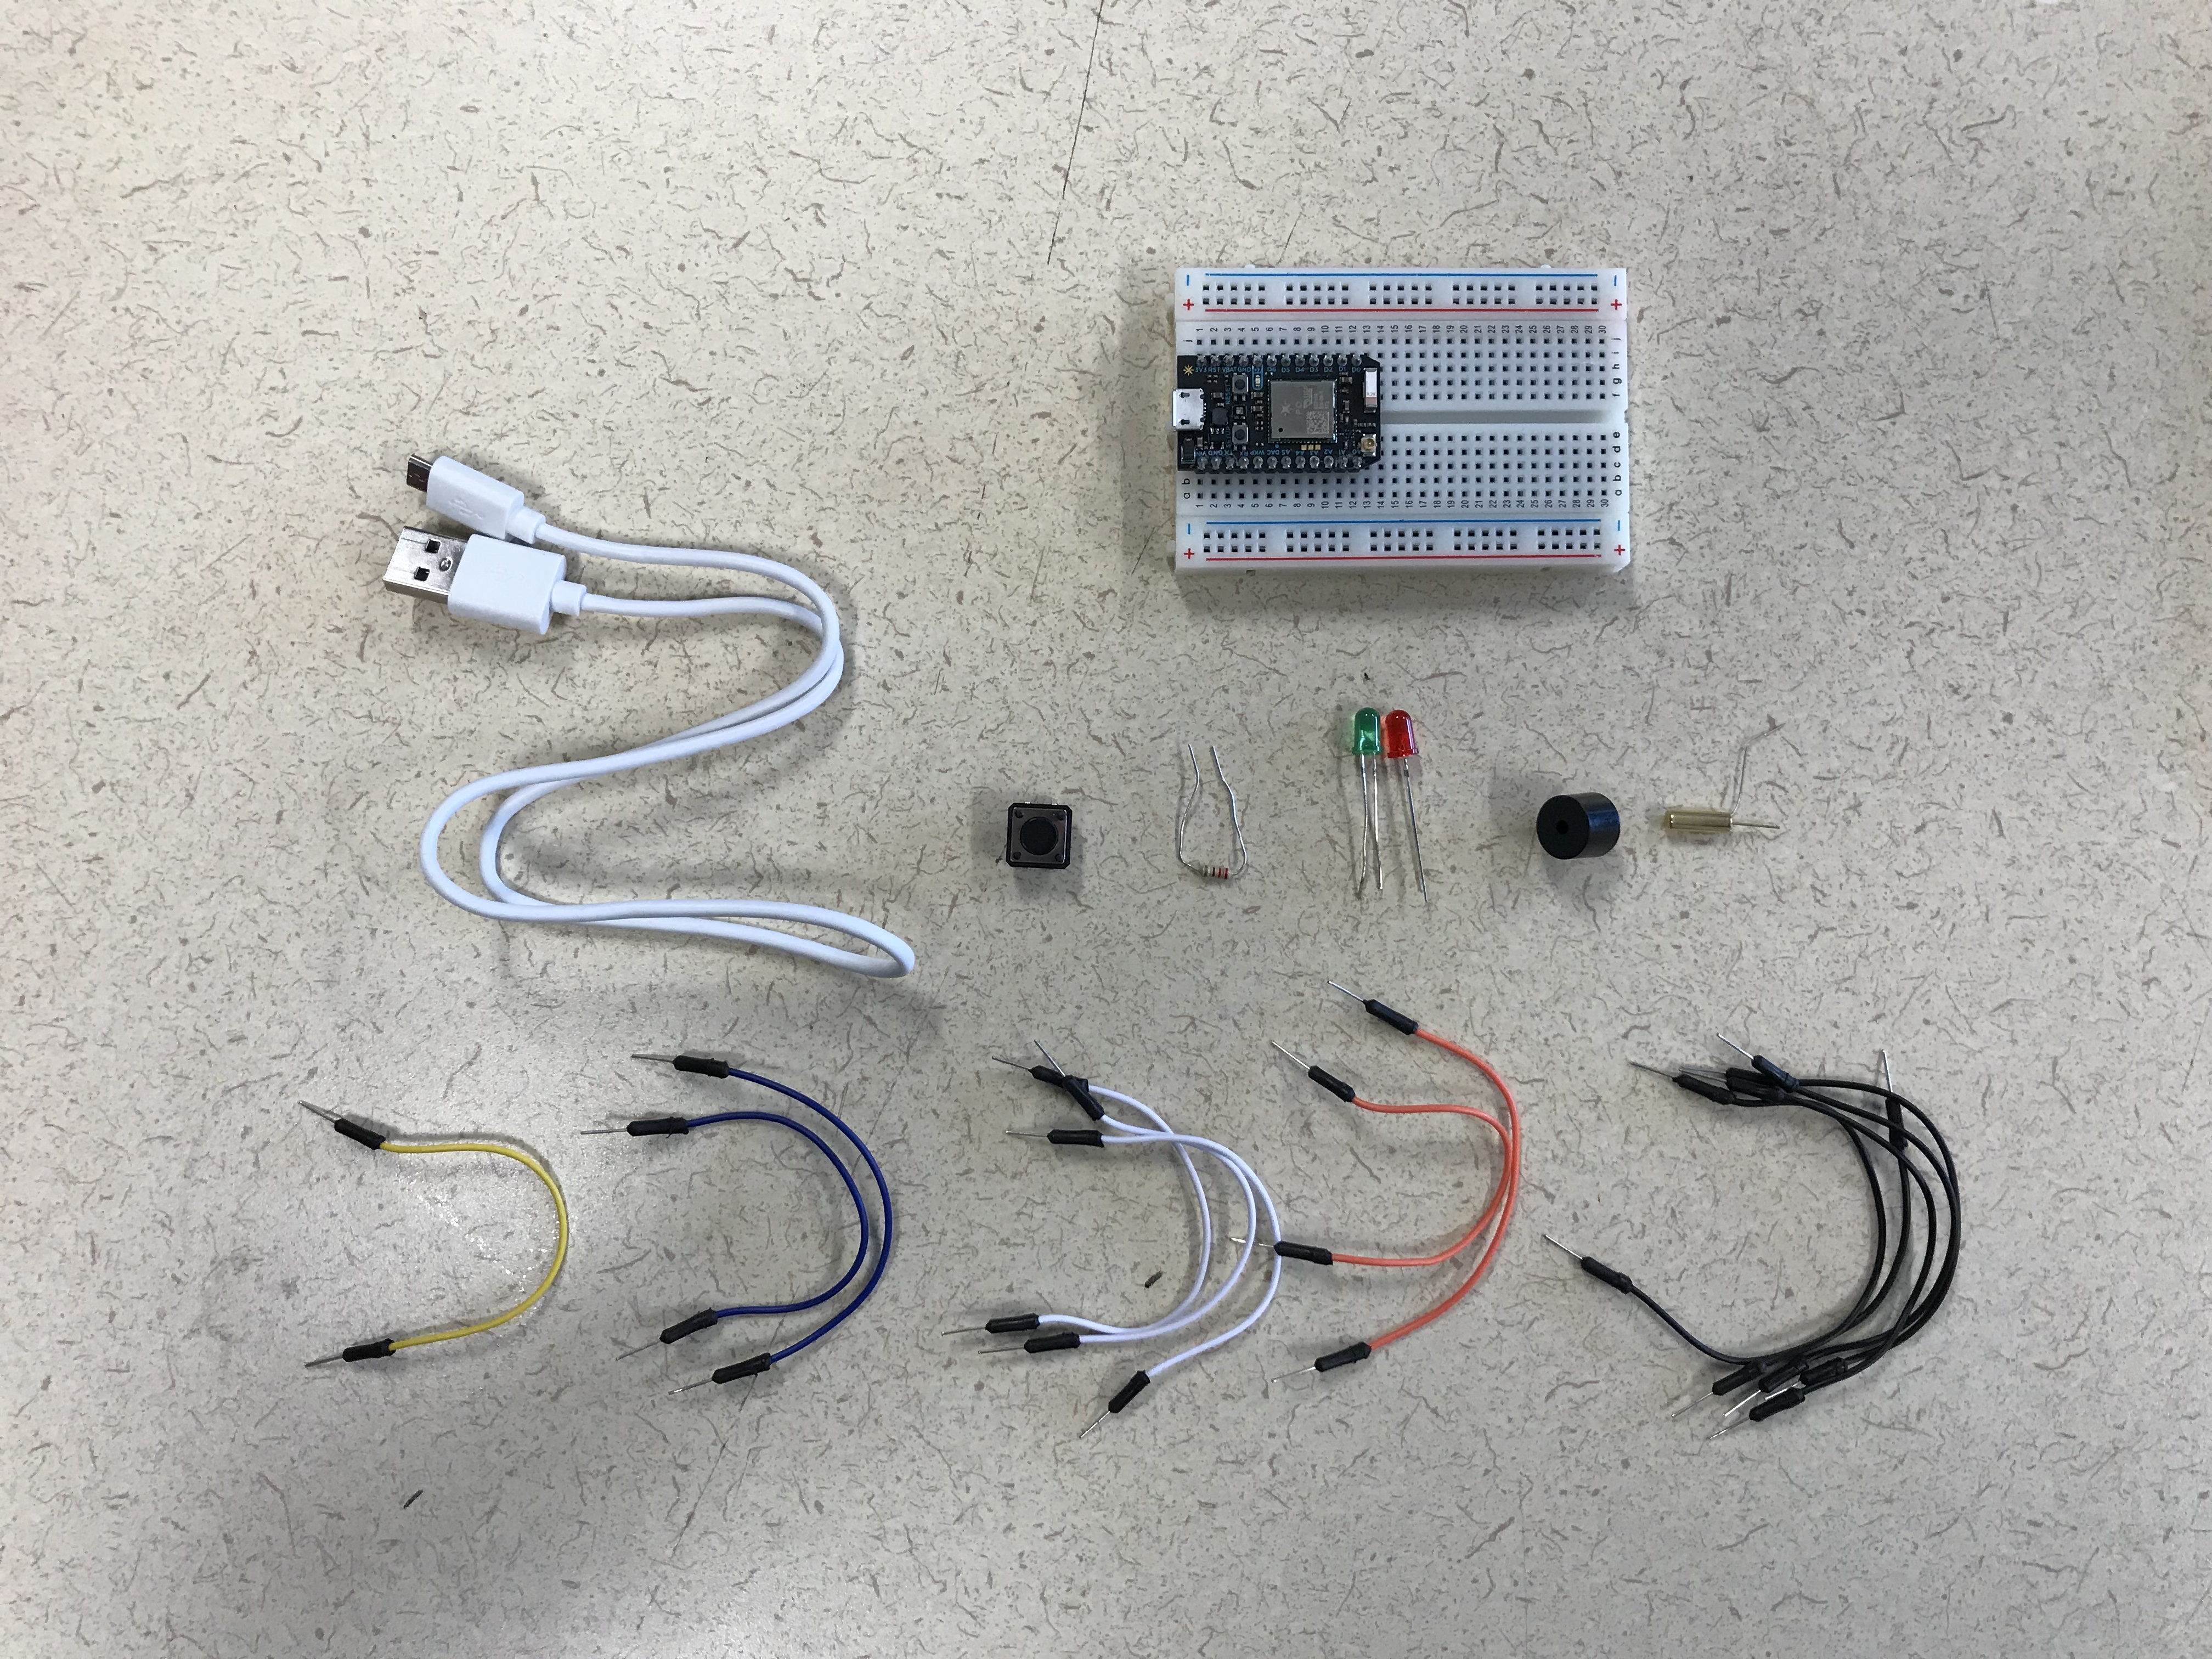
CPU: Photon* 1
Sensor: Tilt Sensor * 1
Input: Button * 1
Output: Piezo Buzzer * 1, Red LED * 1, Green LED * 1
Other: 220 ohm Resistor * 1, Wires
How to secure a home by alarming the trespassers and notifying the residents when someone breaks in?
This project is designed for people who want to secure their home and can take control of their home security remotely. The user will be able to receive notification for any suspicious behaviours in his/her house. The system will also alarm anyone breaking into the house and scare them away.
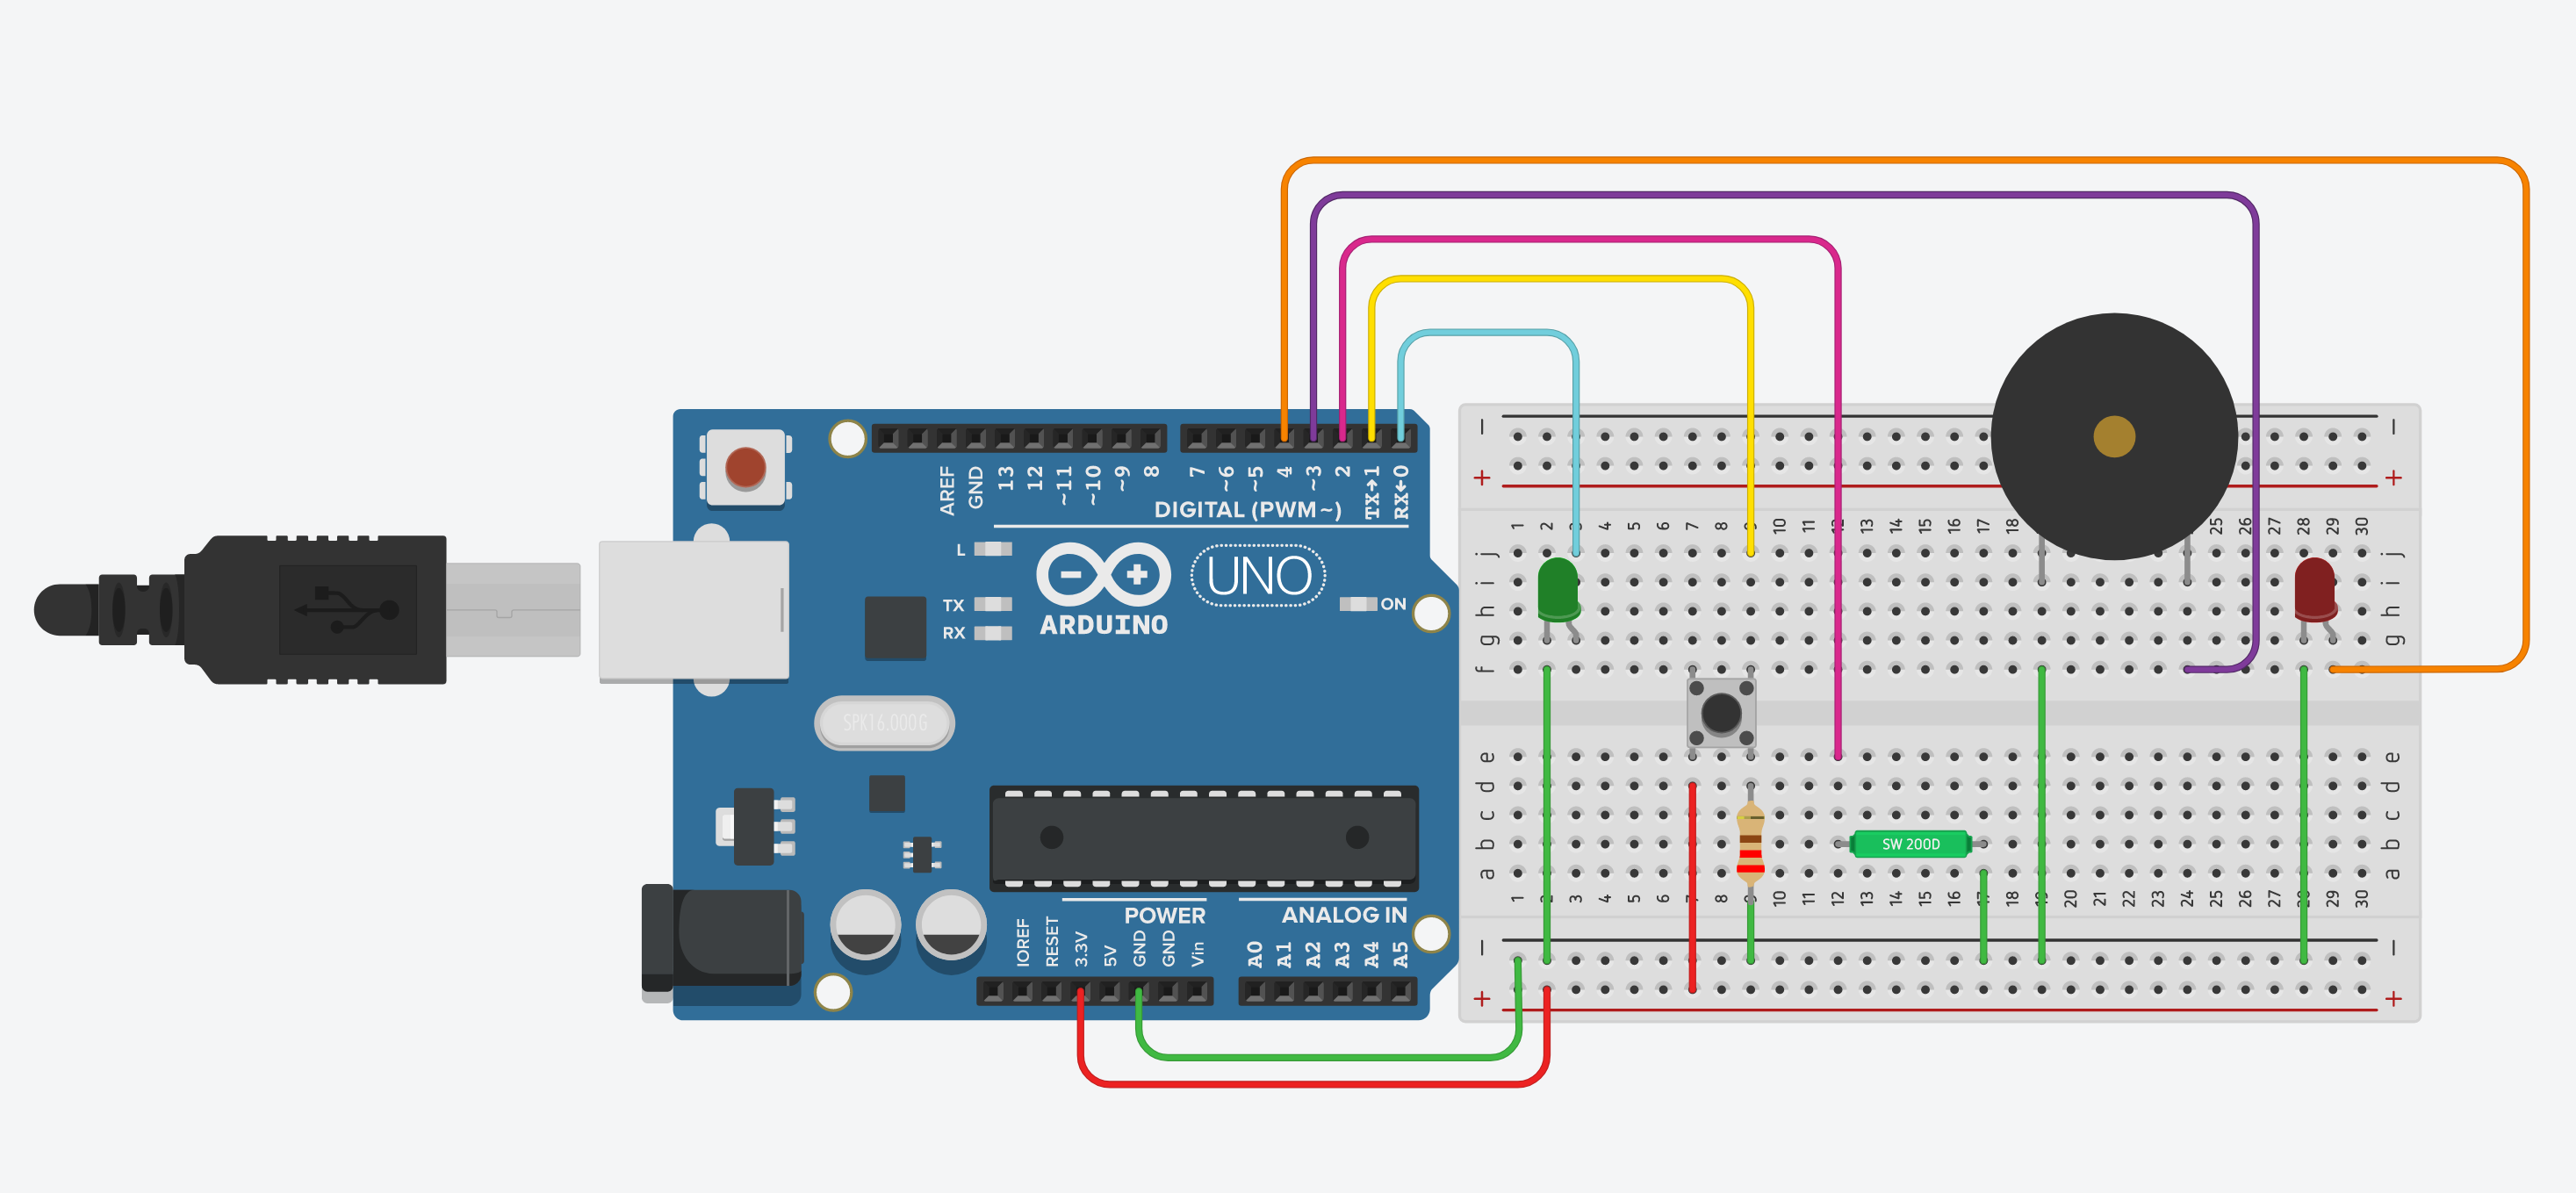
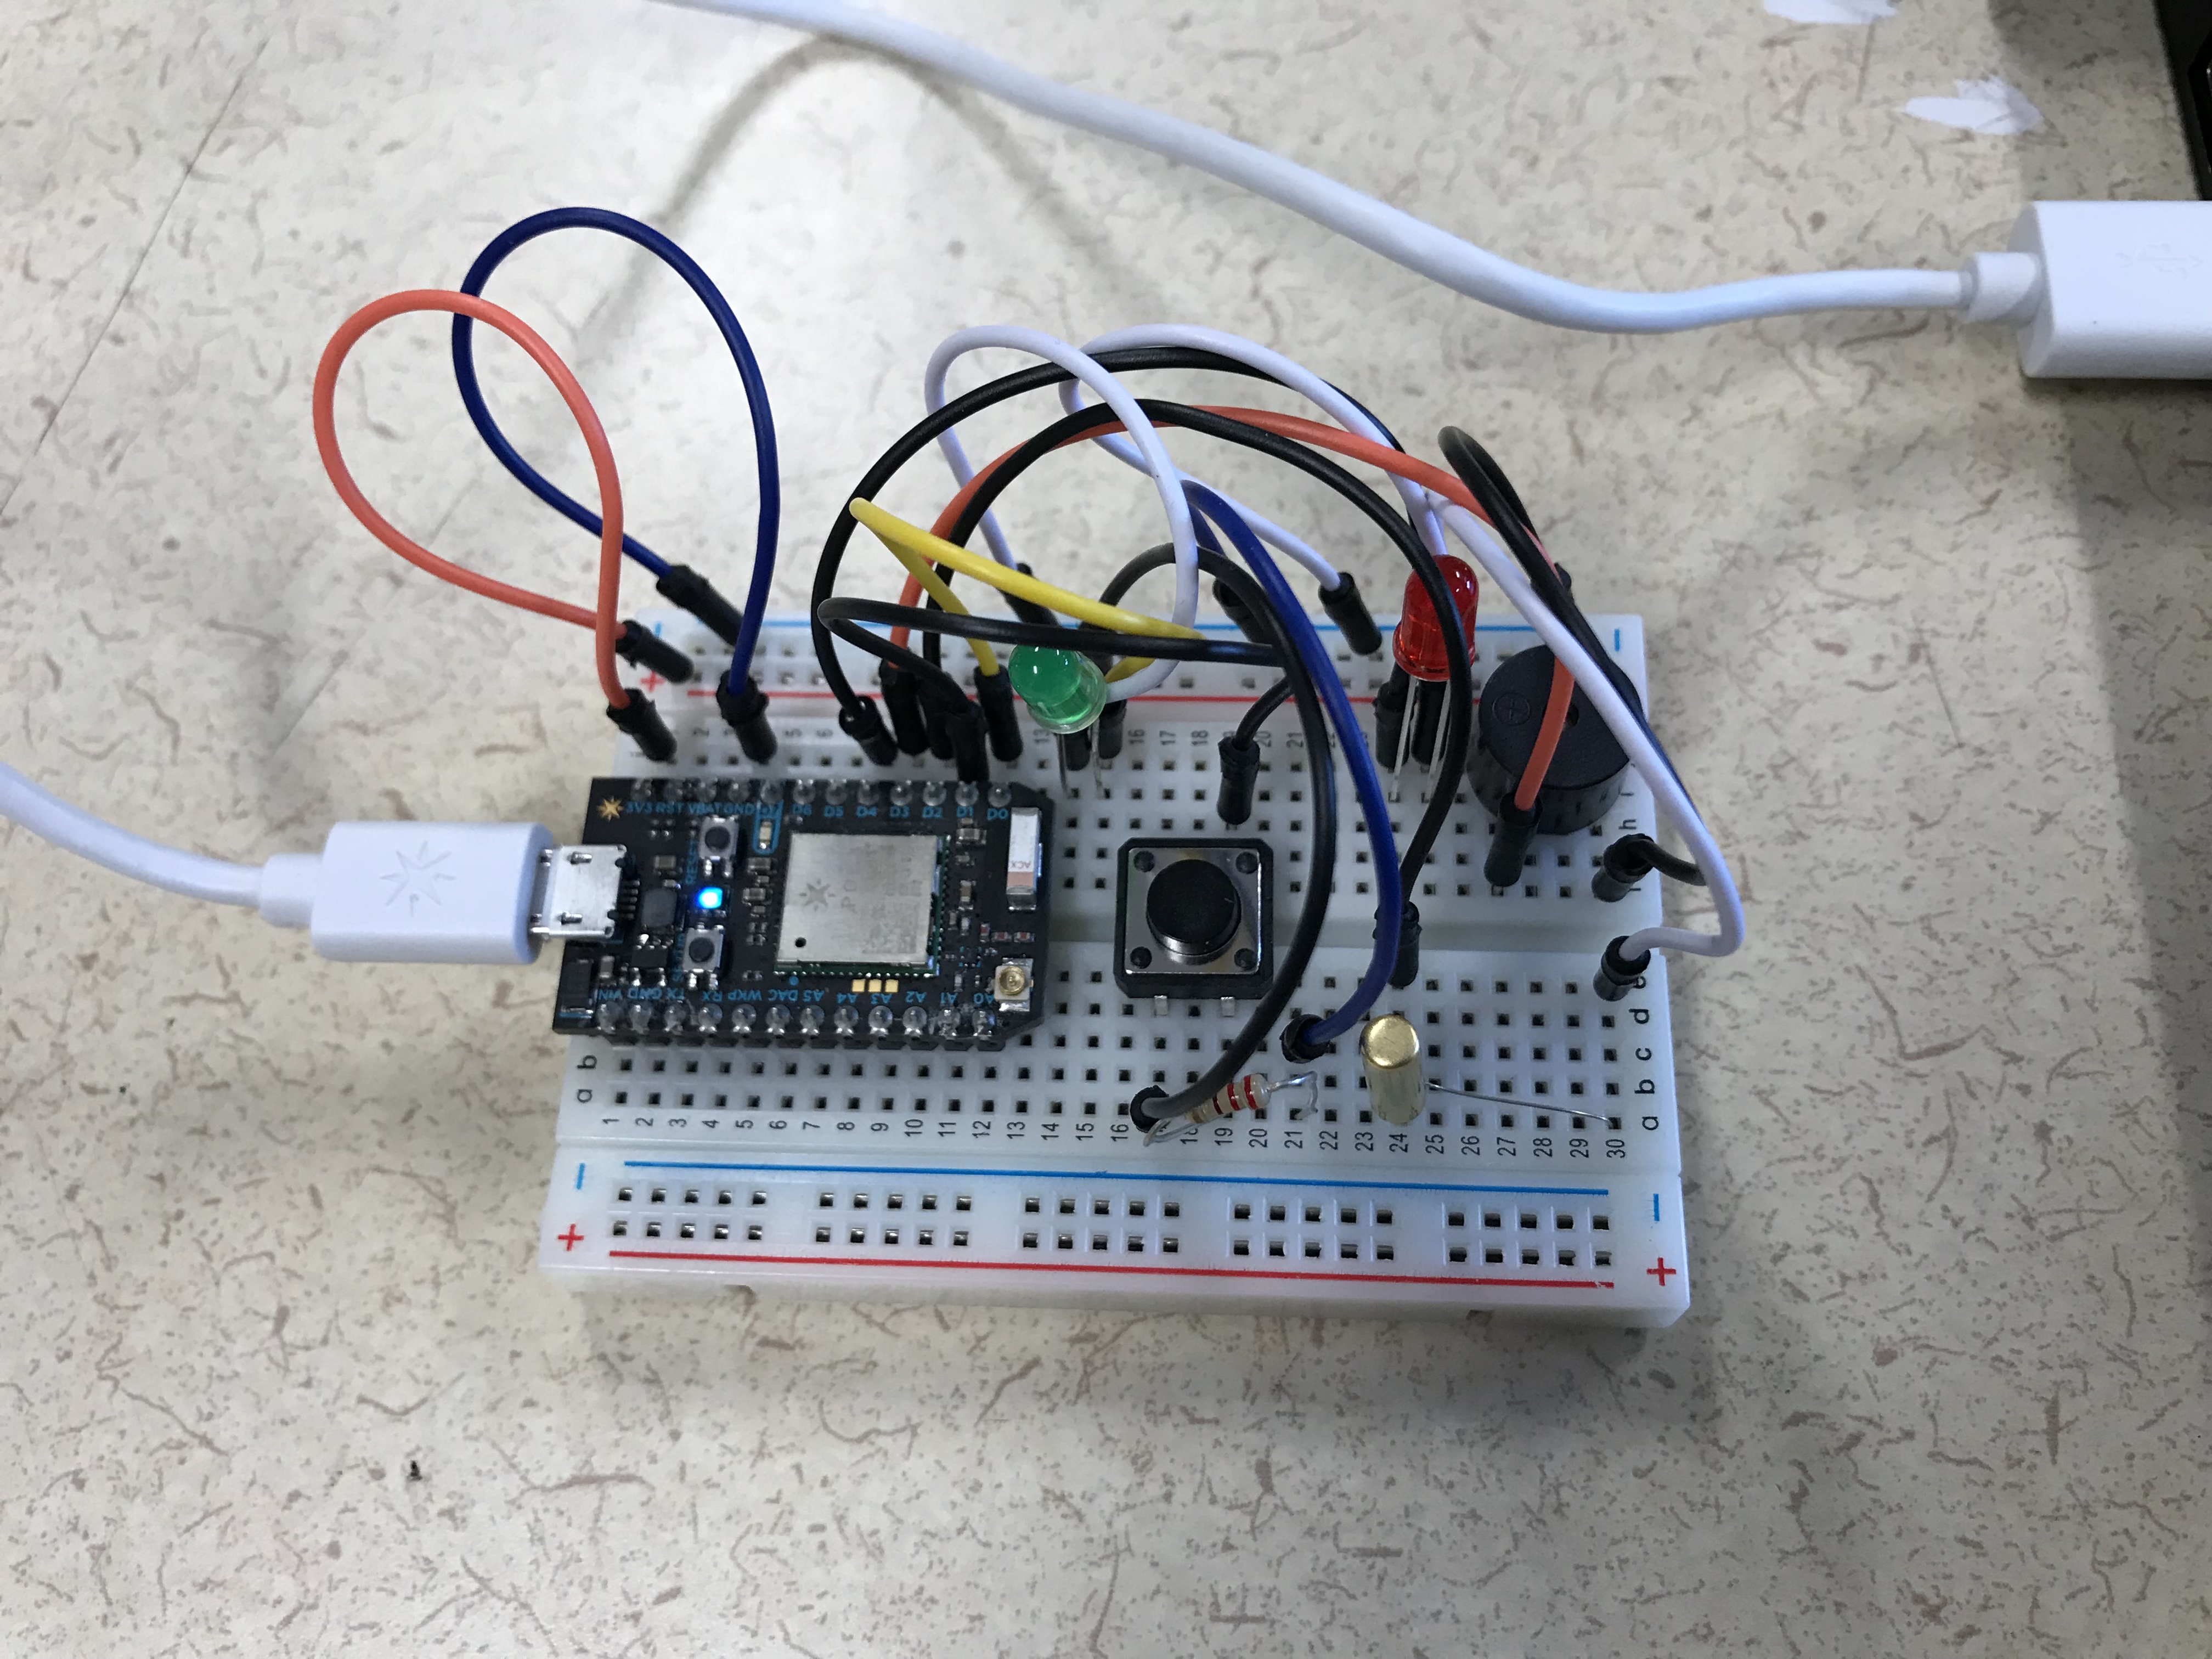
Designing the circuit
At the first step, I designed the circuit on Autodesk Tinkercad (see video for process). Since Tinkercad does not have a Photon icon, I used Arduino in the diagram, but the idea is the same. In the diagram, red wires go to 3.3V, green wires go to ground, and other colored wires go to pins. The idea is that the tilt sensor is installed on a door so that when someone breaks into the room, the red LED and the buzzer will go off. The green LED serves as a power indicator. The system can be controlled by a button.
Coding the circuits
In the coding step, two more functions were added into the system. First is the online control mechanism. The Wi-Fi connectivity of the Photon enables me to program an online portal for users to view system status and turn it ON/OFF. The online function is called "Knok". User can type "ON" or "OFF" to control the system. The variable "system" indicates the system status (1 for on and 0 for off).
Second, I utilized the IFTTT service so that whenever the alarm even is sent to the cloud, users will receive an email notification so that they do not need to log in to the particle console to view the status.
/*
Hua Fan
IoT creative assignment 1
Knok Knok
*/

// variables that won't change
const int powerPin = 0;
const int buttonPin = 1;
const int tiltPin = 2;
const int alarmPin =  3;
const int ledPin = 4;

// variables that will change:
int buttonState = 0;
int tiltState = 0;
int systemOn = 0;
int currentTime = 0;
int peace = 0;

int systemControl(String command);

void setup() {
  // establish serial monitor connection
  Serial.begin(9600);

  // set up all input and output
  pinMode(powerPin, OUTPUT);
  pinMode(buttonPin, INPUT);
  pinMode(tiltPin, INPUT);
  pinMode(alarmPin, OUTPUT);
  pinMode(ledPin, OUTPUT);

  // set up cloud variables and functions
  Particle.function("Knok", systemControl);
  Particle.variable("system", systemOn);
  //Particle.subscribe("Knok Knok", systemControl);
}

void loop() {
  // read the state of the pushbutton value:
  buttonState = digitalRead(buttonPin);

  // check if the pushbutton is pressed
  if (buttonState == HIGH) {
    changeSystemStatus();
  }

  // start the system if system is off and button is pressed
  if (systemOn == 1) {
    tiltSensorOn();
    digitalWrite(powerPin, HIGH);
  } else {
    digitalWrite(powerPin, LOW);
  }

  currentTime = millis();
  while(millis() < currentTime + 100){
    //wait 1 second
  }
}

// read sensor data and respond correspondingly
void tiltSensorOn() {
  // read the state of the tilt sensor value:
  tiltState = digitalRead(tiltPin);
  // alarm is tilt sensor give potisive feedback
  if (tiltState == HIGH) {
    playAlarm();
    if (peace == 1) {
      Serial.println("Intruder Detected!!!");
      Particle.publish("Alert", "Intruder Detected!!!", PRIVATE);
    }
    peace = 0;
  } else {
    digitalWrite(ledPin, LOW);
    digitalWrite(alarmPin, LOW);
    if (peace == 0) {
      Serial.println("It's a peaceful day");
      Particle.publish("Status", "It's a peaceful day", PRIVATE);
    }
    peace = 1;
  }
}

// play alarm sound and red LED light
void playAlarm() {
  tone(alarmPin,2800);
  digitalWrite(ledPin, HIGH);
  currentTime = millis();
  while(millis() < currentTime + 100){
    //wait
  }
  digitalWrite(alarmPin, LOW);
  digitalWrite(ledPin, LOW);
}

// change on/off status
void changeSystemStatus() {
  if (systemOn == 0) {
    systemOn = 1;
    digitalWrite(powerPin, HIGH);
    Serial.println();
    Serial.println("System: On");
    Serial.println("Security Check: On");
    Serial.println("Full Protection: On");
    Serial.println();
    Particle.publish("Status", "System: On", PRIVATE);
  } else {
    systemOn = 0;
    digitalWrite(powerPin, LOW);
    Serial.println();
    Serial.println("System: Off");
    Serial.println("Security Check: Off");
    Serial.println("Full Protection: Off");
    Serial.println();
    Particle.publish("Status", "System: Off", PRIVATE);
  }
}

// control the system over the cloud
int systemControl(String command) {
   // find out the state of the system
   if (command == "ON") {
	   systemOn = 1;
     return 1;
   } else if (command == "OFF") {
	   systemOn = 0;
     return 1;
   } else {
     return -1;
   }
}Overall, the project was fun to work on and the result was successful, but there are also some places that can be improved"
What goes well:
What needs improvement:
A hands-on introductory course exploring the Internet of Things and connected product experiences.
The goal of Knok Knok is to be a smart monitor for homes. It will be able to identify when the door is open/closed and send the data to the Internet. When intrusion happens, it will also be able to alarm the user as well as neighbors.
January 23rd, 2018