

49-713 Designing for the Internet of Things
· 26 members
A hands-on introductory course exploring the Internet of Things and connected product experiences.
I’m surprised I still own any belongings, my old house nearly burned down multiple times as a result of my ex housemate constantly leaving the oven on and then leaving the house. This is extremely dangerous behavior.
I’m attempting to hack together an alert system for when an oven is left on for an extended period of time. Assuming that an oven should not be in use for longer than 60 minutes to prepare any meal, the oven will periodically check the temperature inside the oven, and if that temperature remains above 20 degrees celsius for more than 60 minutes a buzzer will be sounded and an alert sent to the user’s cellphone. This alert will then let the user (tenant(s)) know that the oven is on, and if no one is home, someone should run home to turn it off.
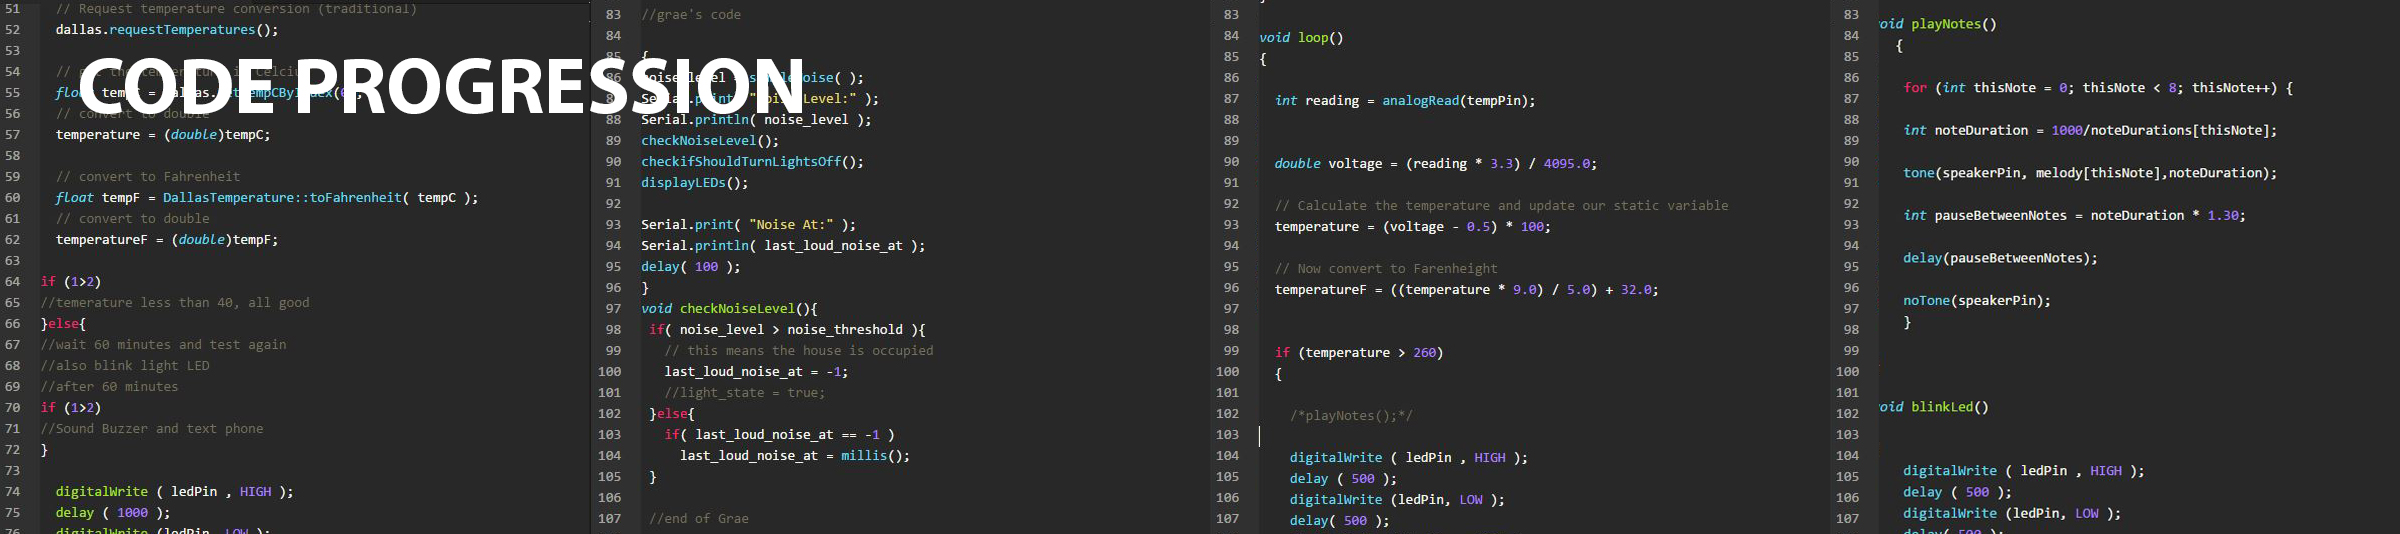
As the main part of my hack was going to be the temperature sensor, I started by revising the tutorials again for the DB18B20 Temperature Sensor, and trying to work forward from there. I immediately got stumped by the ‘OneWire’ library and ‘Dallas’ control as I downloaded them from links at the bottom of the page. Of course these codes were tailored to certain projects, and sent me on a wild goose chase for links that didn't exist. Lesson one learned. From here I looked closely at each component and piece of code I was entering into my script.
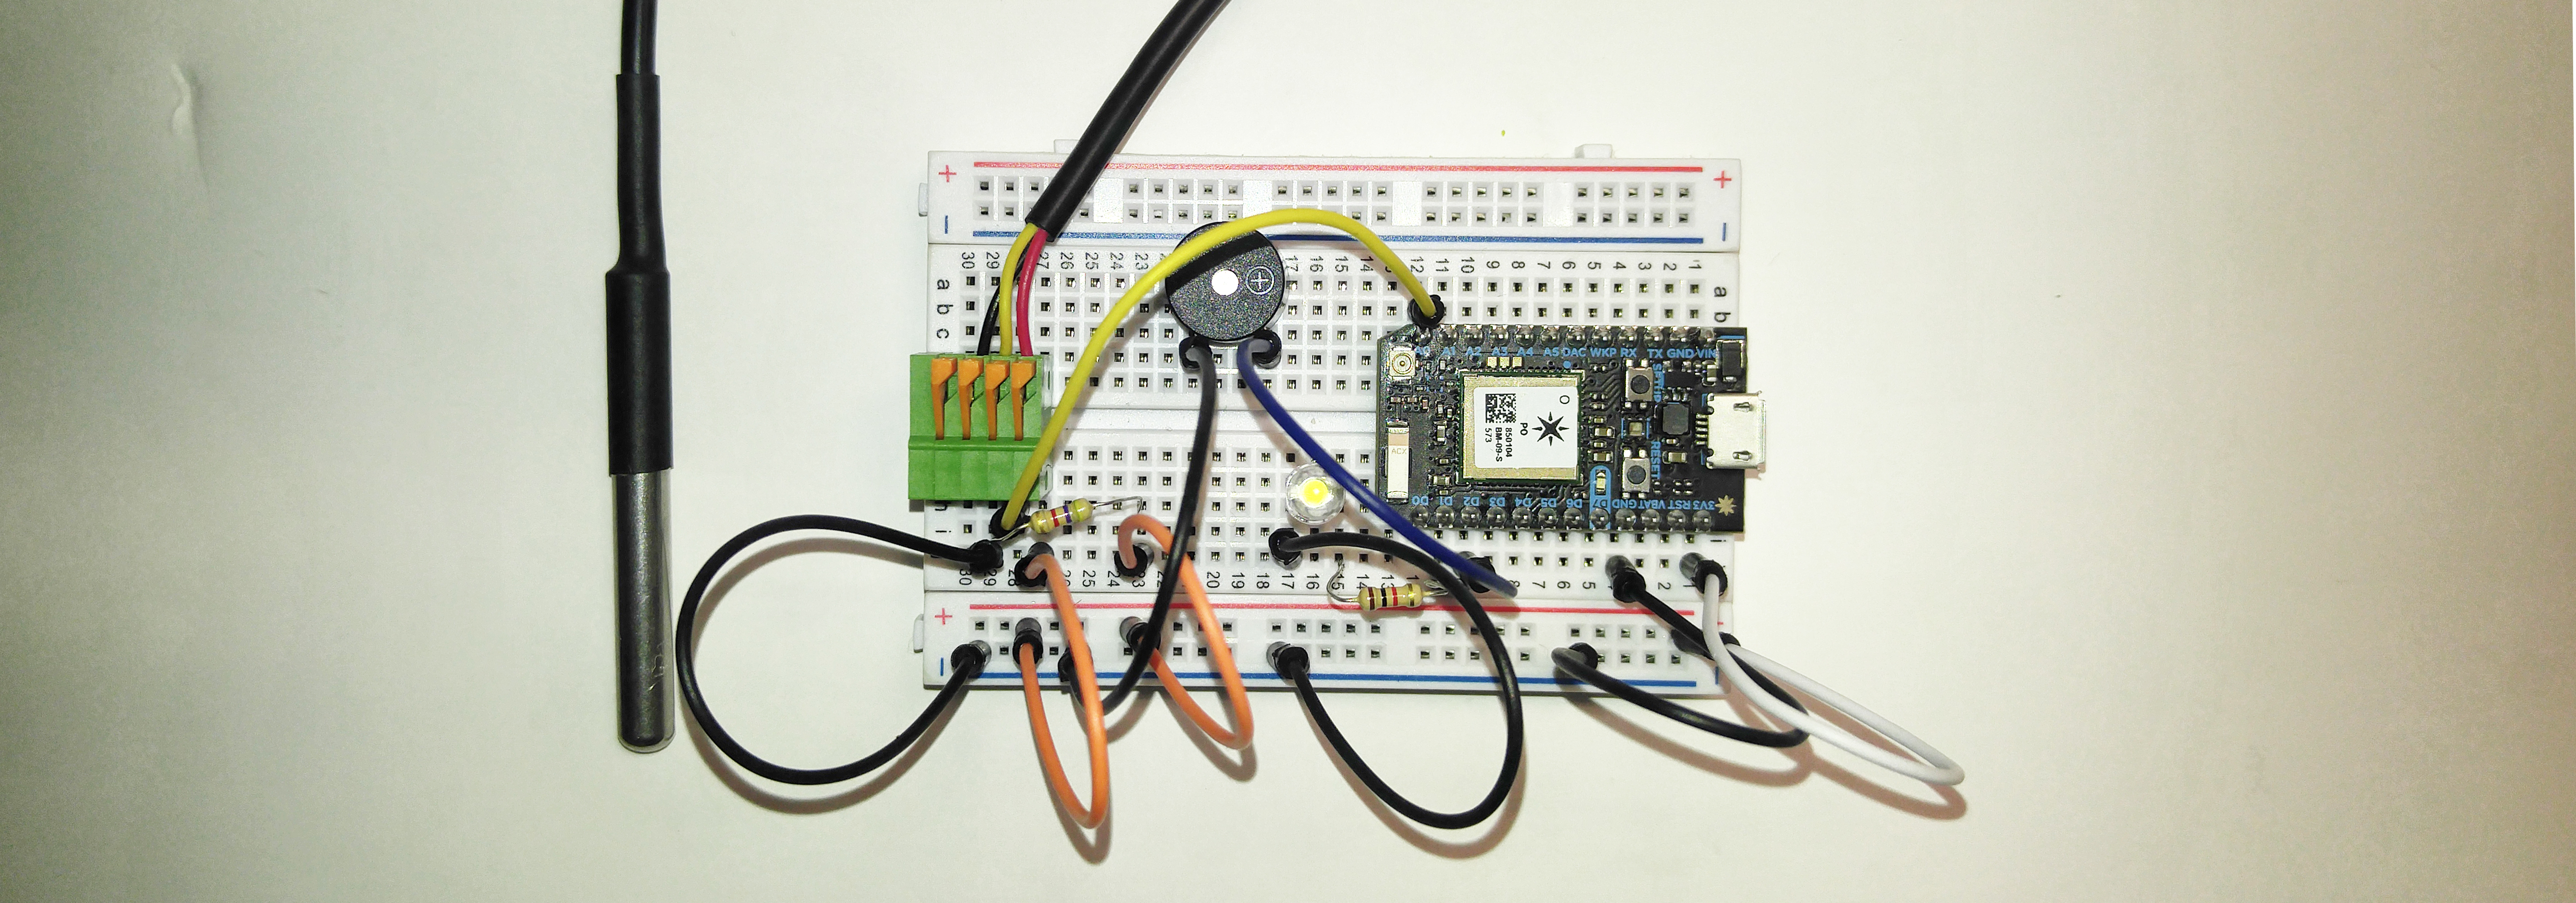
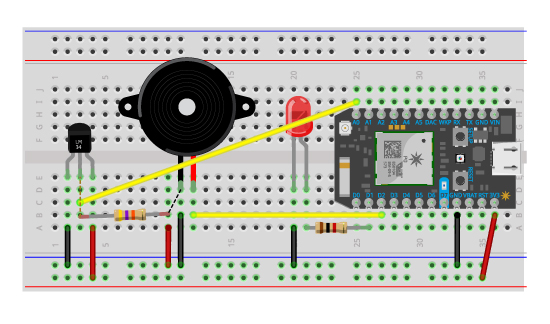
I’d pieced together the temperature code and a little bit of code from the previous LED tutorial, but still had no notion how to link them up, so I decided to progress and try to build the circuit. Luckily sitting beside Christian, who was also doing temperature sensing, I took pointers from what she had built, hacking something together as a base.
I played for ages and then thought about trying the second temperature tutorial, noticing straight away that this time it was plugged into A0 and not D0. Then it dawned on me that I should have been using Analog the whole time to get a variance of values. Lesson two learned. After a little tinkering, I used the code from the first tutorial but plugged it in to A0. Straight away I got the LED to blink at a certain temperature (reading off my laptop fan vent).
Next I had to make a new event, the Piezo sounding an alarm, so I went about trying to create this new event. The next bit took me a few hours to figure out, but along the way I think I cracked Arduino. Organizing events and tasks into their own ‘void’ or ‘int’ groups then calling on them later. It Clicked! Lesson three learned.
With the deadline approaching, I now had a temperature read, buzzer and LED, working together and following a rough sequence that demonstrated my scenario. I needed to throw on the delay and pass it through to my phone as a text message or email, I did this through IFTTT, fairly straightforward. Lesson four learned.
At this stage I went back over the code and tidied it up a little. Work of Art!I've completed the project to the original Goal specifications and satisfied the brief.
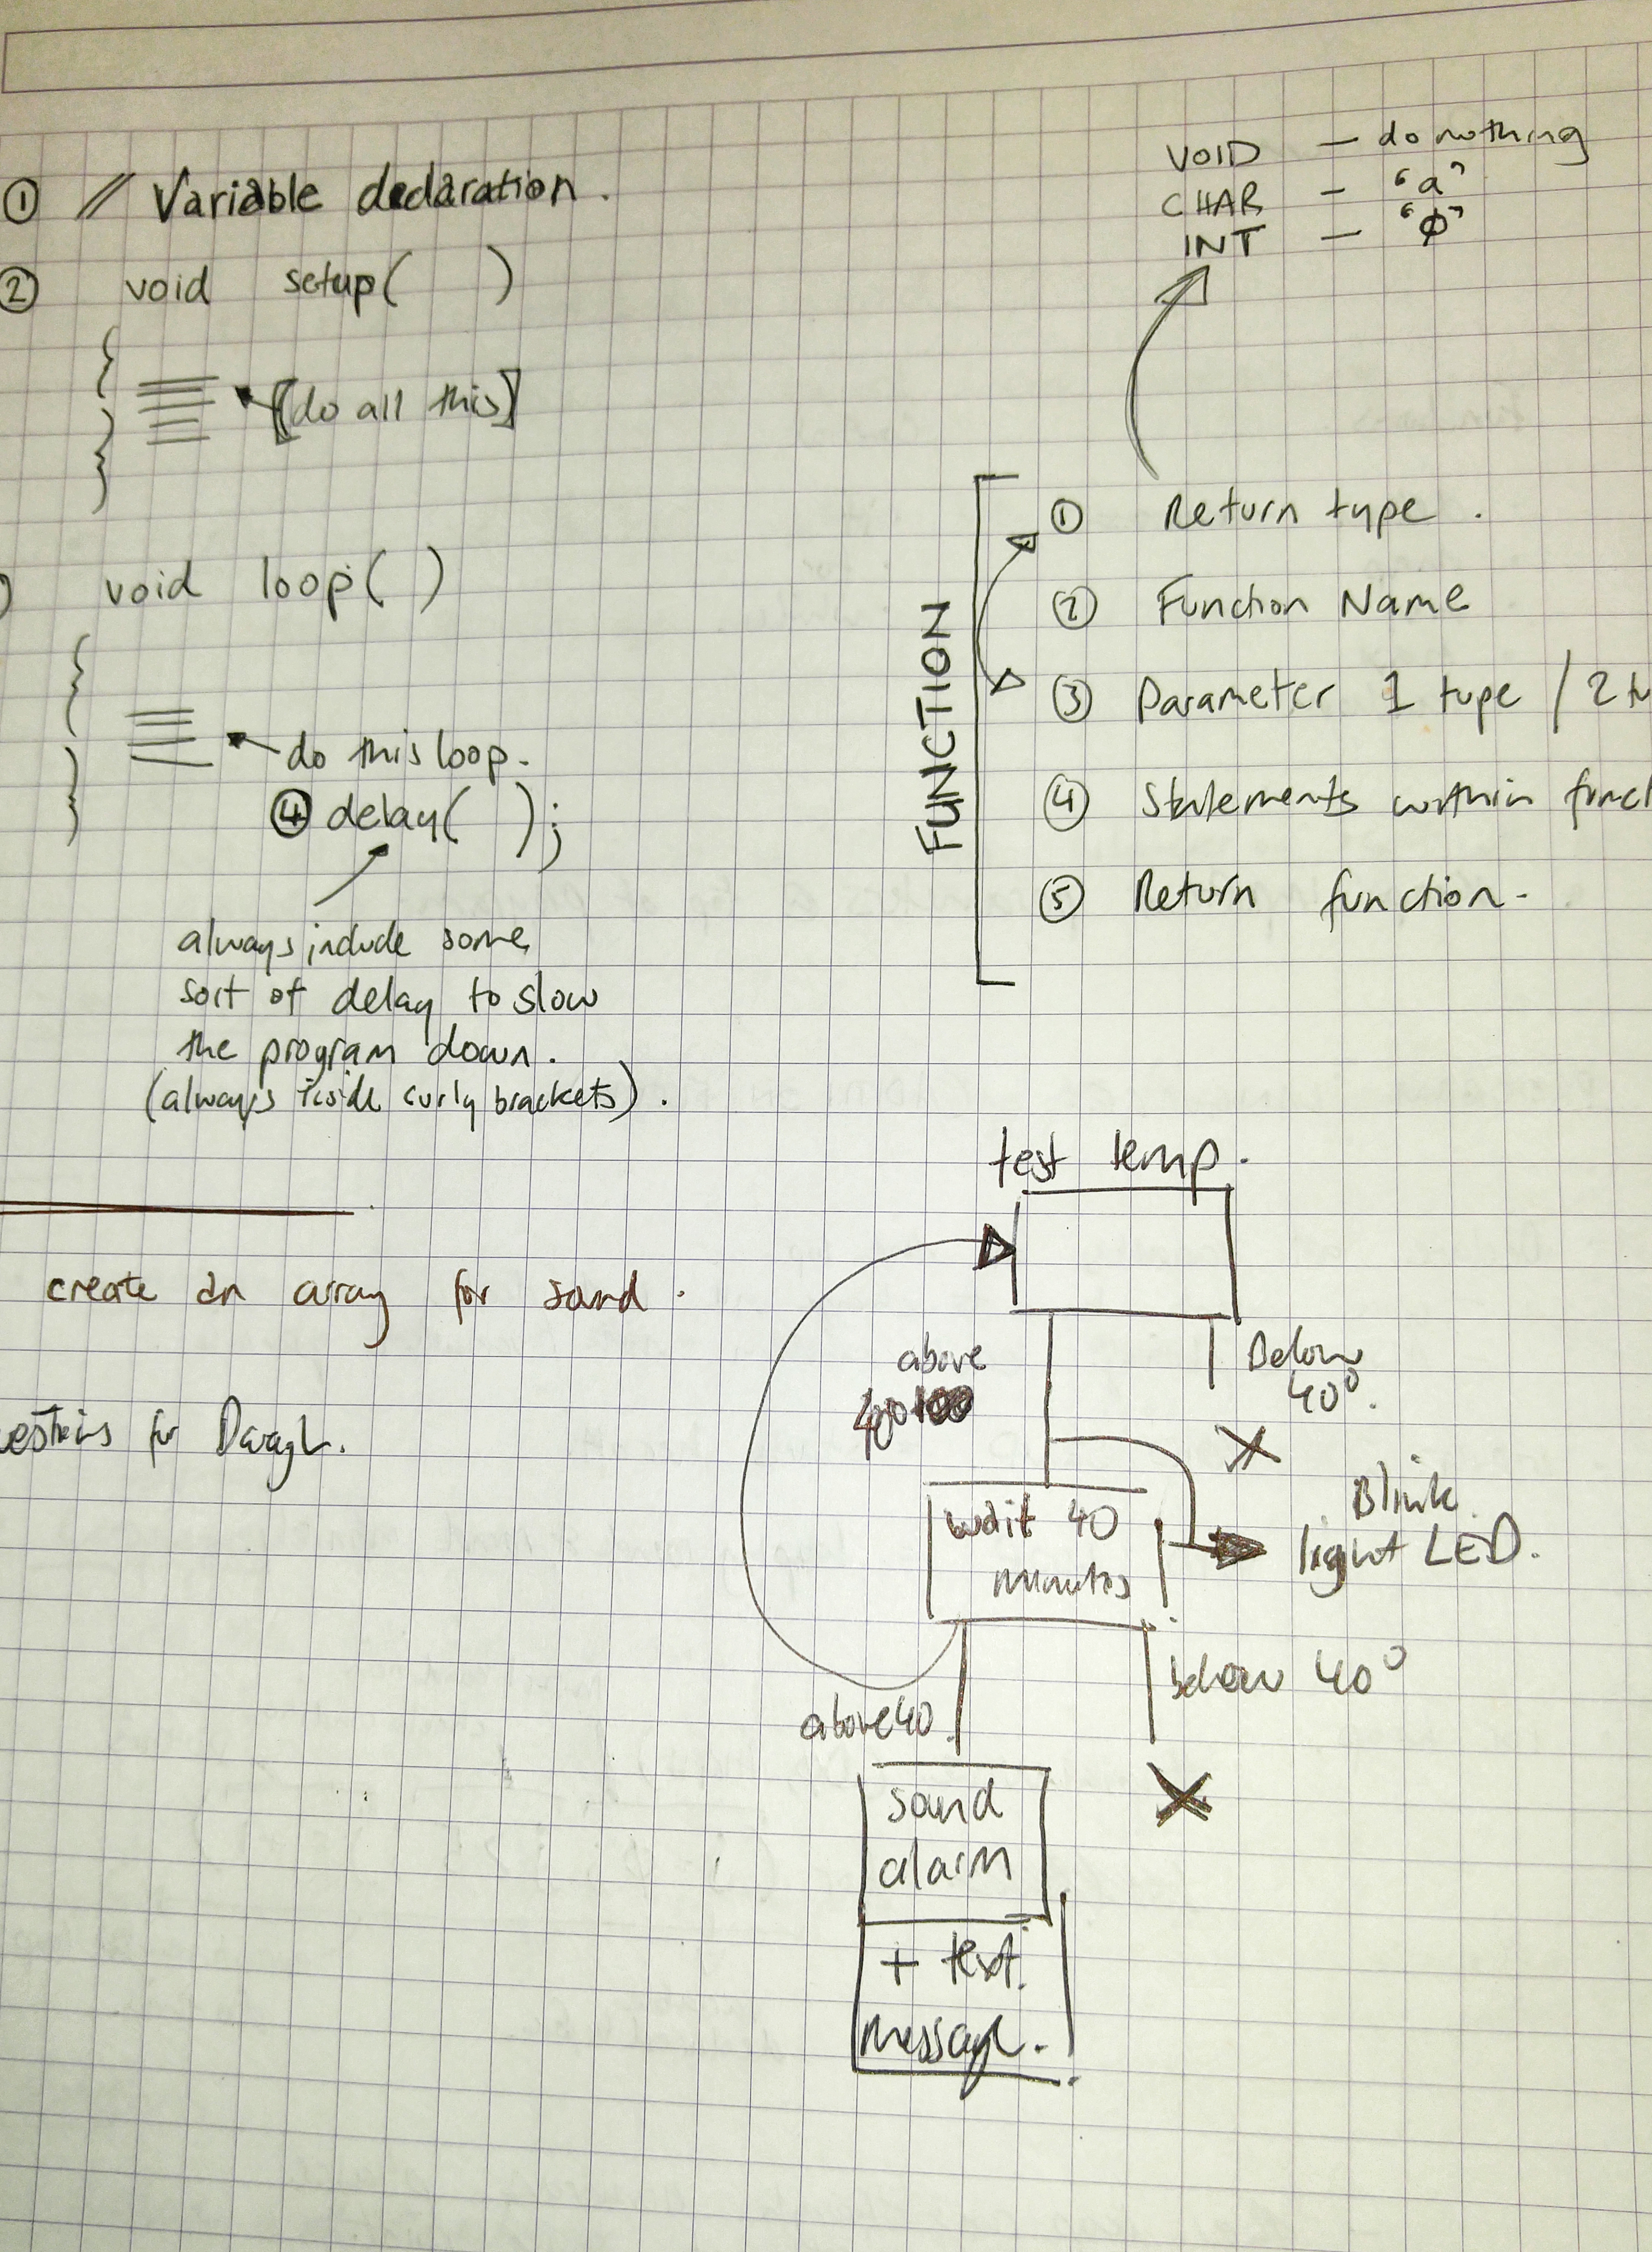
Flow of Scenario:
Particle checks oven temperature/If oven temperature above 40 degrees Celsius/ Speaker plays, LED blinks 5 times to alert user/ Delay of 60 minutes/Oven checks temperature again/Particle checks oven temperature/If oven temperature above 40 degrees Celsius/ Speaker plays, LED blinks 5 times to alert user/Text message sent to user's phone.
For the experiment I reduced 60 minutes to 6 seconds, and 40 degrees Celcius to 30 degrees Celcius.
Further development of this project, I'd like to add an RGB LED to alert of different stages of the process for monitoring and perhaps another function that could turn the oven off, from the user's mobile devive
#include "OneWire.h"
#include "spark-dallas-temperature.h"
OneWire oneWire(A0);
DallasTemperature dallas(&oneWire);
double temperature = 0.0;
double temperatureF = 0.0;
#include <math.h>
int ledPin = D1;
int ledValue = 0;
int speakerPin = D2;
int melody[] = {3830, 3830, 4000, 3830, 5000,};
int noteDurations[] = {6,6,6,4,4};
void setup()
{
Particle.variable("temperature", &temperature, DOUBLE);
Particle.variable("temperatureF", &temperatureF, DOUBLE);
dallas.begin();
Serial.begin(9600);
pinMode (ledPin, OUTPUT);
pinMode( speakerPin, OUTPUT );
playNotes();
}
void loop()
{
if ( getTemp() > 25)
{
playNotes();
blinkLed();
delay( 6000 );
}
if ( getTemp() > 20)
{
Particle.publish("oventxt","You left the oven on");
}
}
int getTemp ()
{
dallas.requestTemperatures();
sin( 23423 );
float tempC = dallas.getTempCByIndex(0);
temperature = (double)tempC;
float tempF = DallasTemperature::toFahrenheit( tempC );
temperatureF = (double)tempF;
Serial.print( "Temp in C = ");
Serial.print( tempC );
Serial.print( "\t\t F = ");
Serial.println( tempF );
return tempC;
}
void playNotes()
{
for (int thisNote = 0; thisNote < 8; thisNote++) {
int noteDuration = 1000/noteDurations[thisNote];
tone(speakerPin, melody[thisNote],noteDuration);
int pauseBetweenNotes = noteDuration * 1.30;
delay(pauseBetweenNotes);
noTone(speakerPin);
}
}
void blinkLed()
{
digitalWrite ( ledPin , HIGH );
delay ( 500 );
digitalWrite (ledPin, LOW );
delay( 500 );
digitalWrite ( ledPin , HIGH );
delay ( 500 );
digitalWrite (ledPin, LOW );
delay( 500 );
digitalWrite ( ledPin , HIGH );
delay ( 500 );
digitalWrite (ledPin, LOW );
delay( 500 );
digitalWrite ( ledPin , HIGH );
delay ( 500 );
digitalWrite (ledPin, LOW );
delay( 500 );
digitalWrite ( ledPin , HIGH );
delay ( 500 );
digitalWrite (ledPin, LOW );
delay( 3000 );
}
Well that was a whirlwind, this time last week I was clueless. I think I had a grasp of how the code was working the whole time and I had made my flow diagram so understood the order of the functions and how they were to interact, it was just writing the code to make this happen. Once I understood ‘void’, ‘cha’r and ‘int’, I started to group individual segments together and it started to fall together fairly easy from then forward. I thought at first, and still wanted to, use a repeat action, or }else{ code. This was not needed but I’d like to explore these further and possible scenarios using them.
A hands-on introductory course exploring the Internet of Things and connected product experiences.
Stop the house burning to the ground.
January 26th, 2017