
49-713 Designing for the Internet of Things
· 26 members
A hands-on introductory course exploring the Internet of Things and connected product experiences.
My chubby tubby hamster does not exercise enough. This device can count and calculate how long she runs for a day. When she runs over 2 miles a day, she will receive a treat.
My chubby tubby hamster does not exercise enough. On average, a hamster runs 2-3 miles a day. Because hamster is nocturnal animal, she usually doesn't run on the wheel until I go asleep. In the day time, she runs occasionally, but because I spend most of my time in school I can't see her daytime activity either. To motivate her to get enough exercise, I want to design a reward mechanism that can automatically offer her treats when he runs over 2 miles a day, without me closely monitoring her activity.
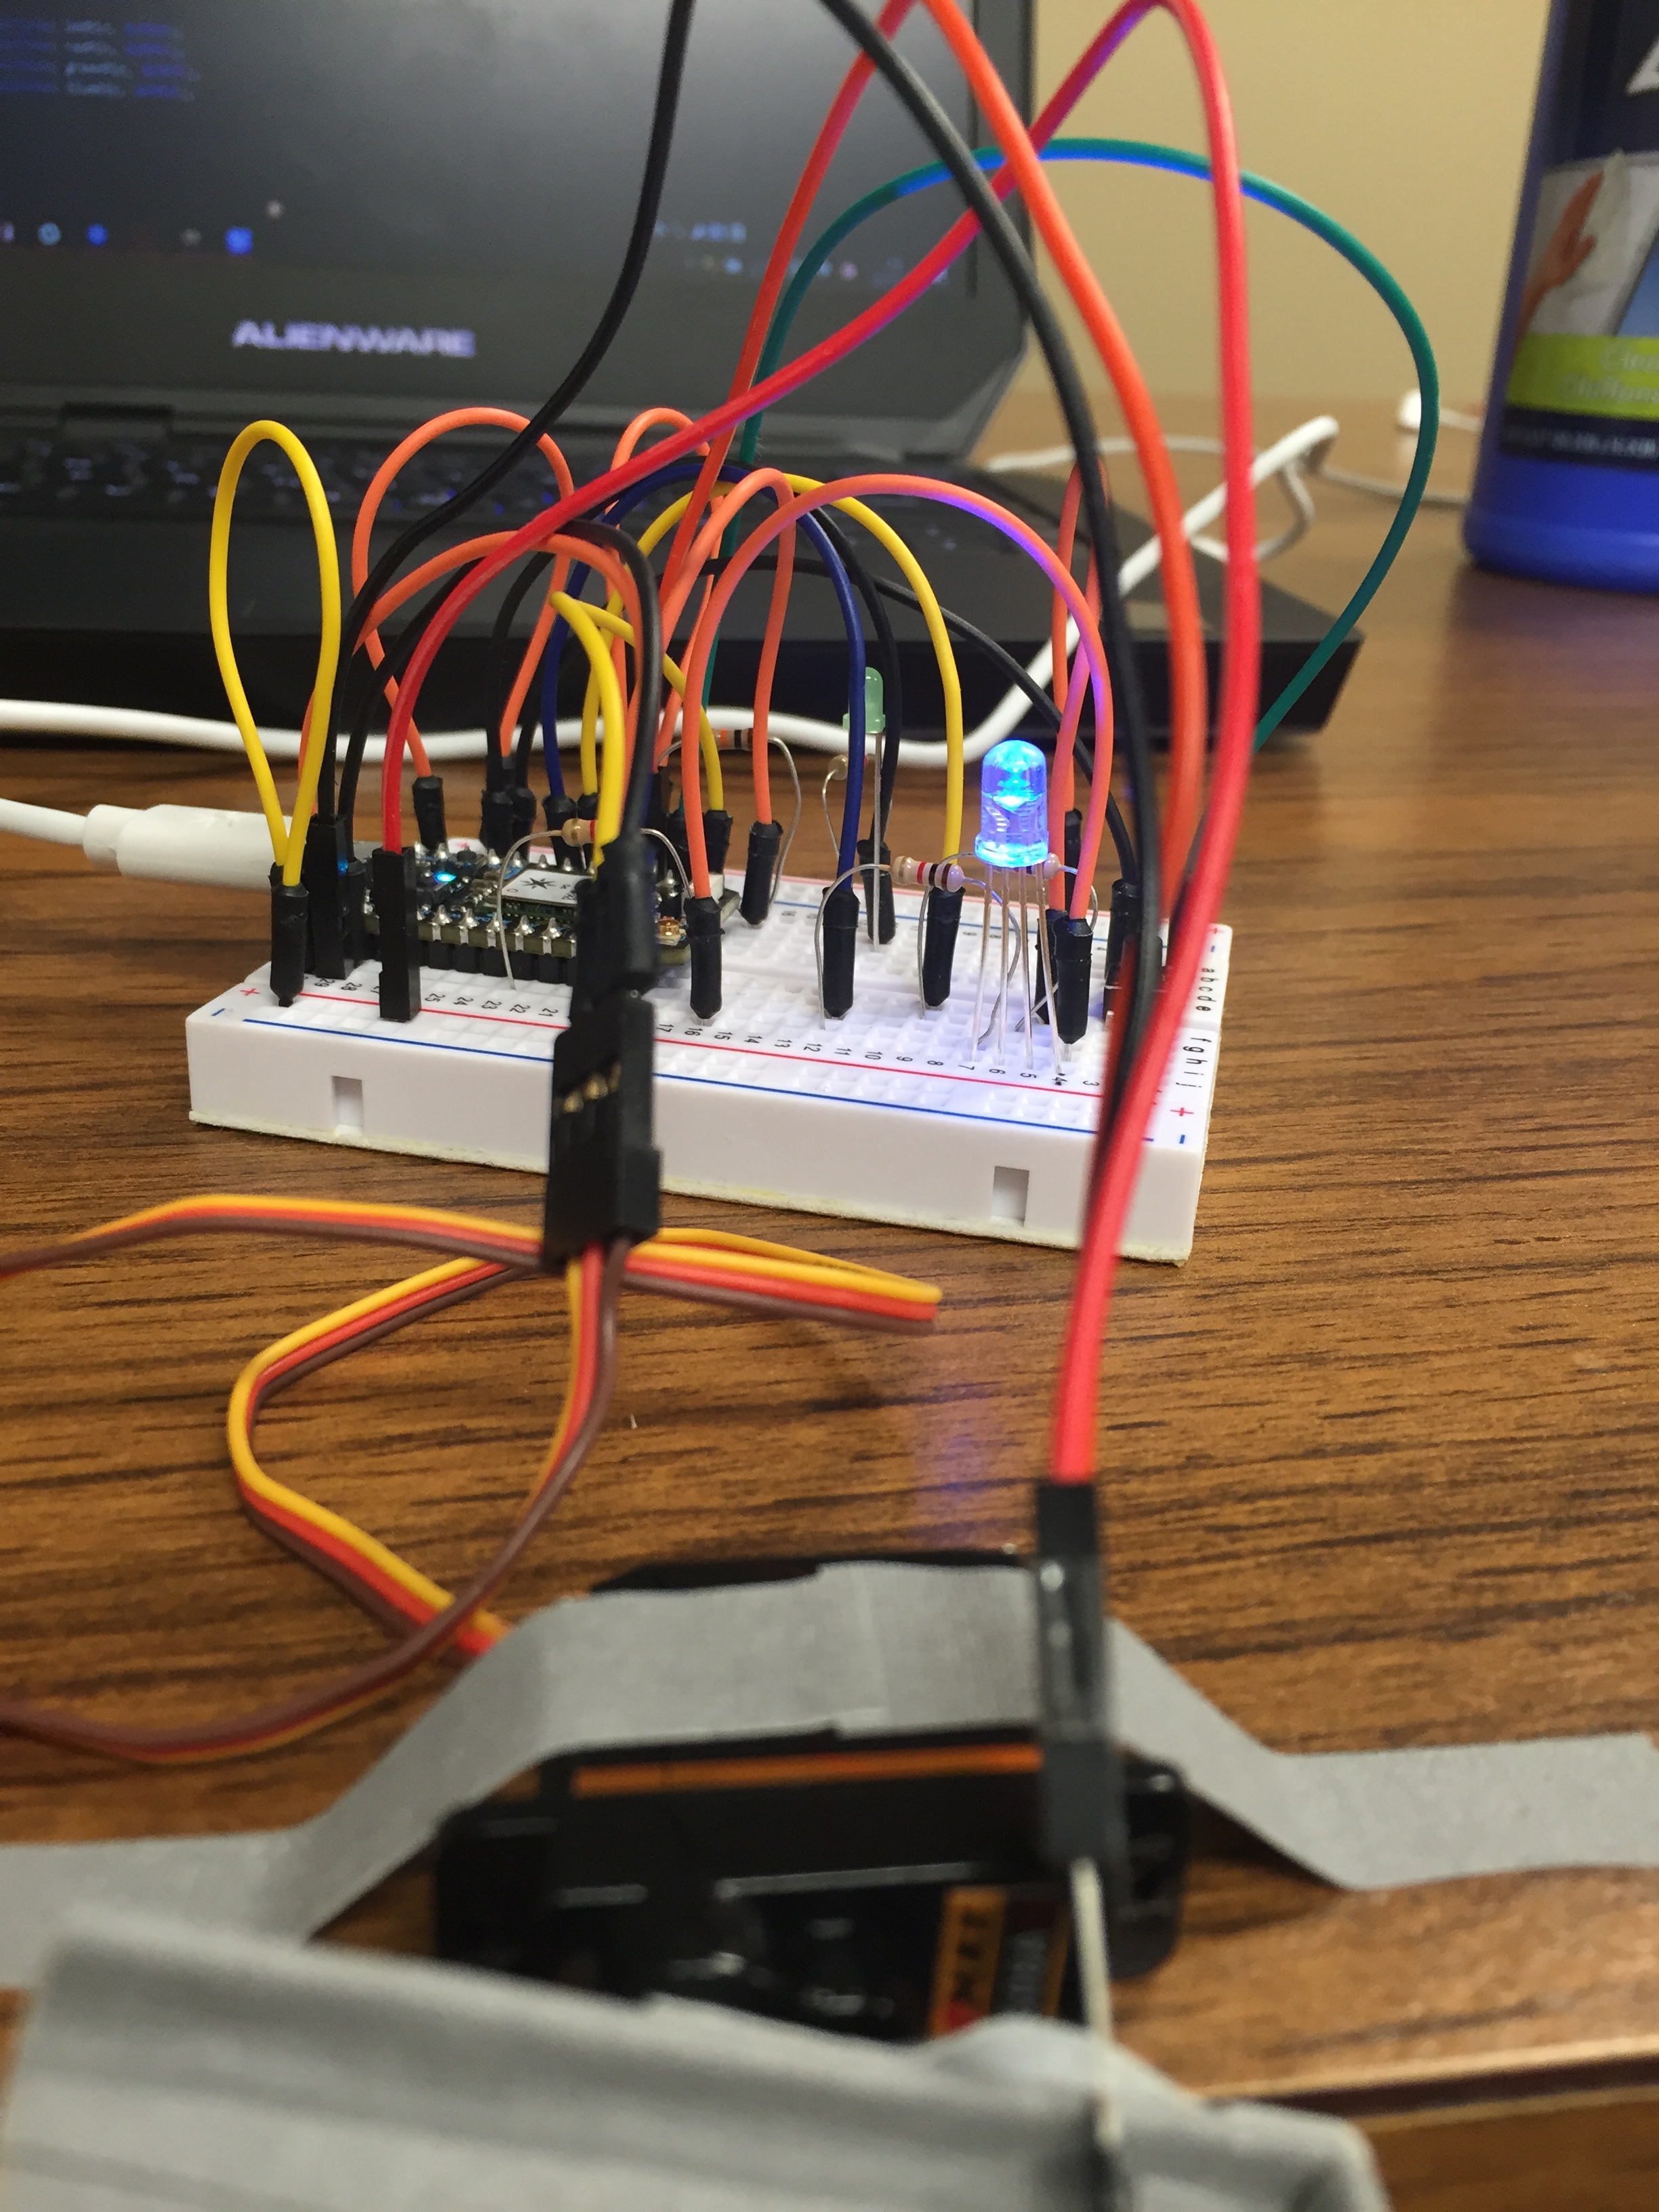
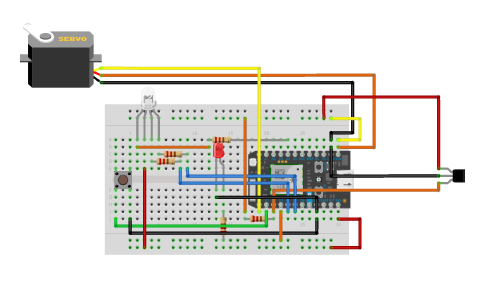
This device should count and indicate how long my hamster runs for a day. When she runs over 2 miles a day, she will receive a treat. A magnet is going to be attached to the outside of the hamster wheel, and when the wheel rotates once, a hall effect sensor will sense it and count once. Using the inner perimeter of the wheel I can calculate how many turns equals to 2 miles. An LED is also needed for indication of functioning. When she reached the goal, a servo with food will rotate and drop off food into her bowl. This will help solving the problem because the mechanism will motivate her to run more.
The biggest problem I met was to make the codes work. Every time the codes were realizing some functions but not all of them, so I have to adjust them over and over again. I also struggled to decide if I should let the system automatically reset the counter or should I manually reset it. In one version I used both but that was a mess, so I just decided to manually reset it.
The final prototype uses a hall effect sensor to sense and count the rounds the wheel turns. When the wheel turns 6726 times it's approximately 2 miles. When reached that goal (for indication the prototype will use 20 instead of 6726), the servo will turn and drop food into the cage. Before the sensor sense anything, the LED is blue. When it started to sense, it turns red until it reaches the goal, then it turns green. A button is used to reset the counts, and when reset, the LED is blue again. When servo moves, another LED whill be on to indicate its movement.
Servo myservo;// create servo object using the built-in Particle Servo Library

 int servoPin = D0;  //declare variable for servo
 int button = D1;    //declare variable for button
 int ledPin = D3;    //declare variable for led
 int redPin = A4;    // RED pin of the LED to PWM pin
 int greenPin = D4;  // GREEN pin of the LED to PWM pin
 int bluePin = D5;   // BLUE pin of the LED to PWM pin
 int count = 0;      //variable to keep track number of times the senser detects magnet
 int food = 0;

 void setup()
 {
   Particle.variable("count", &count, INT);
   //Sensor setup
   Serial.begin(19200);
   attachInterrupt(D2, magnet_detect,RISING);  //Initialize the intterrupt pin

   //Servo setup
   myservo.attach(D0);      //Initialize the servo attached to pin D0
   myservo.write(0);        //set servo to initial position
   delay(500);              //delay to give the servo time to move to its position
   myservo.detach();        //detach the servo to prevent it from jittering

   //LED setup
   pinMode( ledPin, OUTPUT);
   pinMode( redPin, OUTPUT);
   pinMode( greenPin, OUTPUT);
   pinMode( bluePin, OUTPUT);
   digitalWrite(ledPin, LOW);
   analogWrite( redPin, 255);
   digitalWrite( greenPin, 255);
   digitalWrite( bluePin, 255);
 }


 void loop()
 {
   if(count == 0){
     //RGB LED
     analogWrite( redPin, 255);
     digitalWrite( greenPin, 255);
     digitalWrite( bluePin, 0);   //turn on blue led
   }else if (count < 20){
     analogWrite( redPin, 0);   //turn on red led
     digitalWrite( greenPin, 255);
     digitalWrite( bluePin, 255);
   } else{
     //RGB LED
     analogWrite( redPin, 255);
     digitalWrite( greenPin, 0);   //turn on green led
     digitalWrite( bluePin, 255);

      if(food == 0)
      {
        // move servo
        myservo.attach(servoPin);
        myservo.write(180);
        delay(500);
        myservo.detach();

        //LED on
        digitalWrite( ledPin, HIGH);  //indicating servo move

        // reset servo
        delay(1000);
        myservo.attach(servoPin);
        myservo.write(0);
        delay(500);
        myservo.detach();
        digitalWrite( ledPin, LOW);

        food = 1;
       }
    }

   //Manually reset system
   if(digitalRead(button) == LOW) //if a button press has been detected...
    {
      count = 0;
      food = 0;
    }
 }


 void magnet_detect()//This function is called whenever a magnet/interrupt is detected
 {
   Serial.print(count);
   Serial.println("detect");
   count++;
}Before this project I barely know anything about coding, but during this project I learned a lot from not only class but also from friends and internet. If I would have done it differently I might want to try more different sensors to figure out which one is more suitable for this project. Overall, I'm quite happy about the result of the outcome and I think I've learned a lot of new things. I think I could do better if I had a chance to dig into coding.
A hands-on introductory course exploring the Internet of Things and connected product experiences.
My chubby tubby hamster does not exercise enough. This device can count and calculate how long she runs for a day. When she runs over 2 miles a day, she will receive a treat.
January 25th, 2017