49713 Designing for the Internet of Things
· 25 members
A hands-on introductory course exploring the Internet of Things and connected product experiences.
The smart curtain opens and closes automatically upon sensing light.
Imagine waking up everyday without an alarm. However, curtains open up by themselves as soon as sun rises letting light in. Also after sunset, Instead of a tedious rotation over the house curtains to close everyone, Imagine all house curtains closes by themselves at the time you want.
The idea is simply a light sensor that can send a signal to a torque motor responsible for opening and closing the curtains. Further, this should eventually be connected to an app (or another device) to control the preferred opening and closing times.
For this project's scope: It will be a light sensor that rotates the high torque motor to demonstrate and test the concept.
The goal of the this project was to create a tool or a device to help my mother shuts all our apartment's curtains easily everyday at once, instead of having to go over them one by one. Sometimes she comes late from work and wishes if she can enters our apartment and finds everything in place, windows shut and curtains closed.
Given her need to close the curtains. She said that the curtain should be shut when there in no longer light out there (almost sunset). The sunset/or a cloudy day can be monitored using a light sensor. The second part of the project's was to find something that can physically shut the curtain. My plan was to set the system that integrates an input sensor that can senses the light and an output that can control the curtain's position.
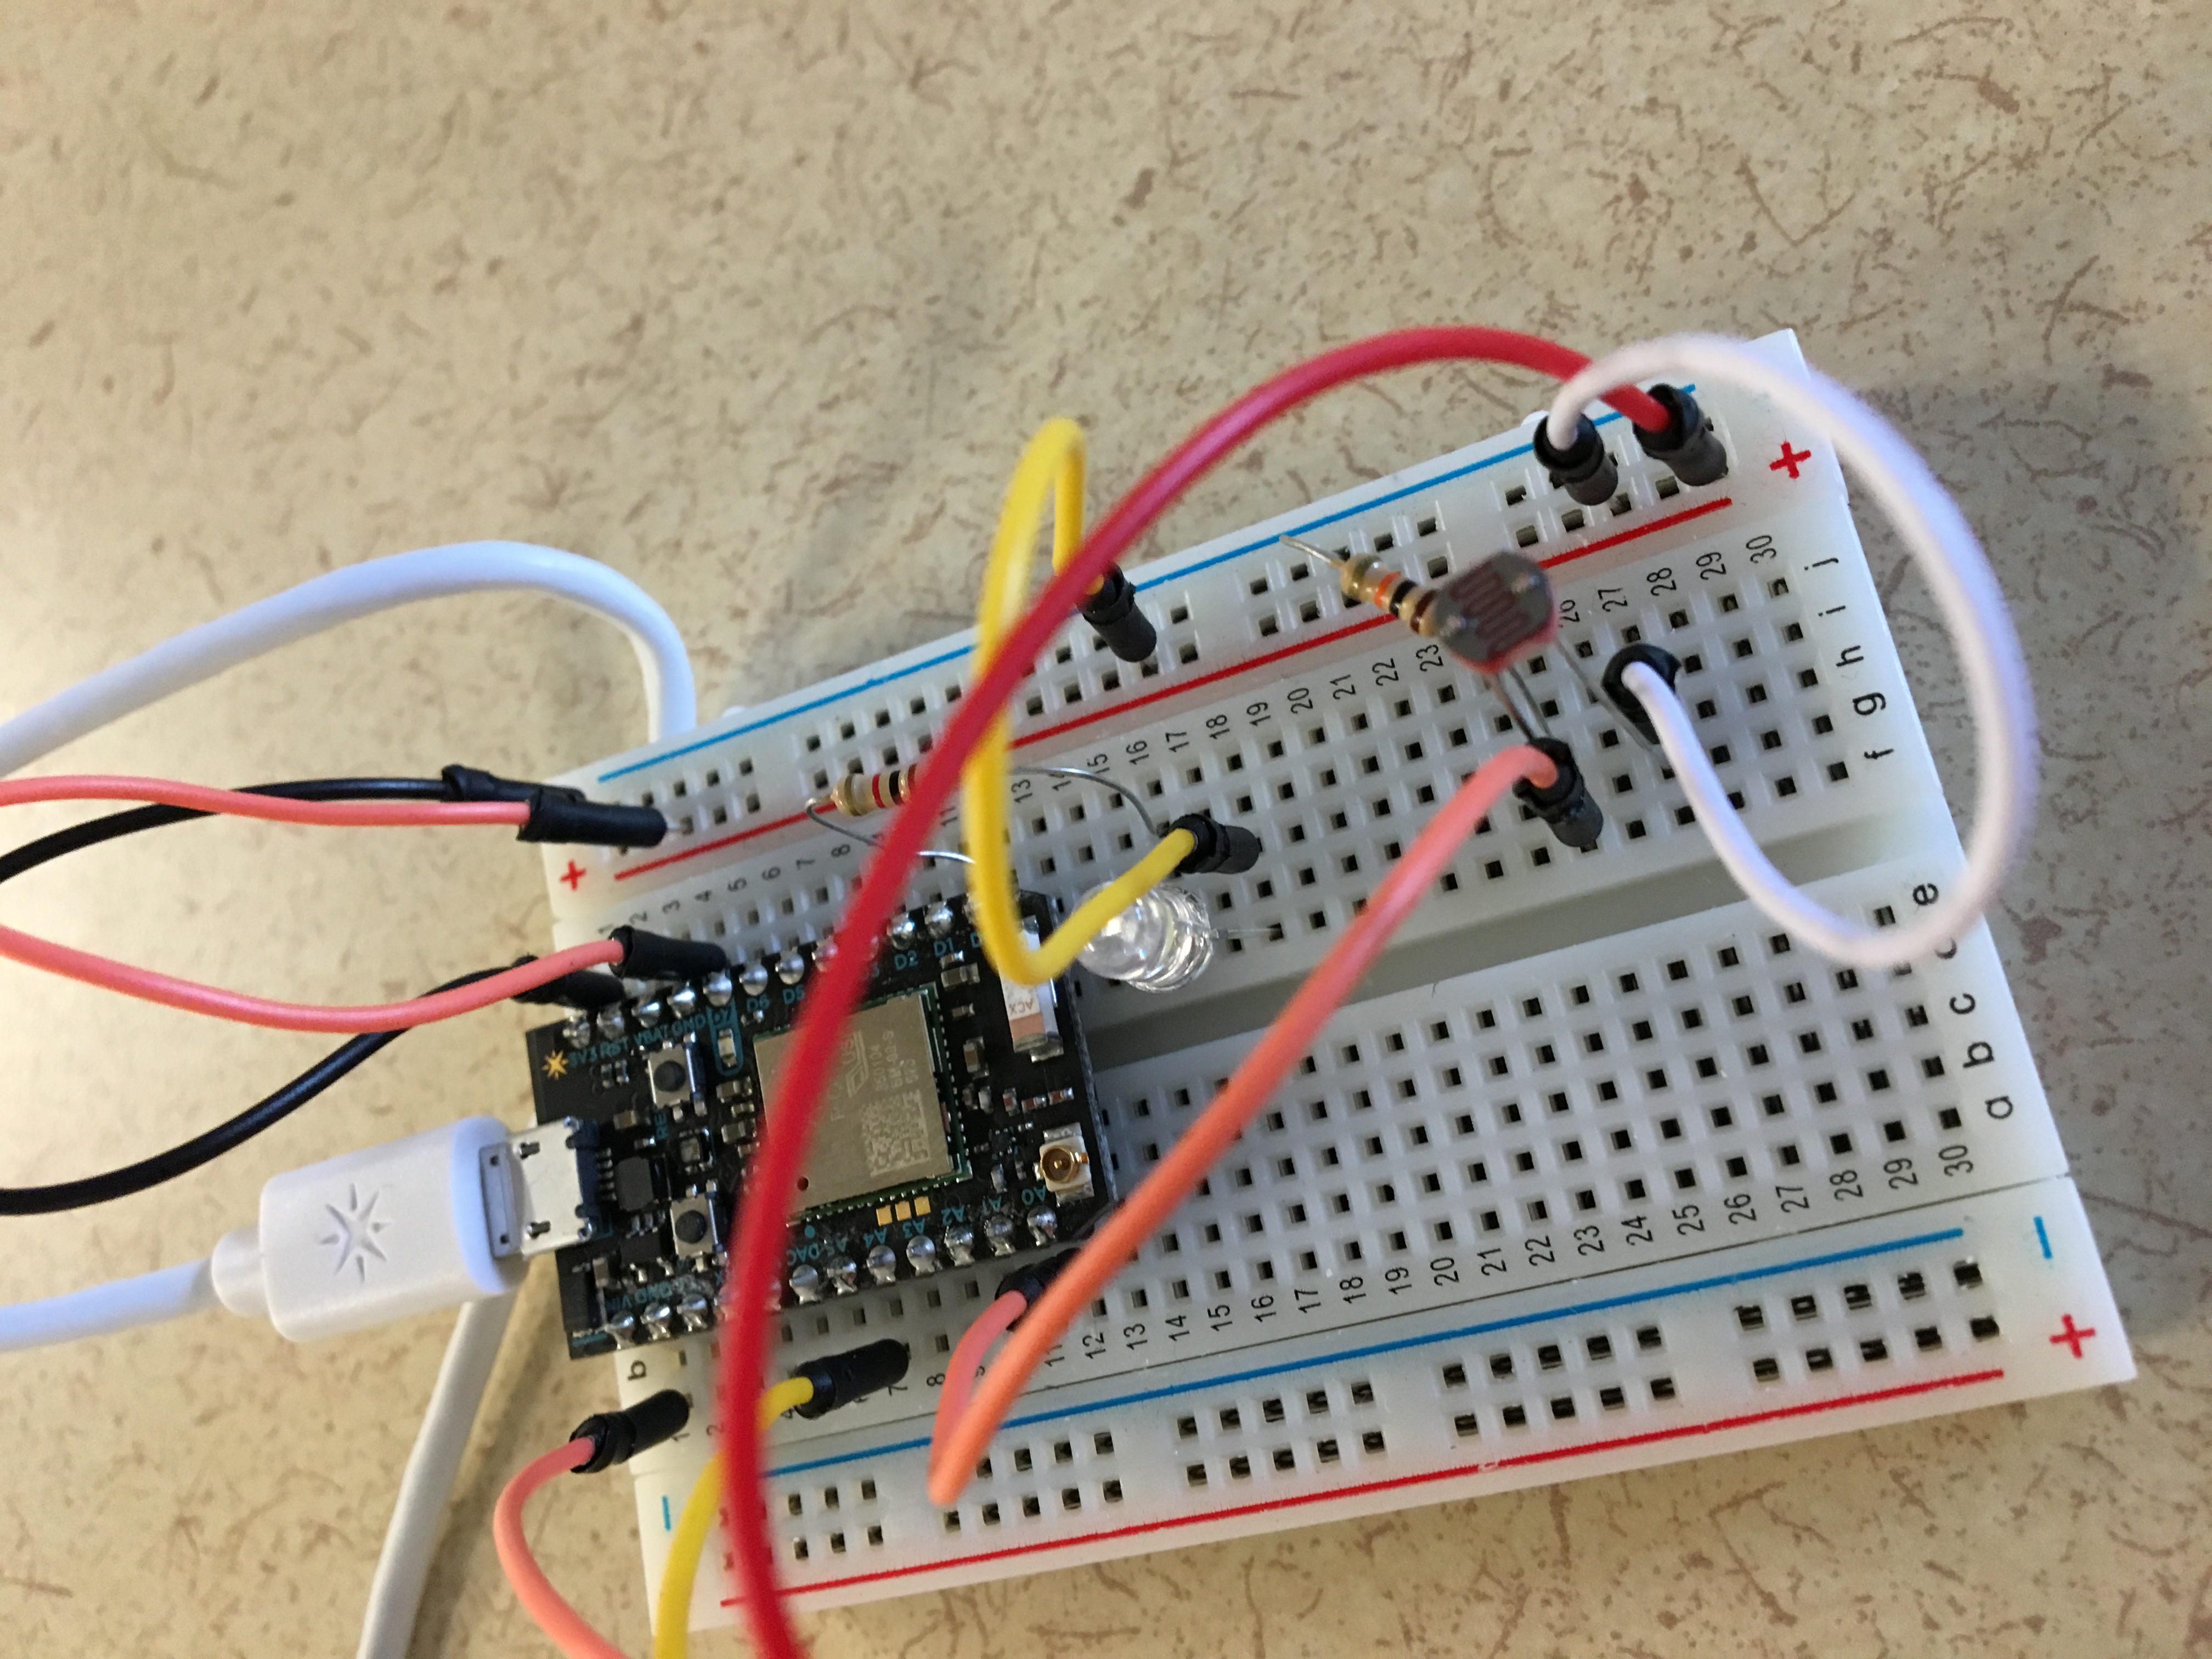
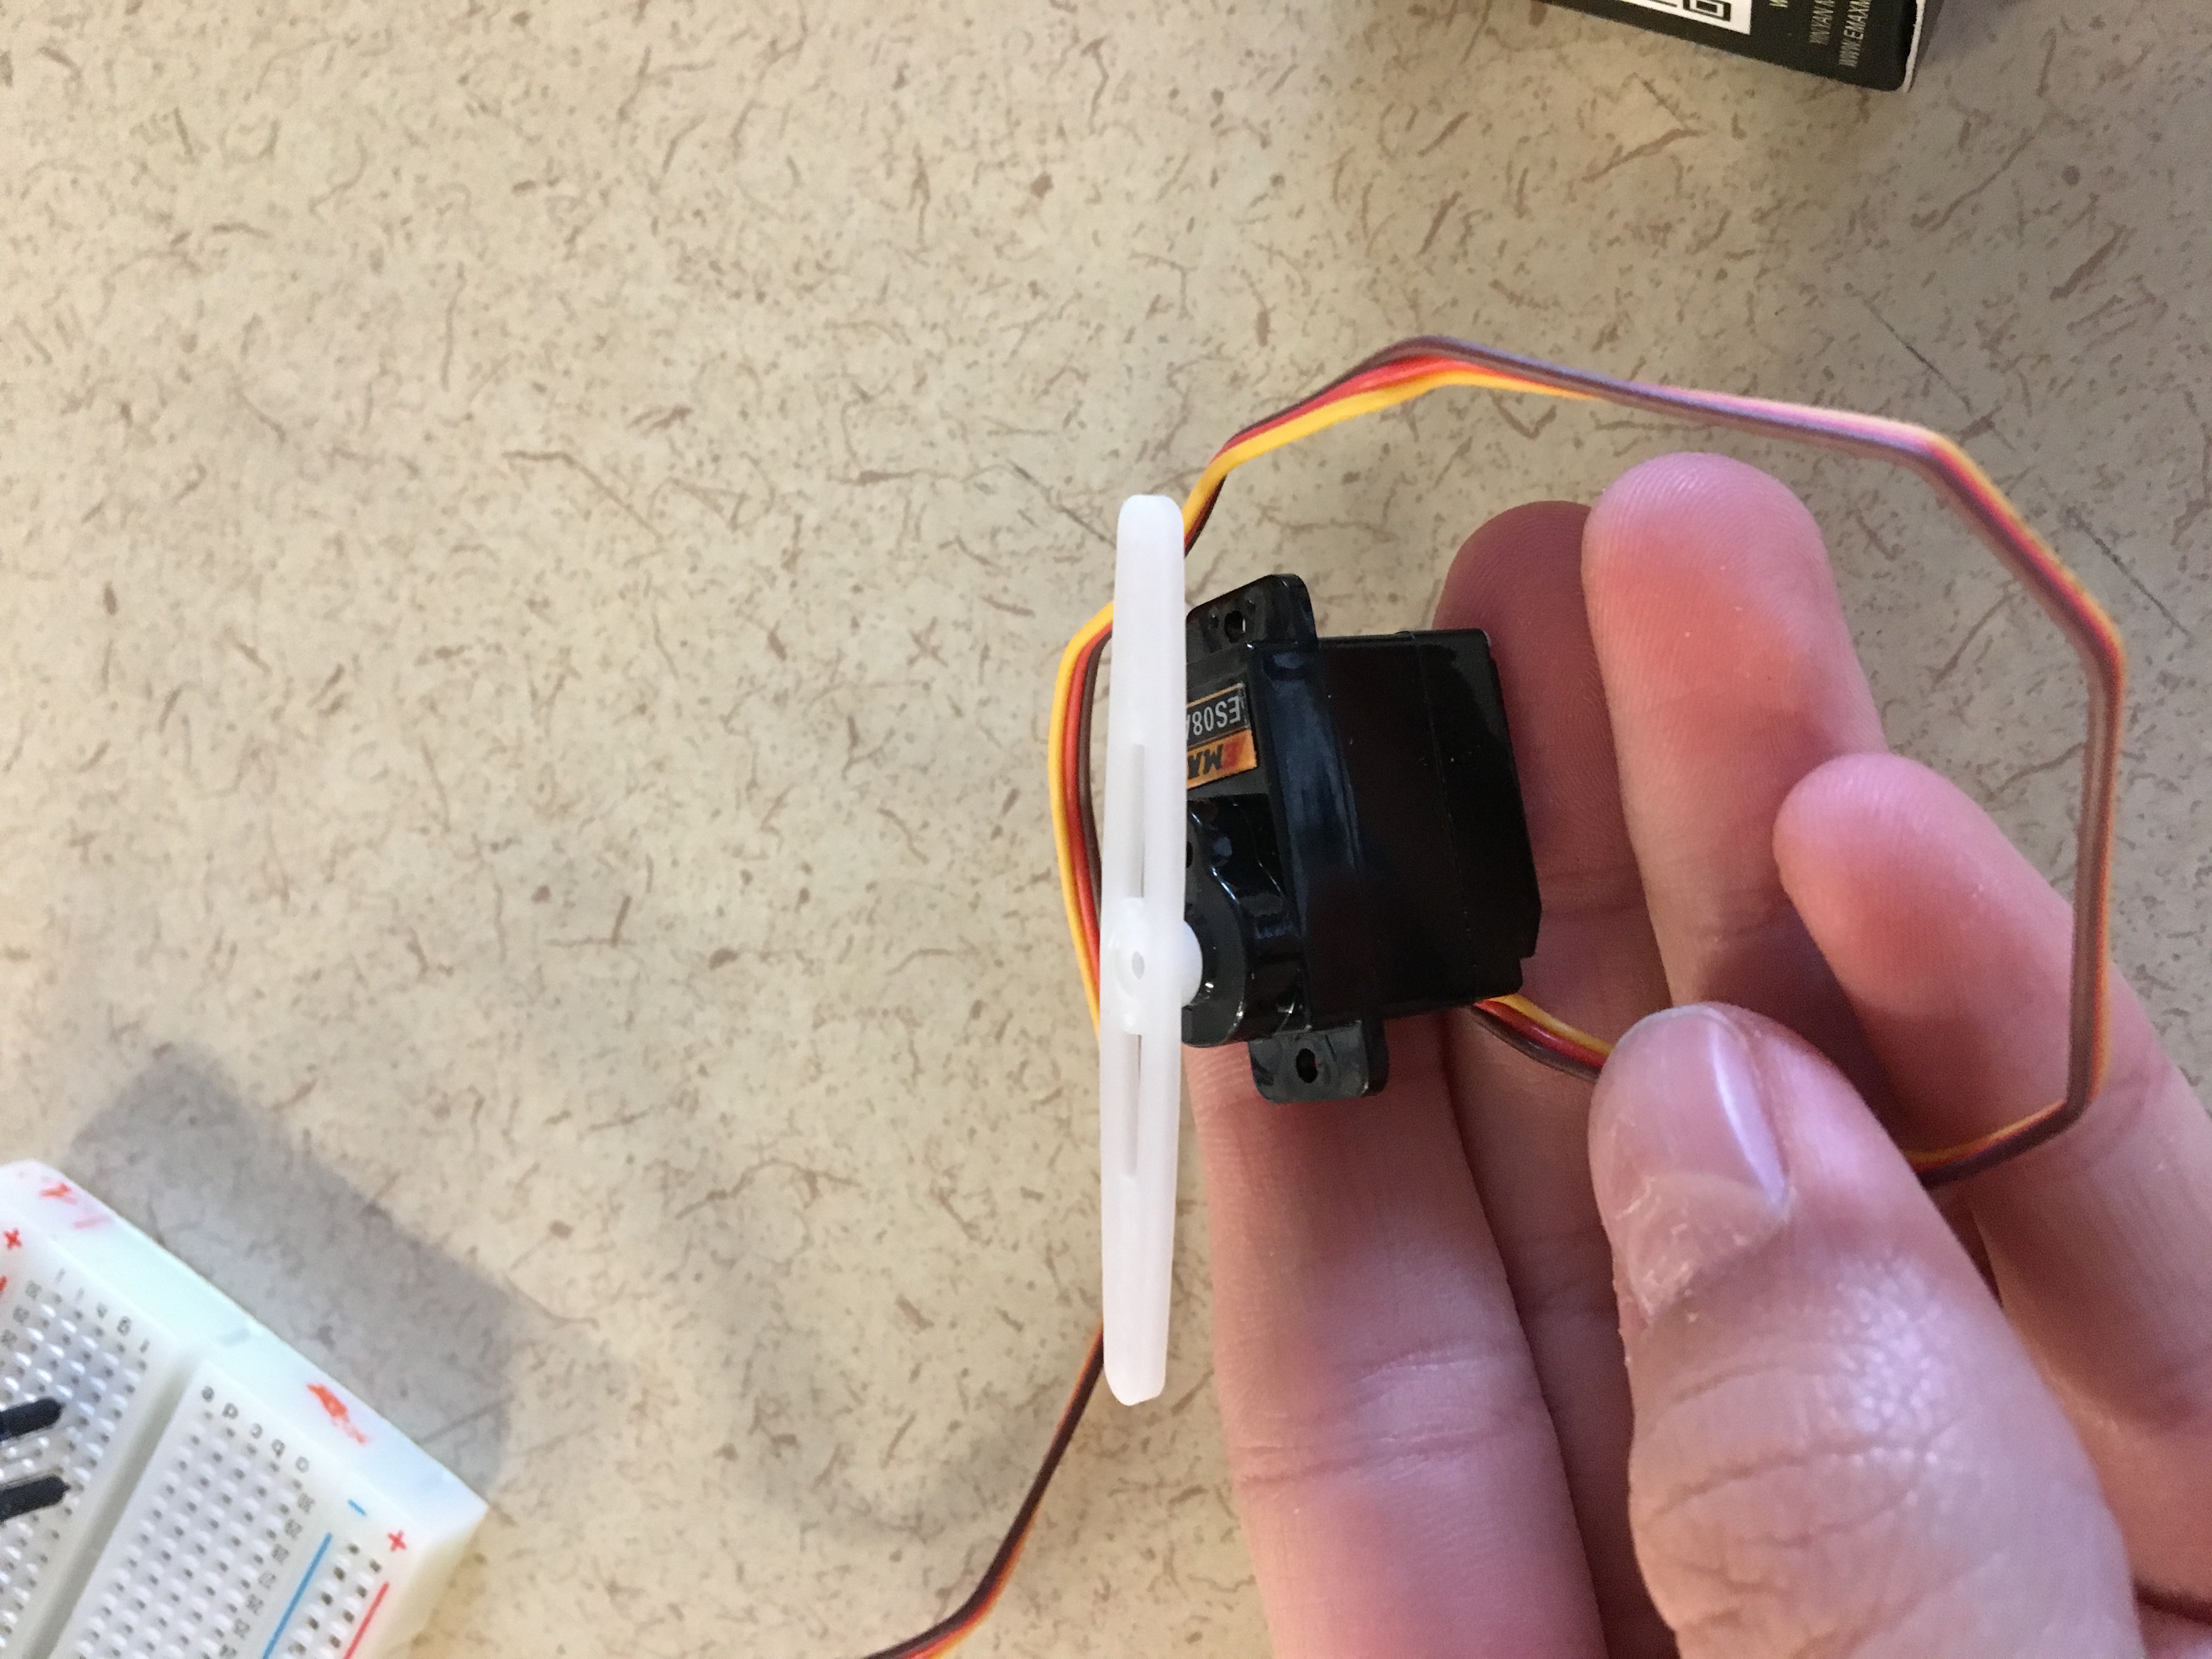
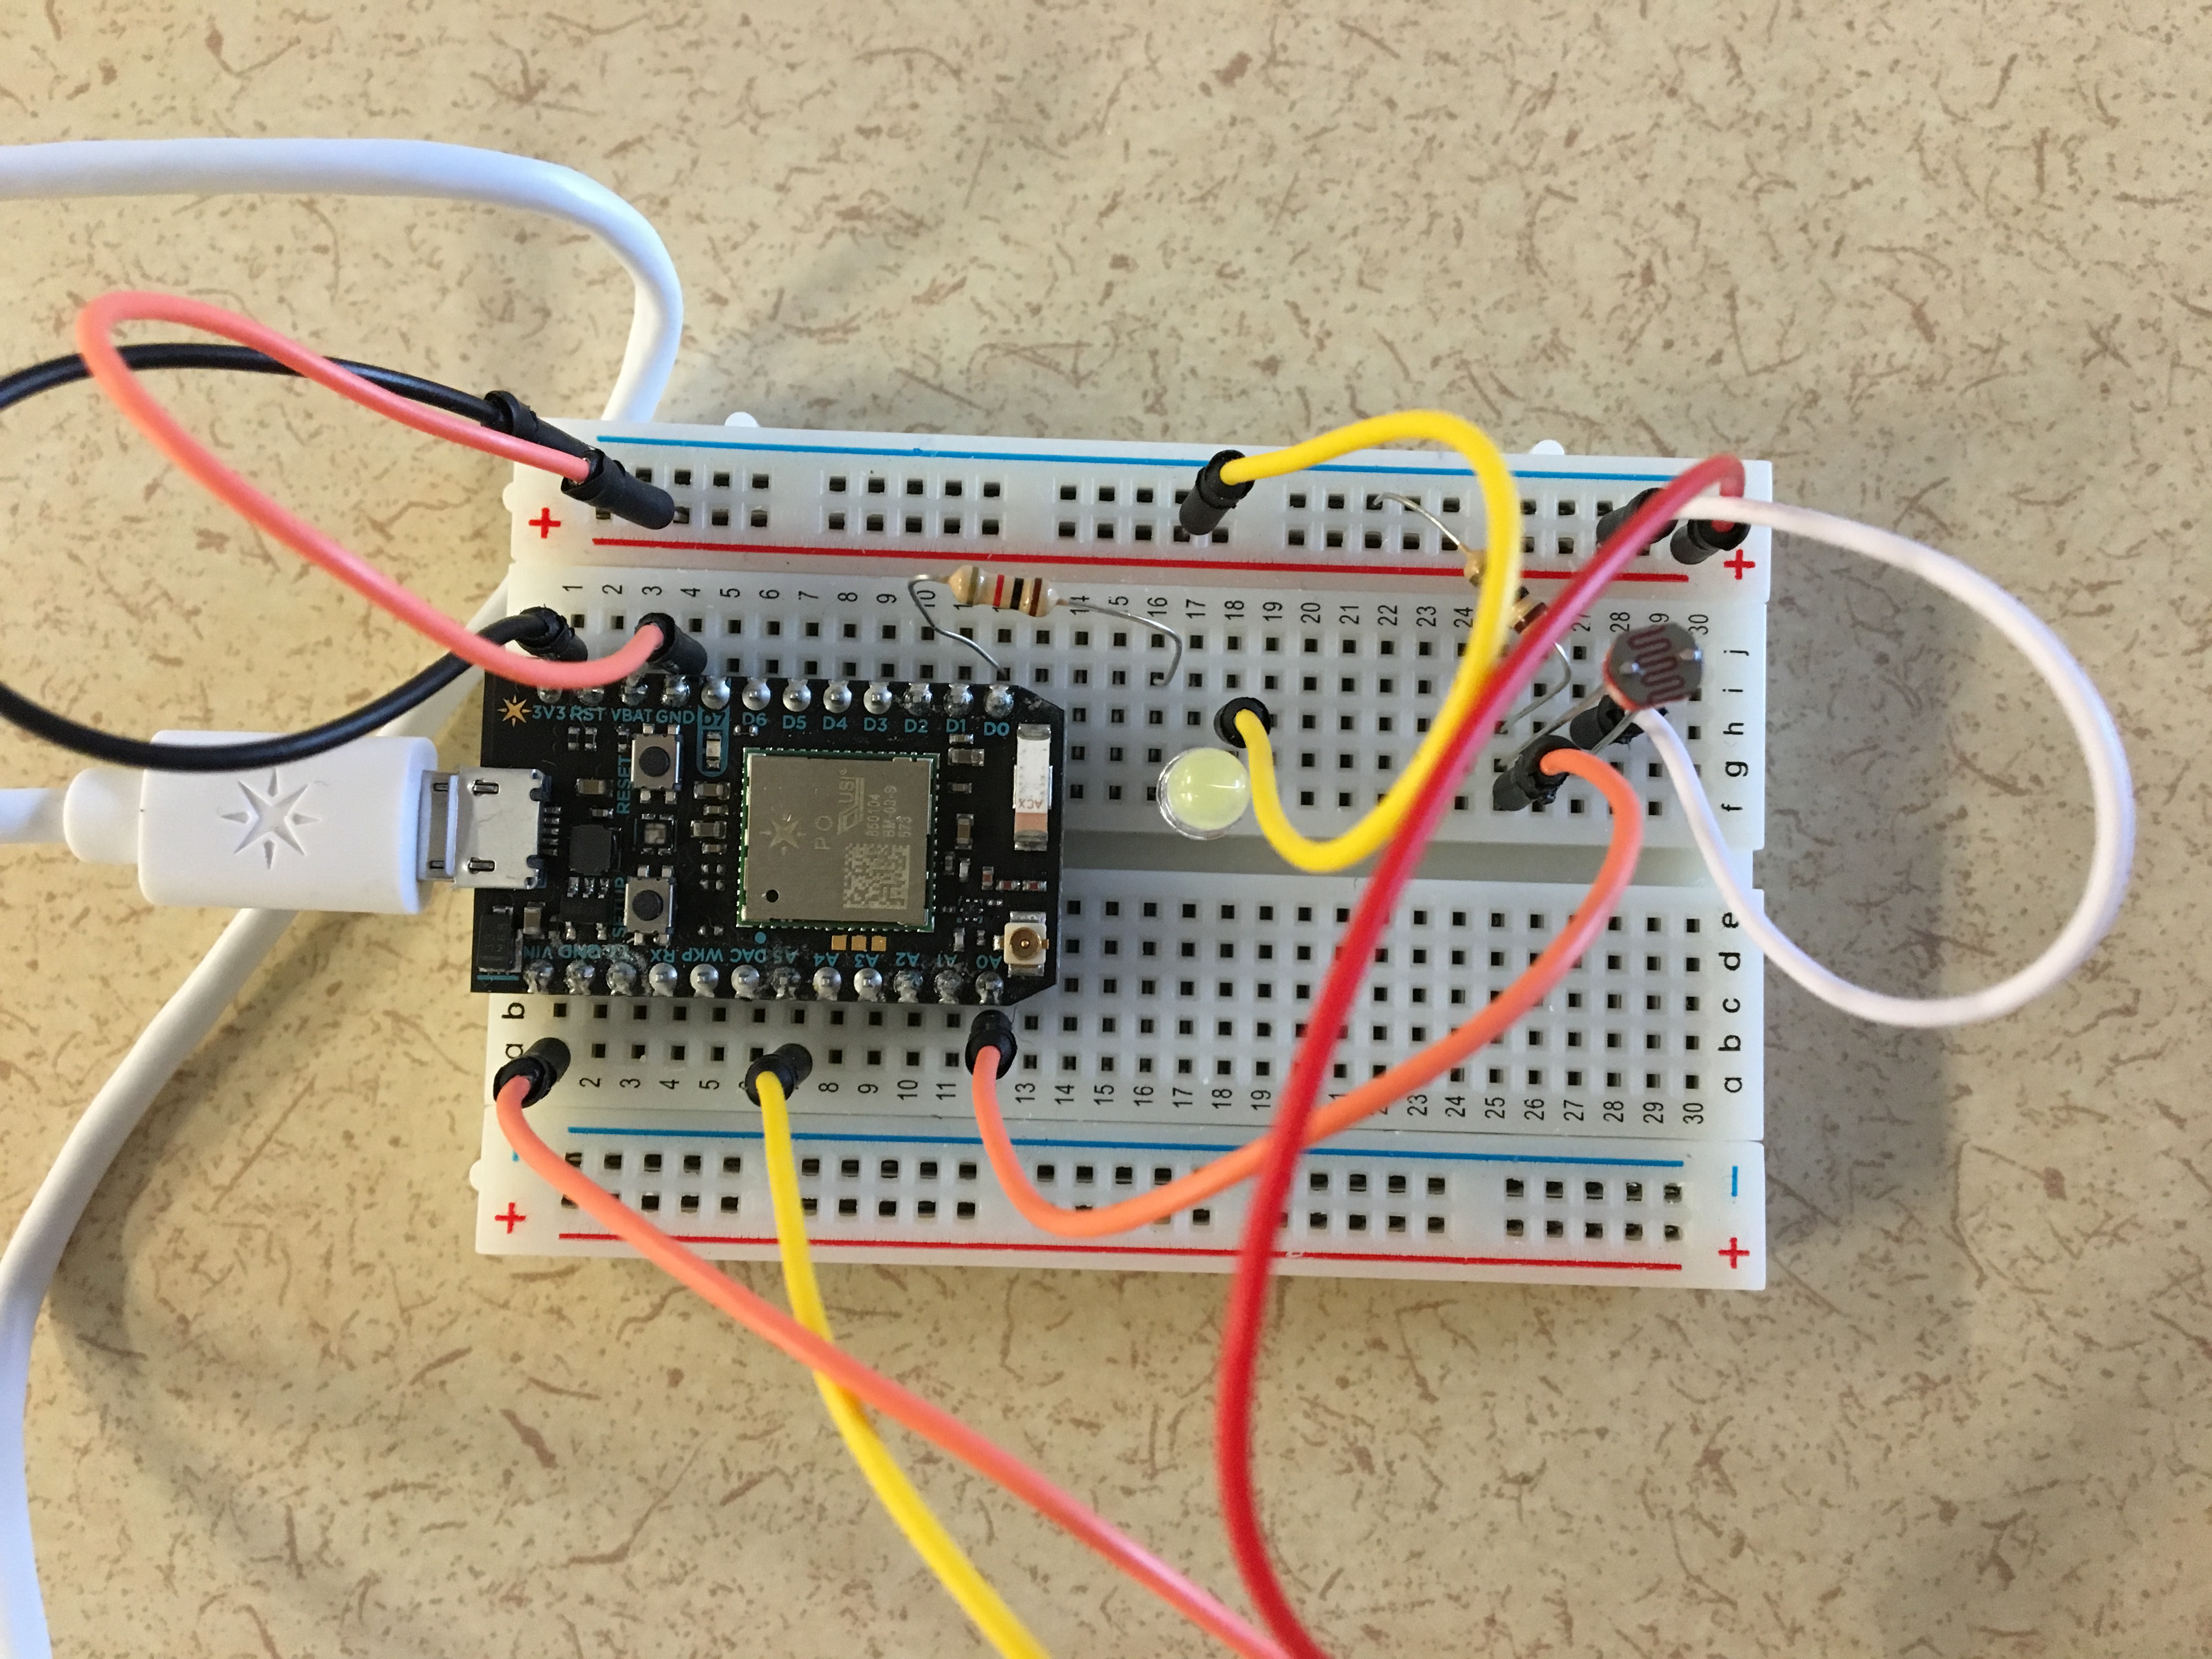
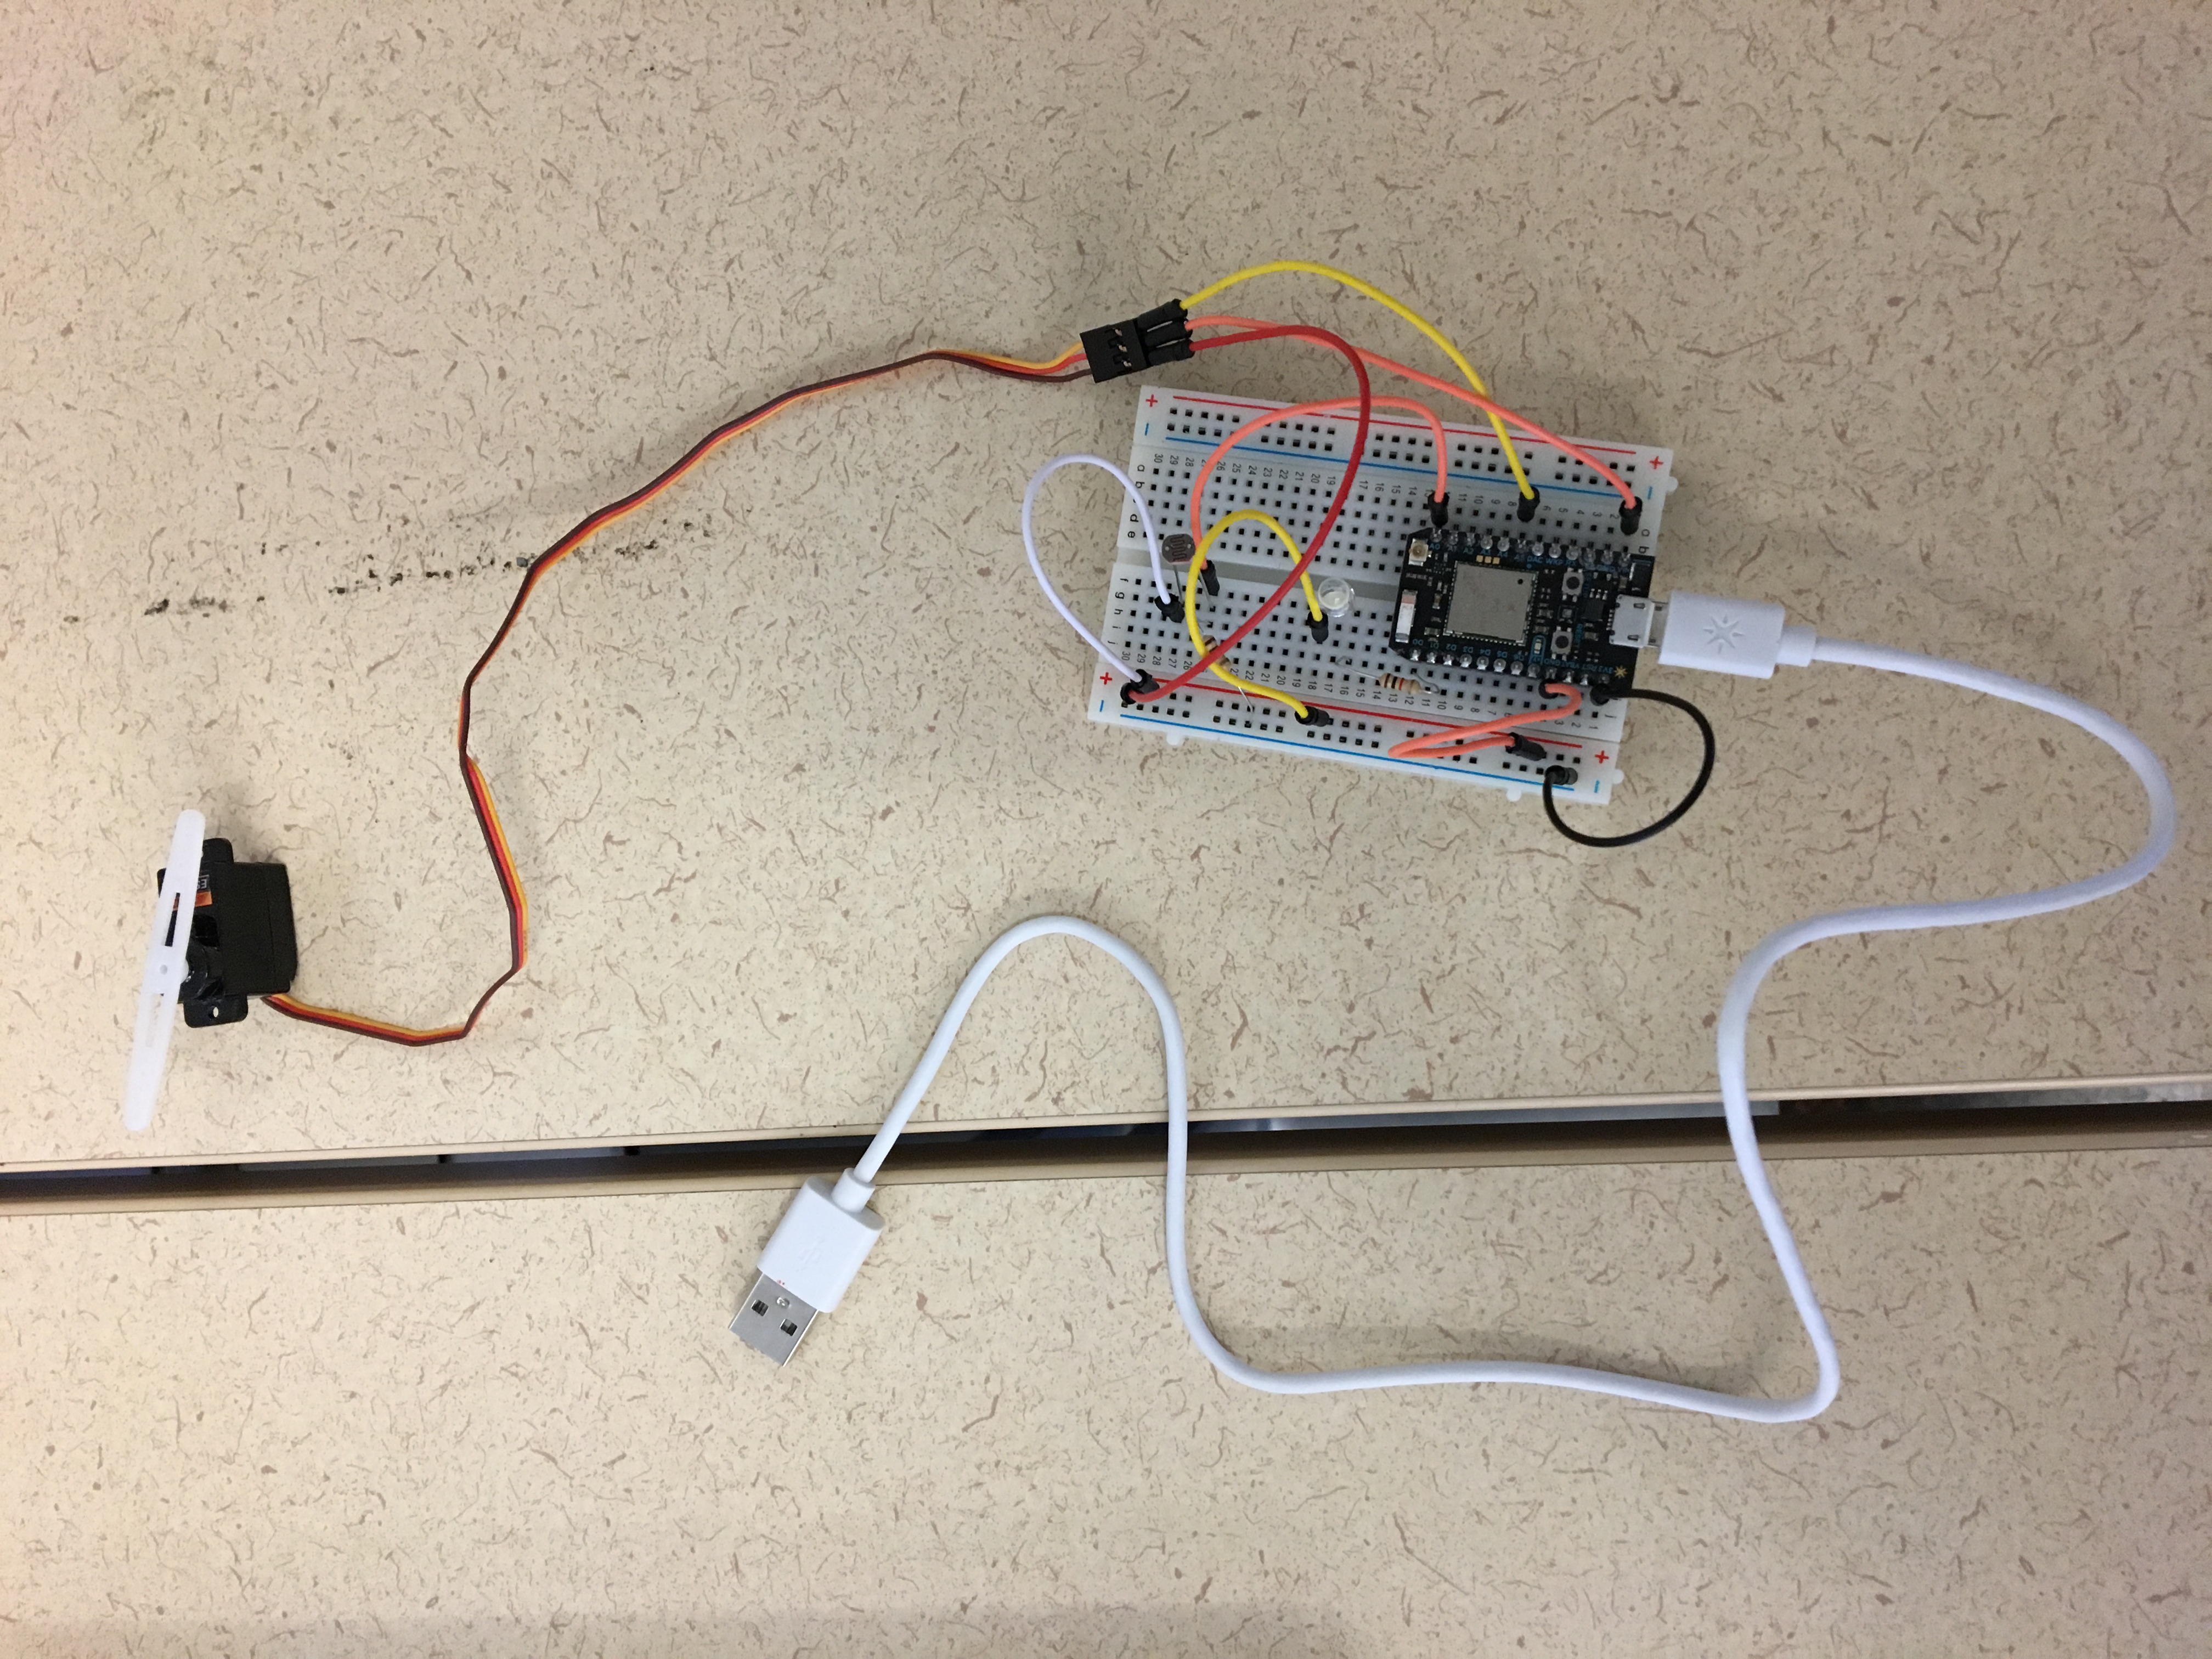
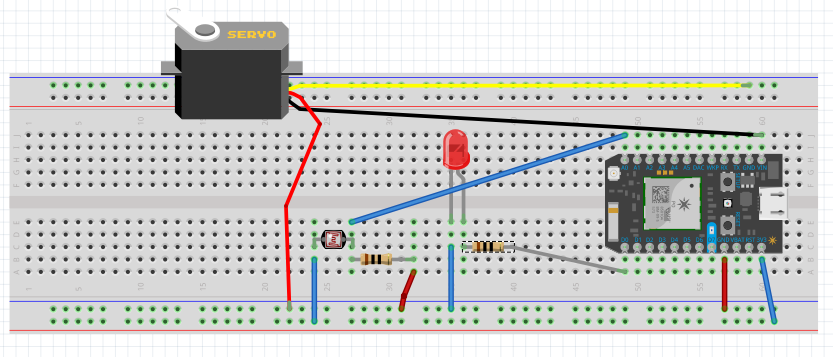
I started the process with looking into the components that I can use. For the scope of this project and given the time constraint of one week, I decided to do a prototype demonstrator version of the actual product. Everything should be pretty much similar if I'm doing the actual one. The reason is, most of the components I needed were already there in my IoT kit; The photo resistor, the lid and the servo motor.
My system is comprised of two main systems; the sensing part and the output control. Luckily, I found similar projects and examples that I was able make use of their code. Below is a sample of the code I used from our GitHub website.
Servo Code:
Photo-resistor Code:
The reason I chose the servo motor is that for this particular application we need a motor that can rotate based on angle instruction instead of continuous rotation when connected to power. I also made use of an example of a servo motor on our website.
The prototype is almost complete. Everything is working fine as shown below in the video. However, I had a little difficulty with the code, probably has to do the the servo motor I used. I wasn't able to calibrate the light reading at which the servo will rotate.
Next steps:
1) Try with a high torque DC motor with a real curtain and connect it to an external power source.
2) Try the light sensor at an actual window and calibrate the readings for the actual sun light intensity
3) Design mechanical components that will help with the actual pulling of the curtain, but this should be a simple step, it will pretty much look like the one in this sample project: https://community.particle.io/t/wi-fi-curtains-with-the-photon/15145
Parts Used:
1) Bread Board
2) Photon Particle
3) wires
4) Servo Motor
5) photo resistor
6) jumping wires
7) 10 Ohm resistors
// Define a pin that we'll place the photo cell on
// Remember to add a 10K Ohm pull-down resistor too.
int photoCellPin = A0;

// Create a variable to hold the light reading
int photoCellReading = 0;

// Define a pin we'll place an LED on
int ledPin = D0;

// Create a variable to store the LED brightness.
int ledBrightness = 0;

//Servo Variabkes
int servoPin = A5;
Servo myServo;
int servoPos = 0;


//
void setup(){

  // Set up the LED for output
  pinMode(ledPin, OUTPUT);

  // Create a cloud variable of type integer
  // called 'light' mapped to photoCellReading
  Particle.variable("light", &photoCellReading, INT);


  // attaches the servo on the A5 pin to the servo object
  myServo.attach( A5 );
  myServo.write(0); // start with servo fully clockwise (down pushup)

   //Register our Particle Core to control the servo
   Particle.function("servo", servoControl);

  // Keep a cloud variable for the current position
  Particle.variable(  "servoPos" , &servoPos , INT );


}

void loop() {

  // Use analogRead to read the photo cell reading
  // This gives us a value from 0 to 4095
  photoCellReading = analogRead(photoCellPin);

  // Map this value into the PWM range (0-255)
  // and store as the led brightness
  ledBrightness = map(photoCellReading, 0, 4095, 0, 255);

  // fade the LED to the desired brightness
  analogWrite(ledPin, ledBrightness);

  // wait 1/10th of a second and then loop
  delay(100);

// Relate the sensor reading to rotate servo
  if ( photoCellReading <= 500) {
    Particle.variable(  "servoPos" , 1 );
    delay(2000);
  }
}

// This function gets called whenever there is a matching API request
// the command string format is 0-128

int servoControl(String command)
{
    // Convert
   int newPos = command.toInt();
   // Make sure it is in the right range
   // And set the position
   servoPos = constrain( newPos, 0 , 180);

   // Set the servo
   myServo.write( servoPos );

   // done
   return 1;
}I really enjoyed working on this. Even though it is not in a completed state as I intended when I started, now I'm intrigued to know more about the code. I felt so restrained not knowing how to try and tweak my code and was dependent on whatever was there.
Second thing, The project gave me a sense of what can be done. I want to try again with more complex systems integrating more than one sensing inputs and outputs.
One thing that went really well is the research I did prior to starting. I found very similar projects to the one I wanted to do. So this will be I habit I'll try to keep for future projects.
A hands-on introductory course exploring the Internet of Things and connected product experiences.
The smart curtain opens and closes automatically upon sensing light.
January 25th, 2018