49-713 Designing for the Internet of Things
· 26 members
A hands-on introductory course exploring the Internet of Things and connected product experiences.
My little one took his first steps recently. He is on the move and into everything. Being first time parents my wife and I are still learning how to “baby-proof” our home. And although we change a lot of things, there are still certain areas, like where the TV plugs to the wall, that can be a little precarious. I plan to create a baby sensor to be placed in one of these troublesome spots that will notify my wife when she is just out of range to catch him herself.
My little one took his first steps recently. He is on the move and into everything. Being first time parents my wife and I are still learning how to “baby-proof” our home. And although we change a lot of things, there are still certain areas, like where the TV plugs to the wall, that can be a little precarious. I plan to create a baby sensor to be placed in one of these troublesome spots that will notify my wife when she is just out of range to catch him herself.
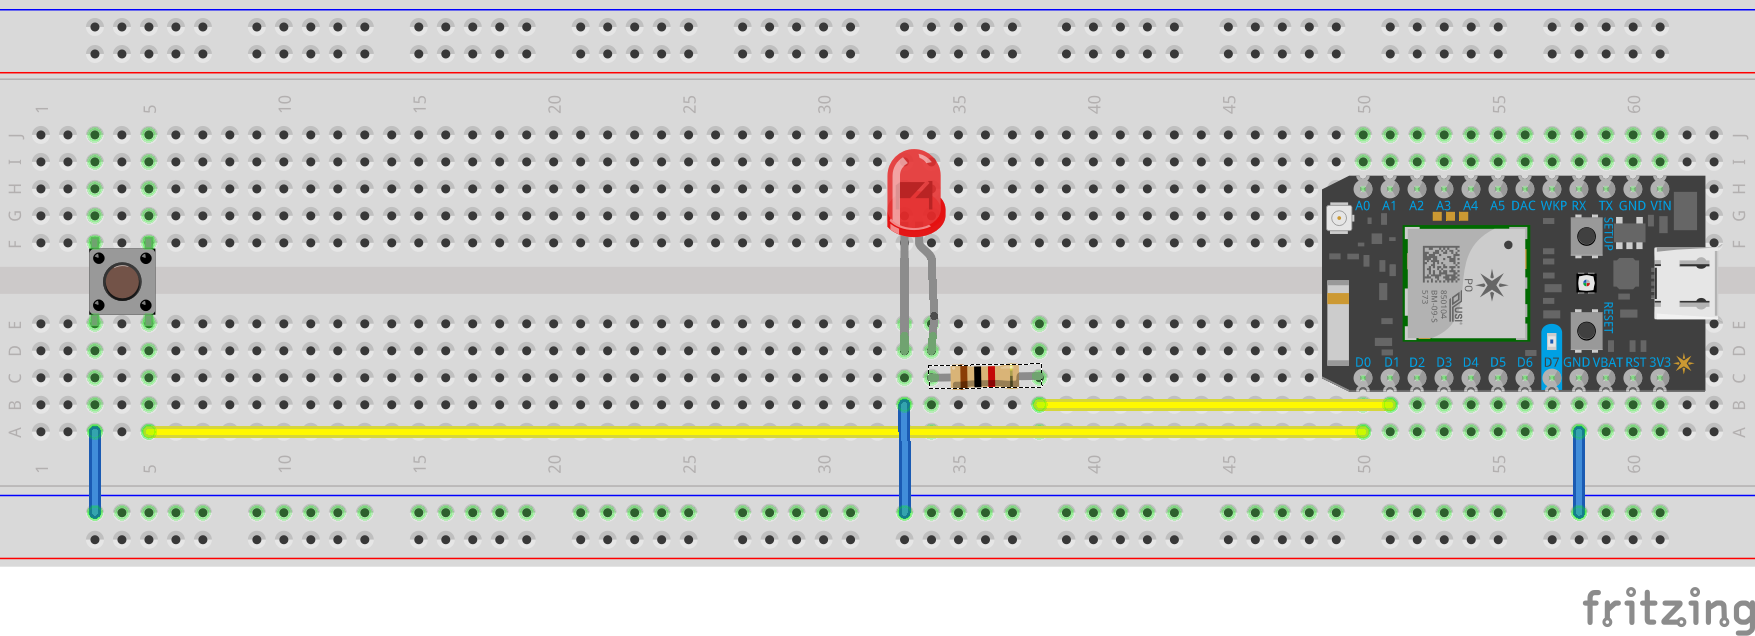
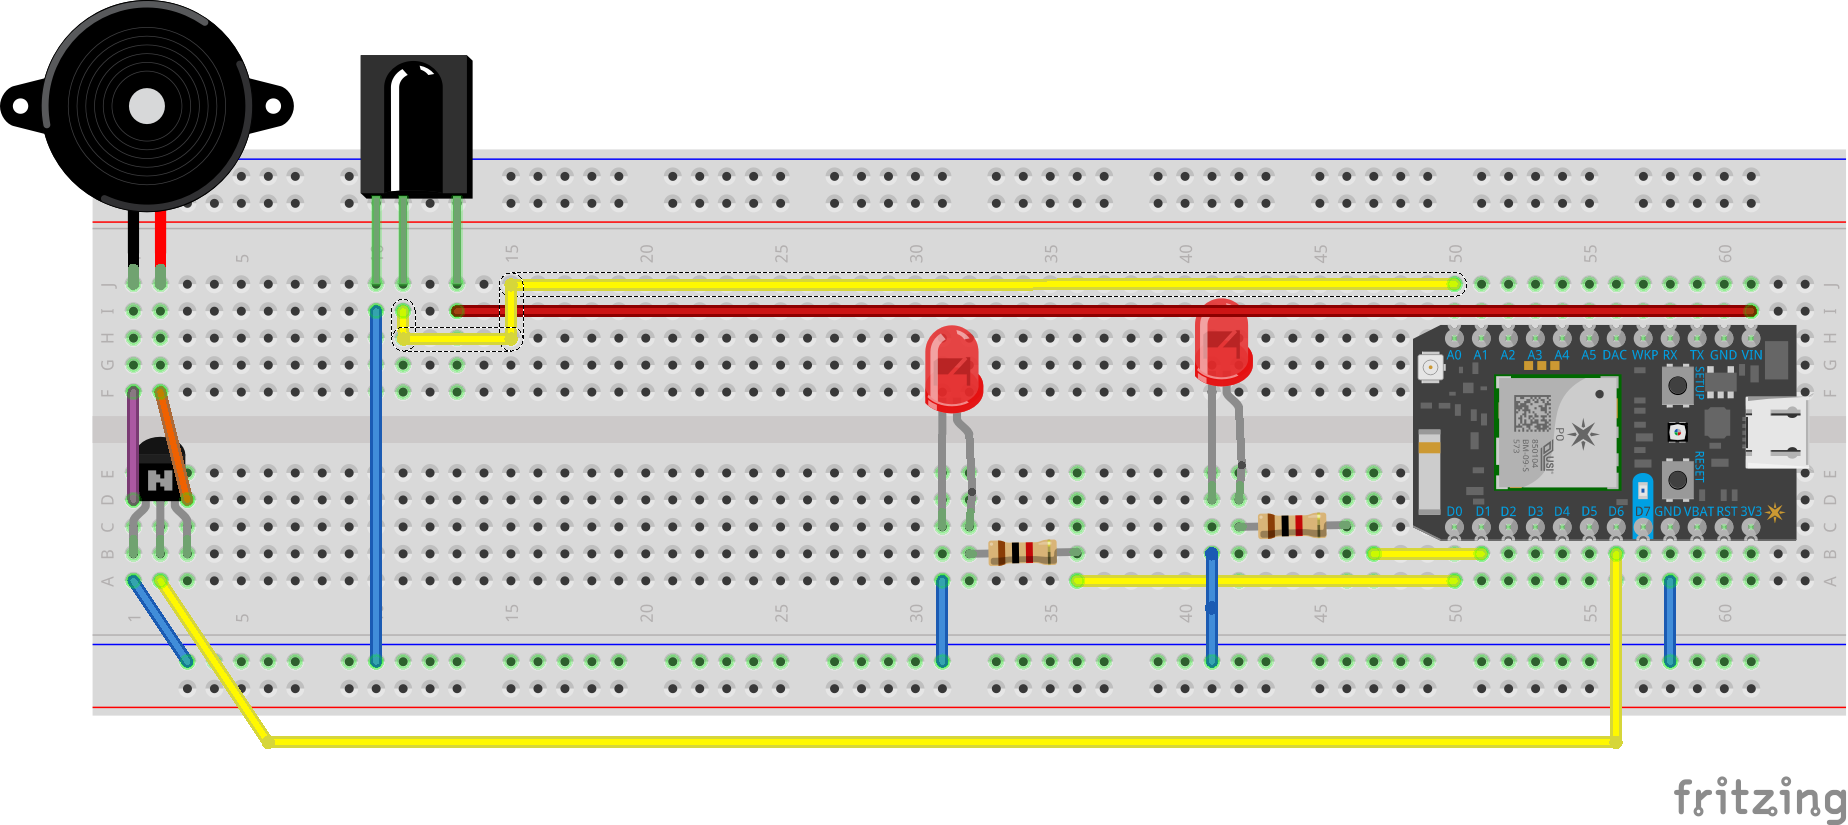
The Product is a PIR sensor that is positioned to sense when a baby is near something dangerous. The sensor turns on an LED when motion is sensed and then publishes an event. While the event is being published a second LED blinks to indicate publishing. This event turns on an LED on another particle that is located near the babies parent to notify them there is a dangerous situation brewing. The mother can than make a decision to push a button to turn on an alarm (piezo buzzer that is located on the sensor photon) that is intended to surprise and freeze the baby while the parent has time to reach the child and remove them from danger. This button press triggers another event that causes the buzzer to chirp at the baby. I hope you enjoy the product, please see it demonstrated in the video below.
People make motion sensors all the time so there was a lot of information on how to set on up. I found the wiring for both the piezo and the PIR sensor from the link below where a guy set up an alarm for his dog to stop drinking from the toilet. I used his code as a guy as to how to put this together.
https://particle.hackster.io/31043/toilet-water-protector-119a4d?ref=search&ref_id=pir&offset=4
Key to success of this process was the being able to communicate between photons through the particle cloud. This is example was used write the code that allows the photons to talk through events.
The buttons and led I was able to set up from past experience with Arduino.
Outline your approach to the project? What ideas did you generate and how did you refine or reject them? What did you research and explore? what were the design choices? What challenges were encountered and how did you resolve them?
My approach was to create the two fundamental functions of the device separately then meshed them together. The first was to get one photon to sense motion. The second was to get two photons to communicate.
First, the PIR sensor was connected and check to ensure sensing. Because the example above had basically done this, I used what the toilet dog guy did exactly. Here I found how annoying the buzzer was and quickly unplugged it. Then I added a serial communication to the code to add a feedback mechanism for understanding the output of the sensor. And set the threshold in my if statement for what detected motion was. I also had to do some searching to figure out how to make the motion sensor less sensitive. One knob on the PIR is for delay and the other for sensitivity, I found that I had to turn both to get close to the desired sensing, although I never really reached it. In the future I think I'd like to combined sensors to get a more sensitive read on when my baby's presents is being sensed.
Second, the communication between the photons was tested in what I will call a separate sandbox. I wired an LED to each photon and programmed a quick "light show" (series of blinks). I then published and event when the sequence is done, to get the other photon to begin their "light show". I doing this I found my second photon (purchased just the other day) blinking red with and overwhelmed memory error (13 blinks between SOS's). I did some research to try to find people with similar problems, but ended up just trying to understand the error code and tried to code my way around publishing too often. This brought to life the design choice to incorporate and indicator light that would both provide feedback as I was trouble shooting, as well as providing a meaningful delay in my ecosystem. After do this I was able to achieve the desired result.
Finally, I integrated the two functions. This included jumping back an forth from each set of code and working my way through the interaction that would transpire as I planned them to transpire. And commenting out the buzzer until the very end. Positioning the the devices was not trivial. Something that will definitely receive more consideration next time.
//Mom (photon)

int ledPin;
int blink_delay;
int reps;
int alarm_pin = D6;
int buzzer_delay = 45;
int buzzer_times = 7;
int led_sense=D1;
int motion_pin=A0;
int motion_state = -1;
int motion_threshold = 2000;
bool motion_event = FALSE;
int count = 0;


//happens once
//what pins we want to act on
//read/write- pinMode(pin,mode)
void setup()
{
  pinMode( ledPin, OUTPUT);
  pinMode( led_sense, OUTPUT);
  pinMode( motion_pin, INPUT);
  pinMode(alarm_pin, OUTPUT);
  Particle.subscribe("bz/button", buzzer_alarm_cmd);
  /*Particle.function("bz/button_func",buttonToggle);*/

  Serial.begin(9600);

}

void loop()
{
  motion_state = analogRead(motion_pin);
  if (count < 11)
  {
    if (motion_state > motion_threshold)
      {
        digitalWrite(D0 , HIGH);
        Particle.publish("bz/motion_detect_on", "on");
        blinking(D1,100,10);

        if (motion_event == FALSE)
          /*buzzer_alarm(12);*/

        motion_event = TRUE;
        count = count+1;
      }
    else
      {
        digitalWrite(D0, LOW);
        if (count > 0)
          count = count-1;
        if (motion_event==TRUE)
          {
            Particle.publish("bz/motion_detect_off", "off");
            blinking(D1,200,5);
          }
        else{}
        motion_event = FALSE;
        delay(500);
      }
  }
  else
  {
    delay(30000);
    count = 0;
  }

  Serial.print("motion value ");
  Serial.println( motion_state );
  delay(250);


}

//Functions That Make Life Easier

int blinking(int ledPin, int blink_delay, int reps)
{
  pinMode( ledPin, OUTPUT);
  for (int i =1; i <= reps; i++)
  {
    digitalWrite( ledPin, HIGH);
    delay(blink_delay);
    digitalWrite( ledPin, LOW);
    delay(blink_delay);
  }

  return 1;
}

void buzzer_alarm(int buzzer_times)
{
  for (int i =1; i <= buzzer_times; i++)
  {
    digitalWrite( alarm_pin, HIGH);
    delay(buzzer_delay);
    digitalWrite( alarm_pin, LOW);
    delay(buzzer_delay);
  }


}

void buzzer_alarm_cmd(const char *event, const char *data)
{
  buzzer_alarm(30);
  delay(1000);

}

int buttonToggle(String command)
{

    if (command=="on") {
        buzzer_alarm(8);
        return 1;
    }
    else if (command=="off") {
        digitalWrite(alarm_pin,LOW);
        return 0;
    }
    else {
        return -1;
    }

}//Baby Photon
int ledPin = 0;
int button_pin = D1;
int blink_delay;
int reps;
int buttonPin = D1;
int button_pressed = 0;
void setup ()
{
pinMode(ledPin, OUTPUT);
pinMode(button_pin, INPUT_PULLUP);
pinMode(D7, OUTPUT);
Particle.subscribe("bz/motion_detect_on", alarm_light_on);
Particle.subscribe("bz/motion_detect_off", alarm_light_off);
/*Particle.variable("button_pressed", &button_pressed, INT);*/
/*digitalWrite(D7, HIGH);*/
}
void loop()
{
int buttonState = digitalRead( buttonPin );
if( buttonState == LOW )
{
// turn the alarm On
if ( button_pressed ==0)
Particle.publish("bz/button","push");
int button_pressed = 1;
}else{
// otherwise
// turn the LED Off
digitalWrite( ledPin, LOW);
button_pressed = 0;
}
}
int blinking(int ledPin, int blink_delay, int reps)
{
pinMode( ledPin, OUTPUT);
for (int i =1; i <= reps; i++)
{
digitalWrite( ledPin, HIGH);
delay(blink_delay);
digitalWrite( ledPin, LOW);
delay(blink_delay);
}
return 1;
}
void alarm_light_on(const char *event, const char *data)
{
digitalWrite(ledPin, HIGH);
delay(5000);
}
void alarm_light_off(const char *event, const char *data)
{
digitalWrite(ledPin, LOW);
delay(50);
}The process of making this was very fun! Almost too fun. I really feel like the more I make and hackup, the more curious and excited I become. What starts as a simple idea just seems to grow in complexity as I want to push the boundaries of what the technology is capable of. For example, when first conceptualized I only planned on using one photon... but after start to build I quickly got online and ordered another.
Some challenges that I encountered were: 1) sensitivity of the sensor, 2) being annoyed by the buzzer, and 3) using events to communicate between two photons. It took me a while to get the PIR sensor to the right sensitivity by turning the knobs of the sensor. The buzzer really needs to stay unplugged until the project is ready. And I spent a lot of time making sure that the photons were not publishing too often in my code. I got a few red blinks, but now I have learned to code my way around that and be aware of what is being published.
All in all, this was a wonderful experience.
This project is only listed in this pool. Be considerate and think twice before sharing.
A hands-on introductory course exploring the Internet of Things and connected product experiences.
My little one took his first steps recently. He is on the move and into everything. Being first time parents my wife and I are still learning how to “baby-proof” our home. And although we change a lot of things, there are still certain areas, like where the TV plugs to the wall, that can be a little precarious. I plan to create a baby sensor to be placed in one of these troublesome spots that will notify my wife when she is just out of range to catch him herself.
January 26th, 2017