49713 Designing for the Internet of Things
· 25 members
A hands-on introductory course exploring the Internet of Things and connected product experiences.
Students living away from home often feel disconnected from the experiences and important events that take place in their family's home and in their home towns. These events range from intimate family dinners and holiday celebrations to more public events like festivals and sports matches.
Our concept aims to bridge the connection gap between a student's new place of residence and their homes, in essence bringing their home life into their new lives away. We aimed to create an experience that is powerful, comforting, and non-interruptive so that enhances connection while not distracting from one's day-to-day experience. We wanted the interaction to feel authentic and to coordinate well as a system with our two other products.
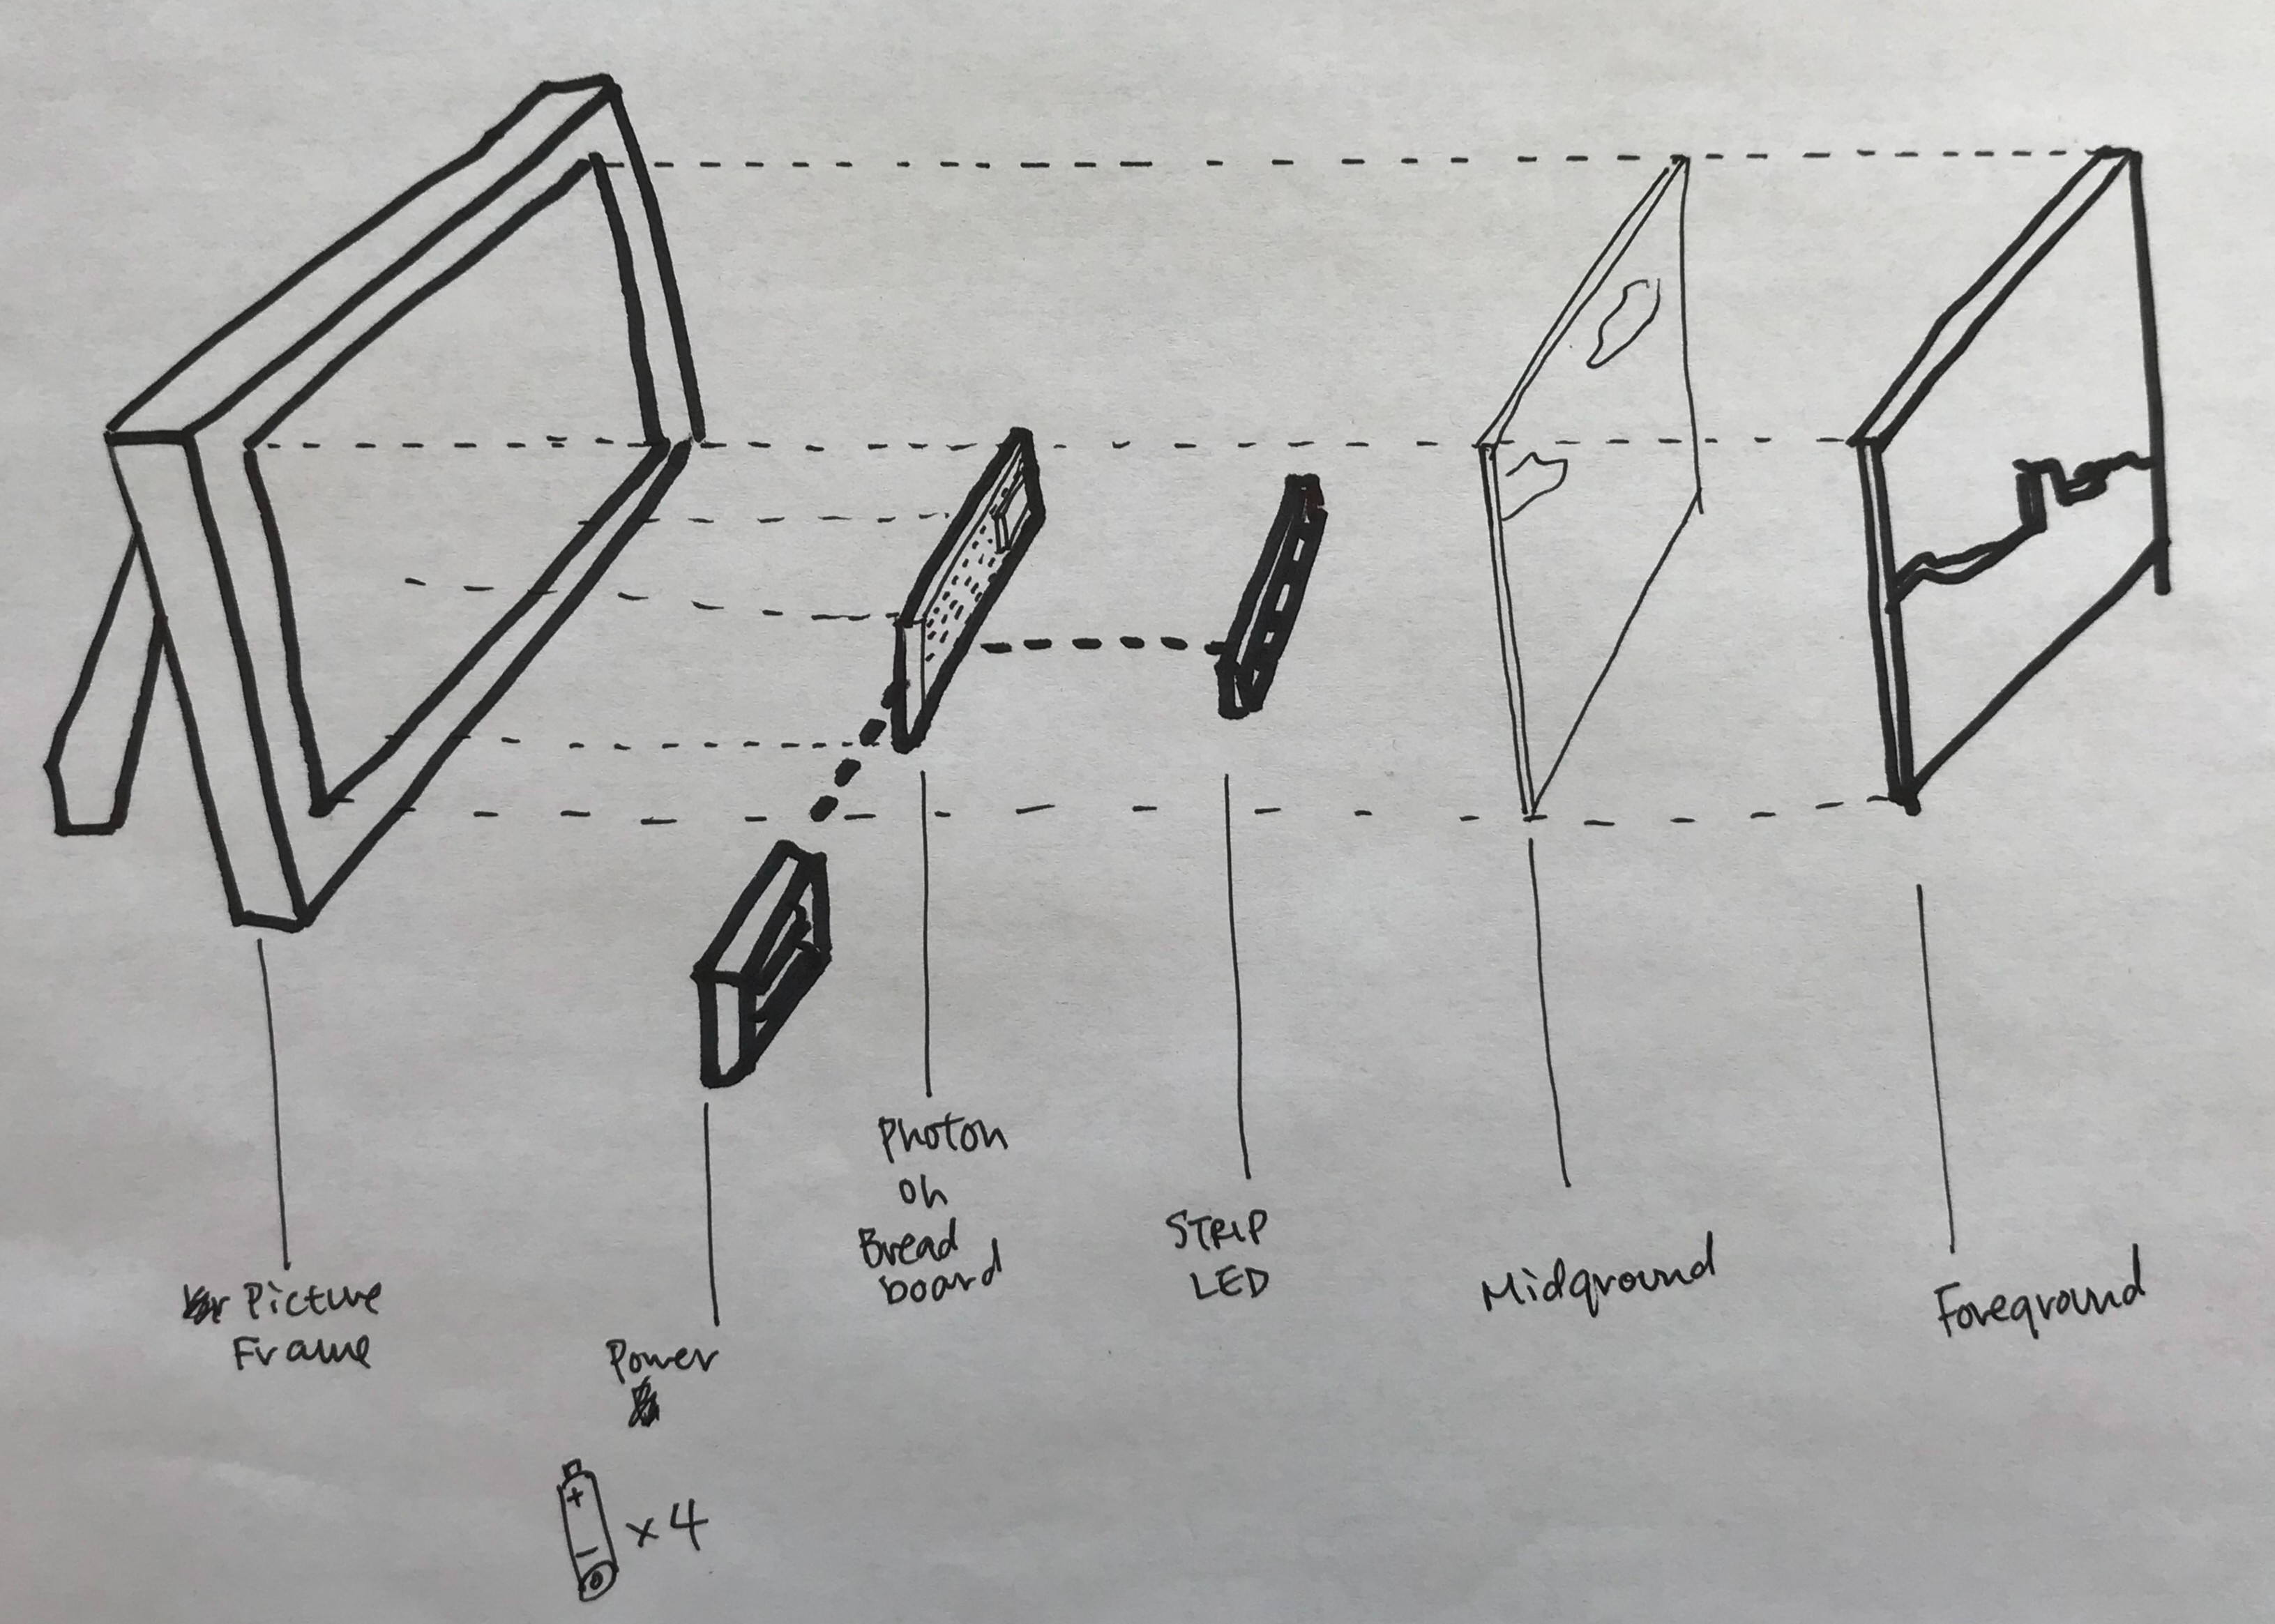
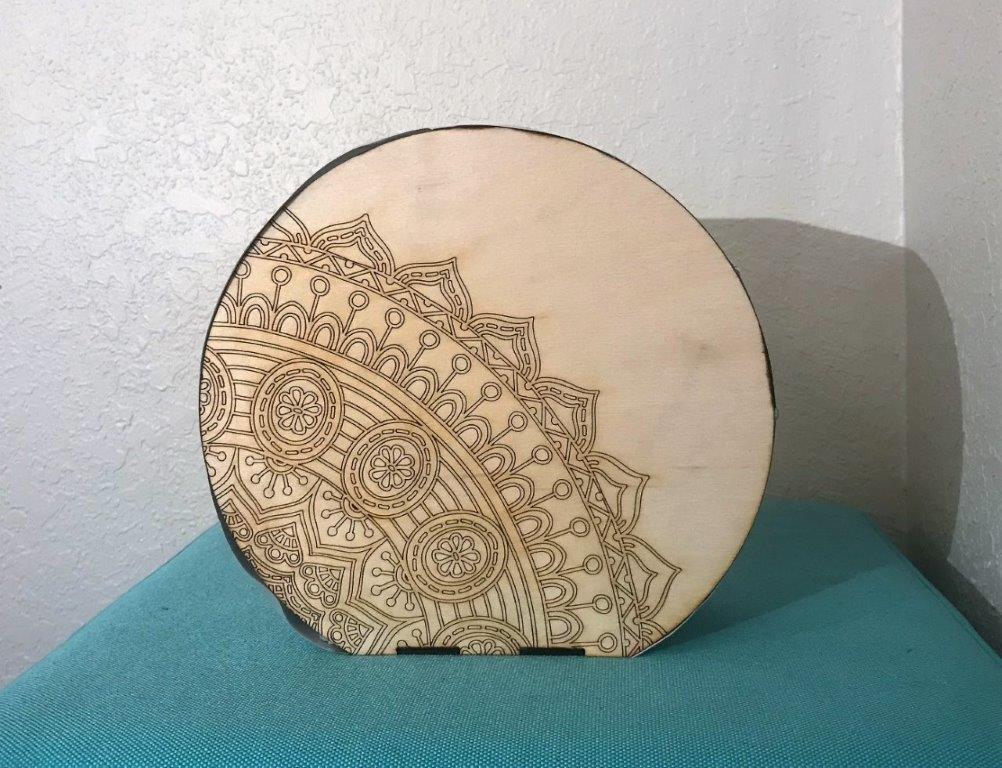
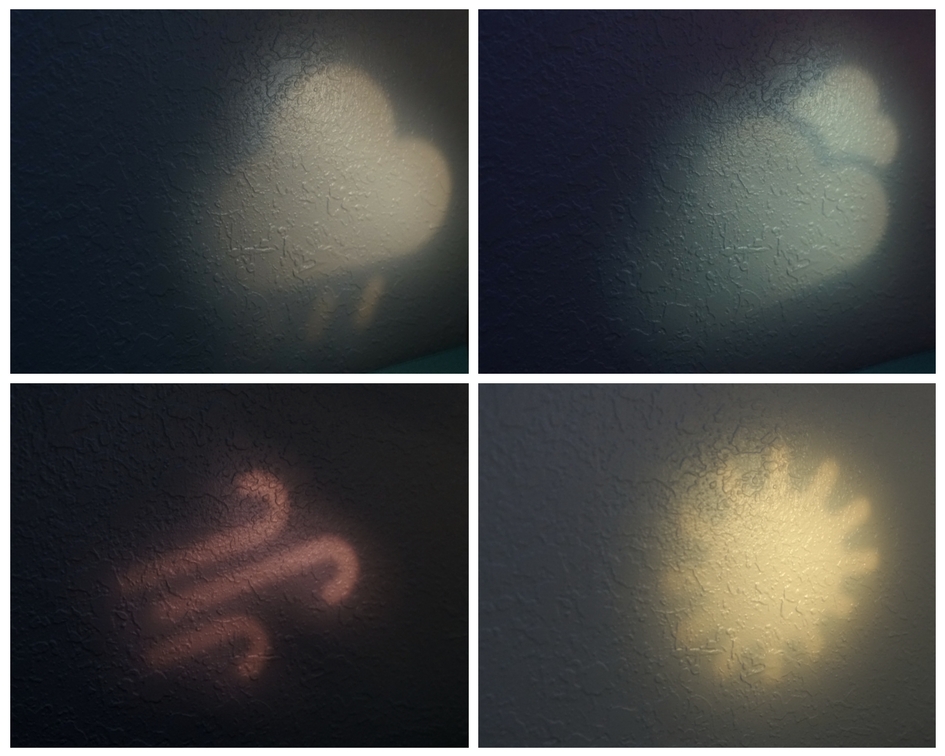
We set out to build a picture frame with an LED strip behind the image. The image would show a view outside the windows of the student's home, and the LED light would change its intensity/color based on the weather of the student's hometown. By looking at the picture frame, the student would know what the weather is like in their hometown while they are living away from their home. Through our design and circuit building process, we created a number of iterations, keeping with the original intent of the project while changing the form and some functionality.
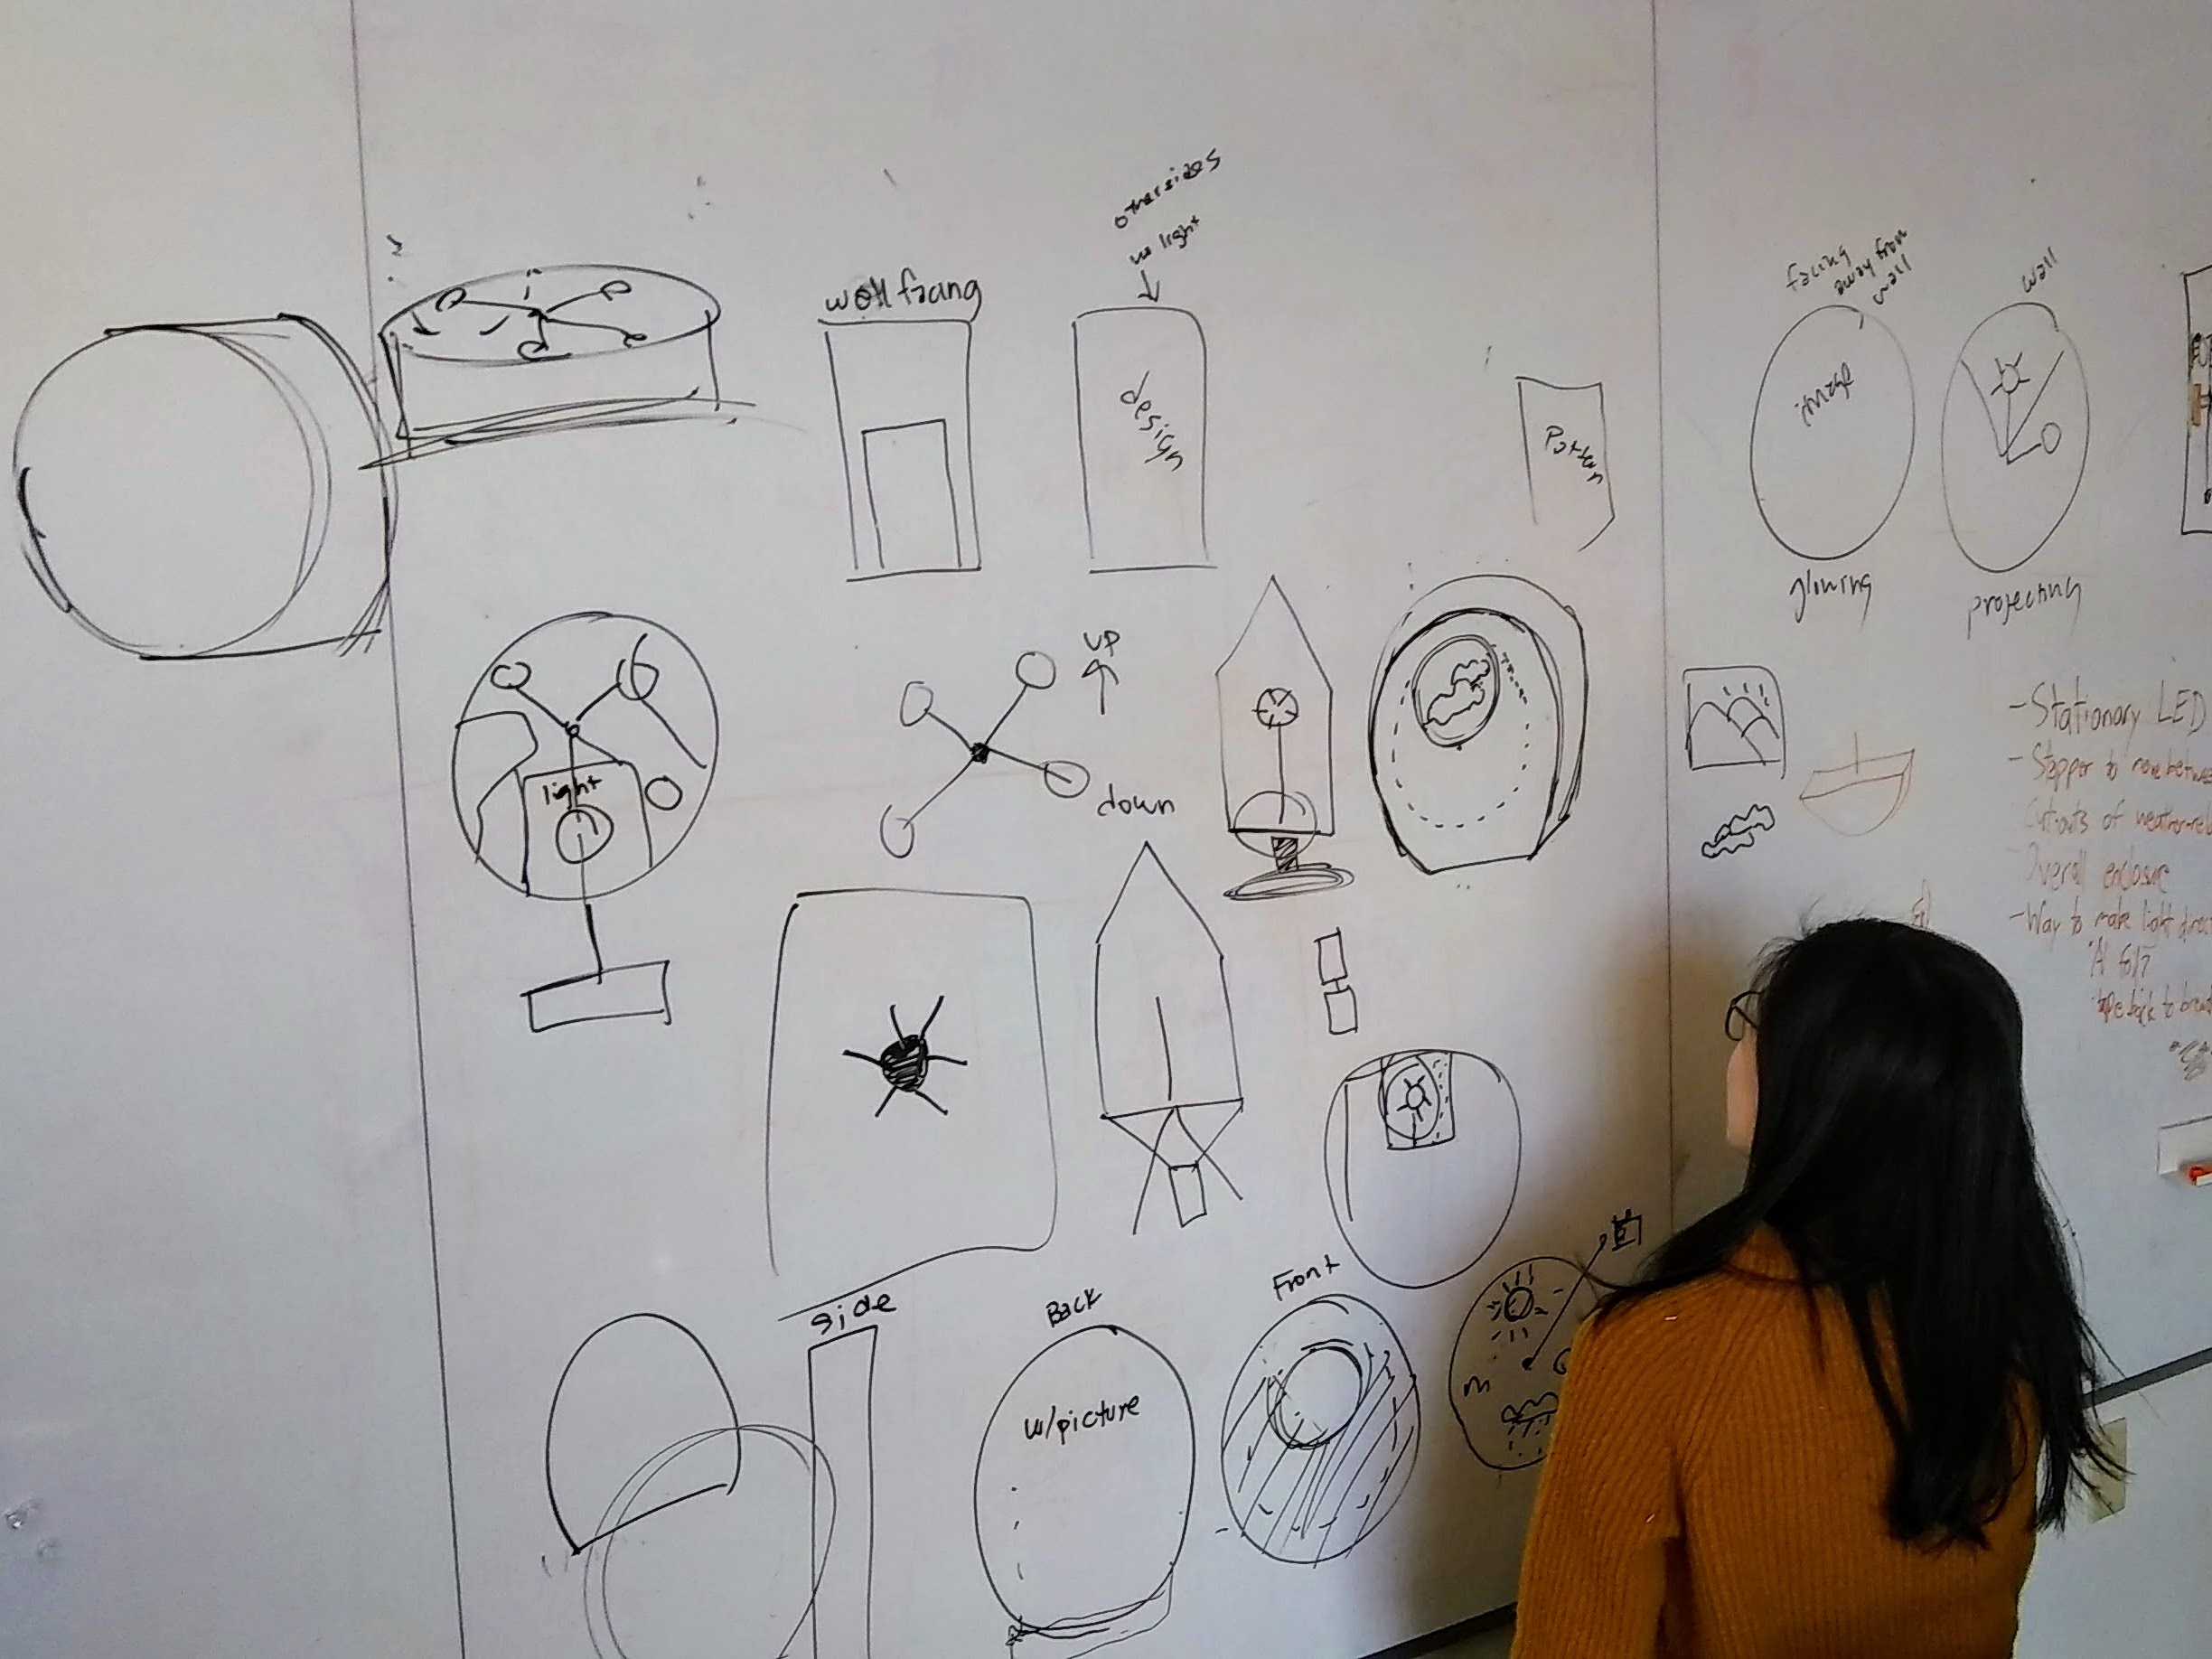
Form Progression
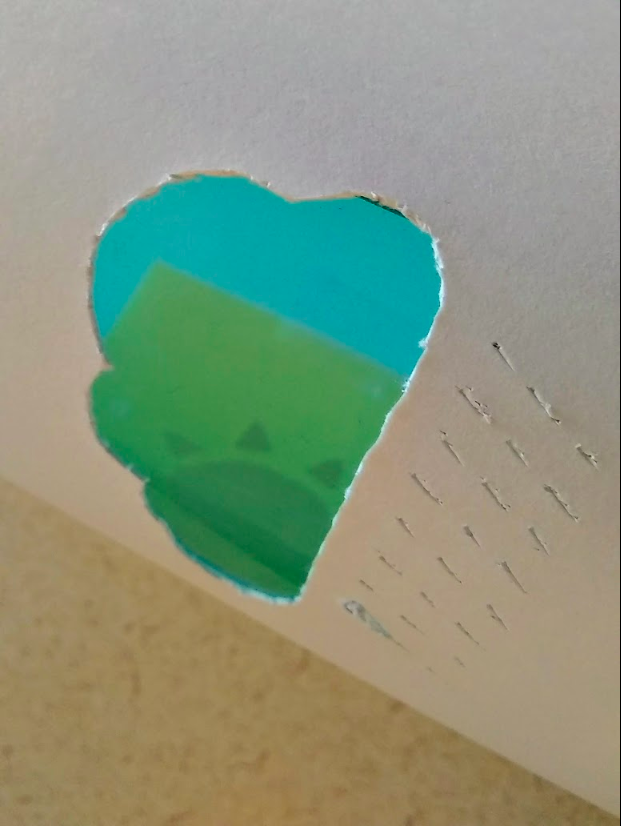
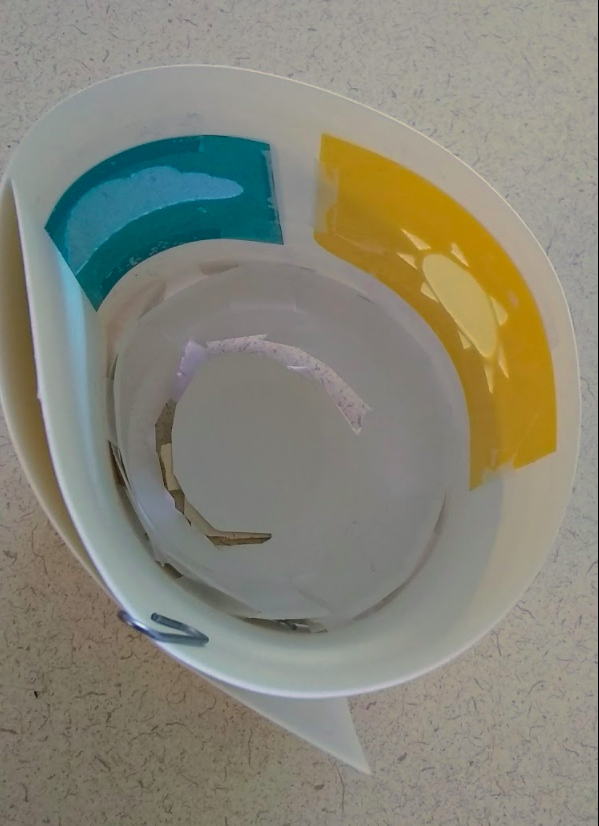
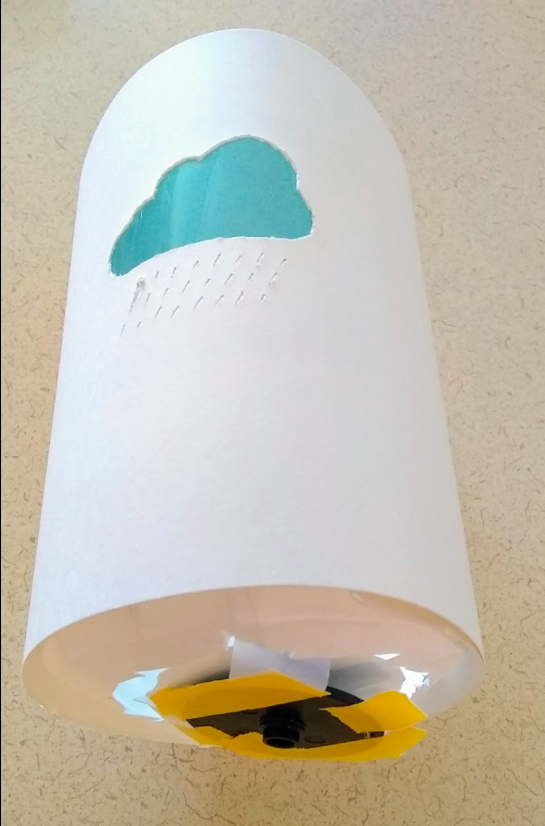
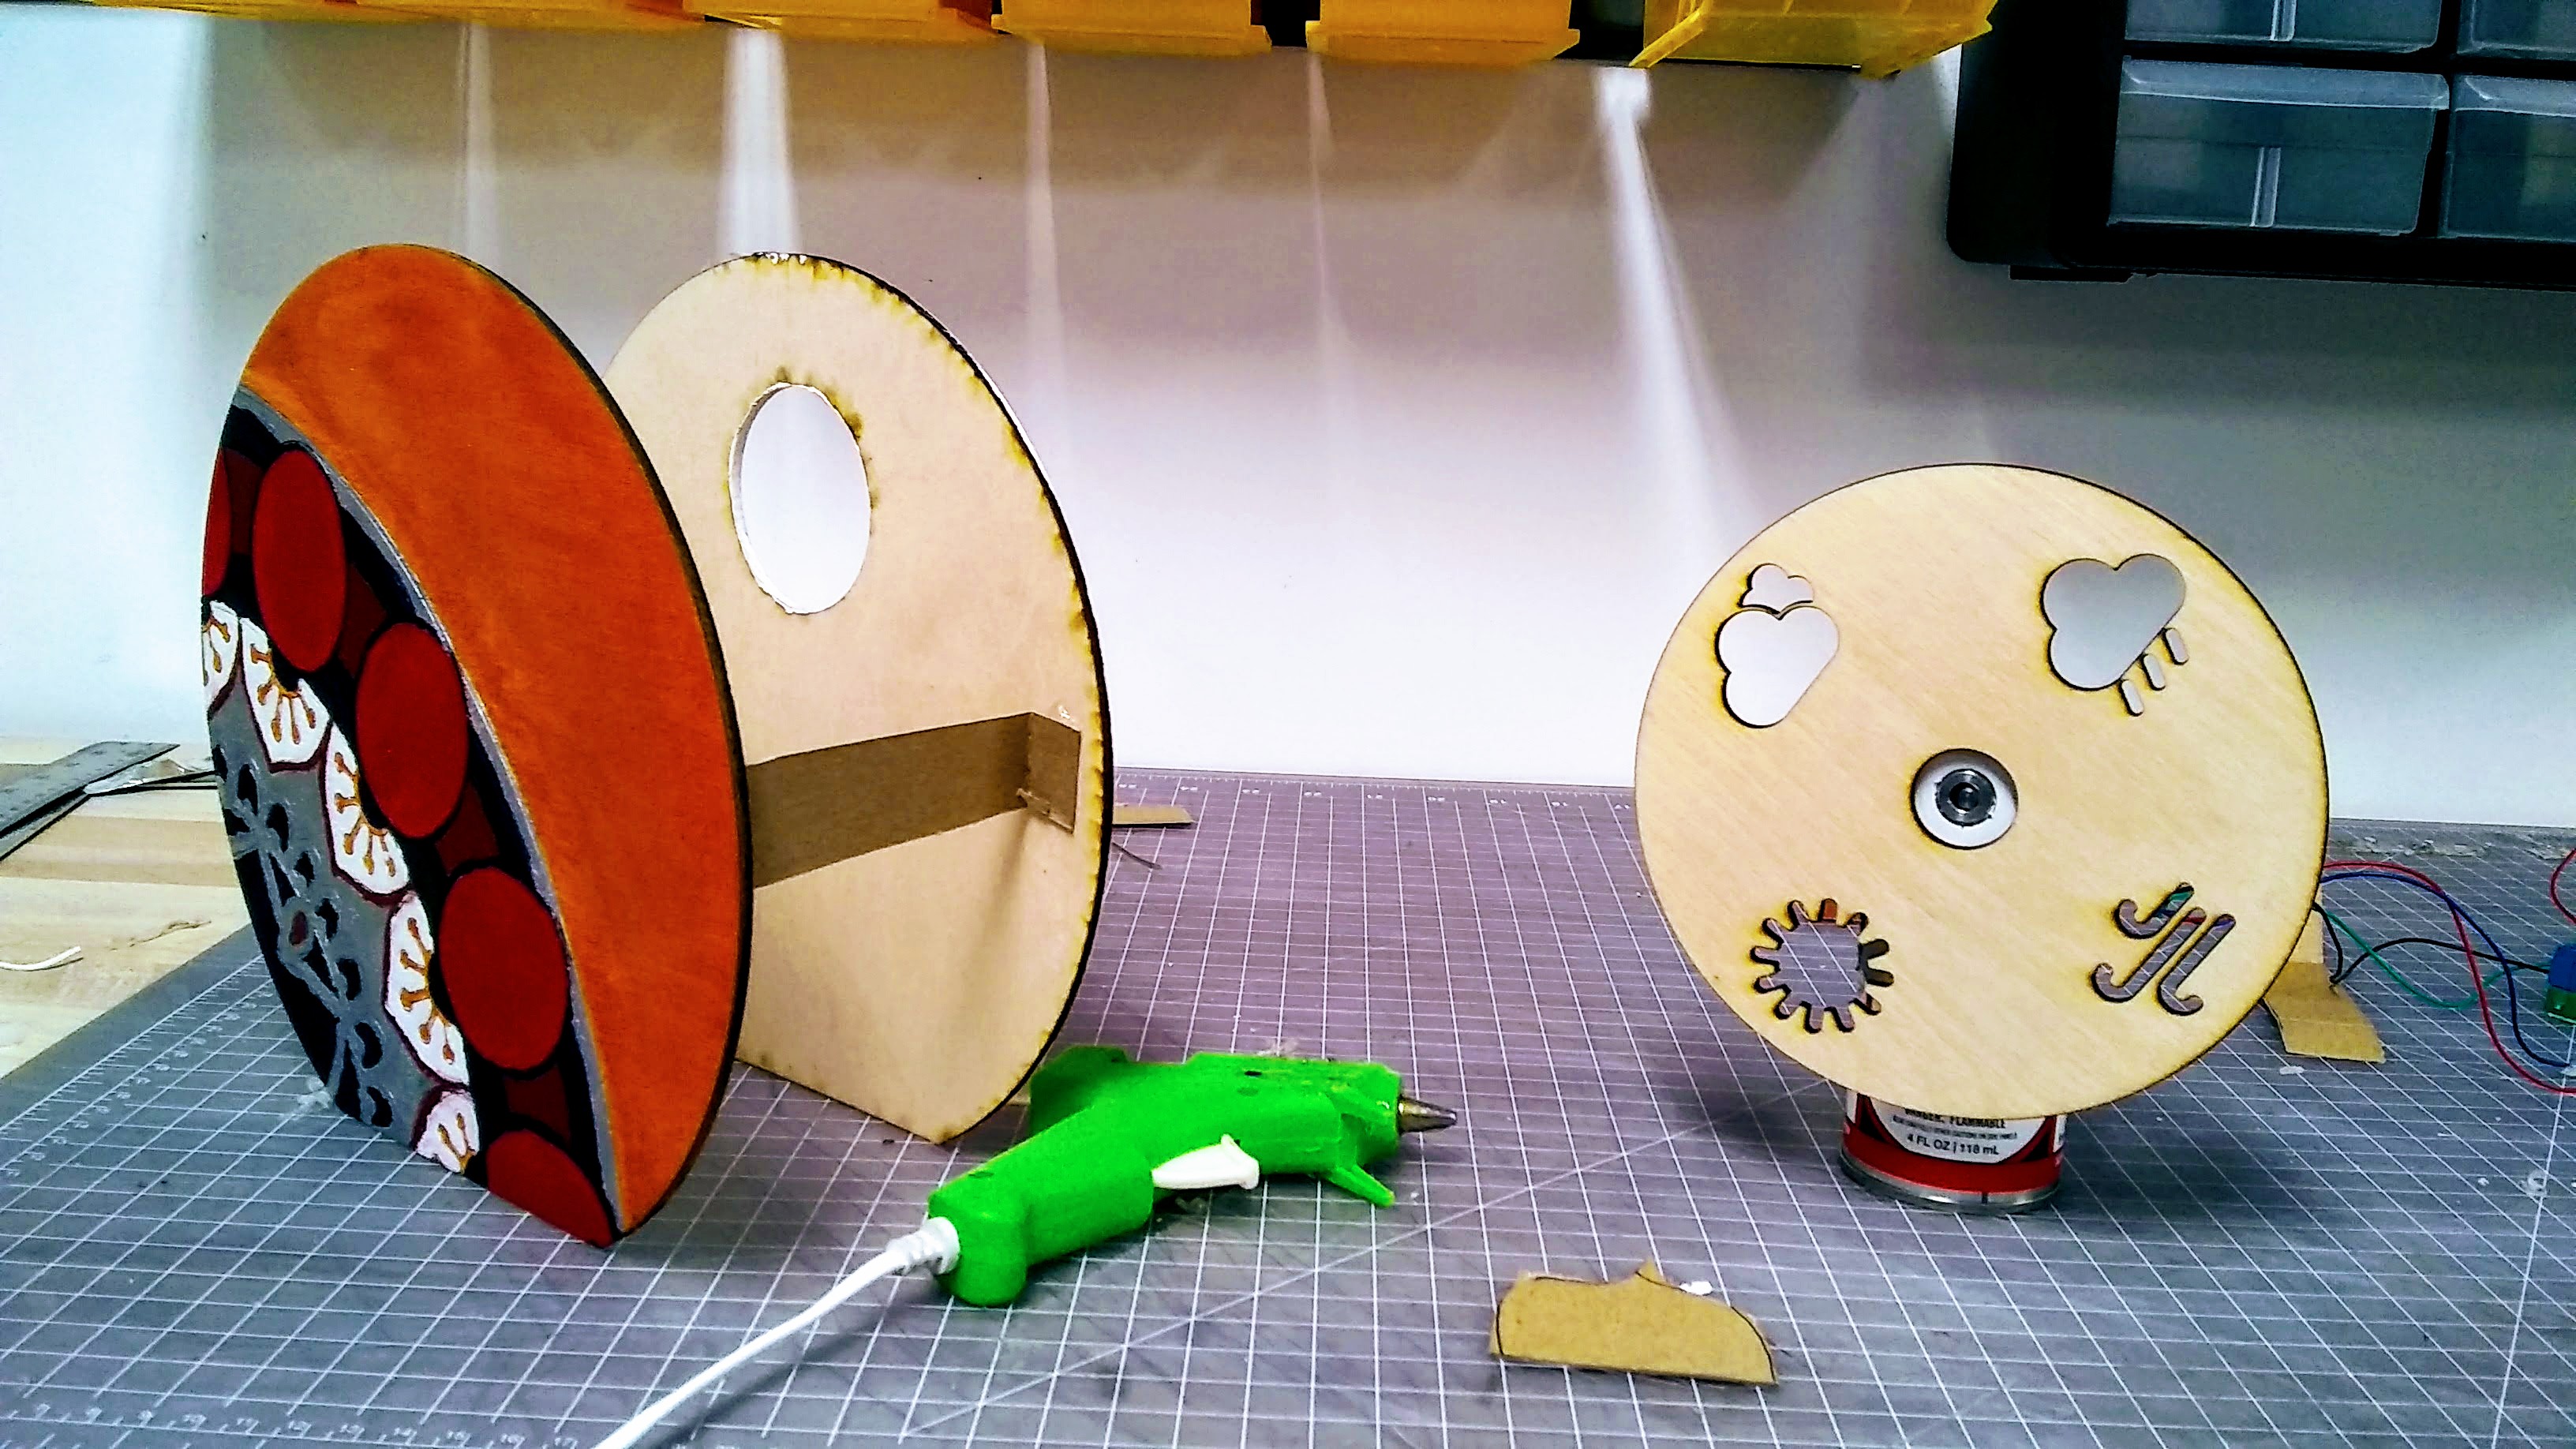
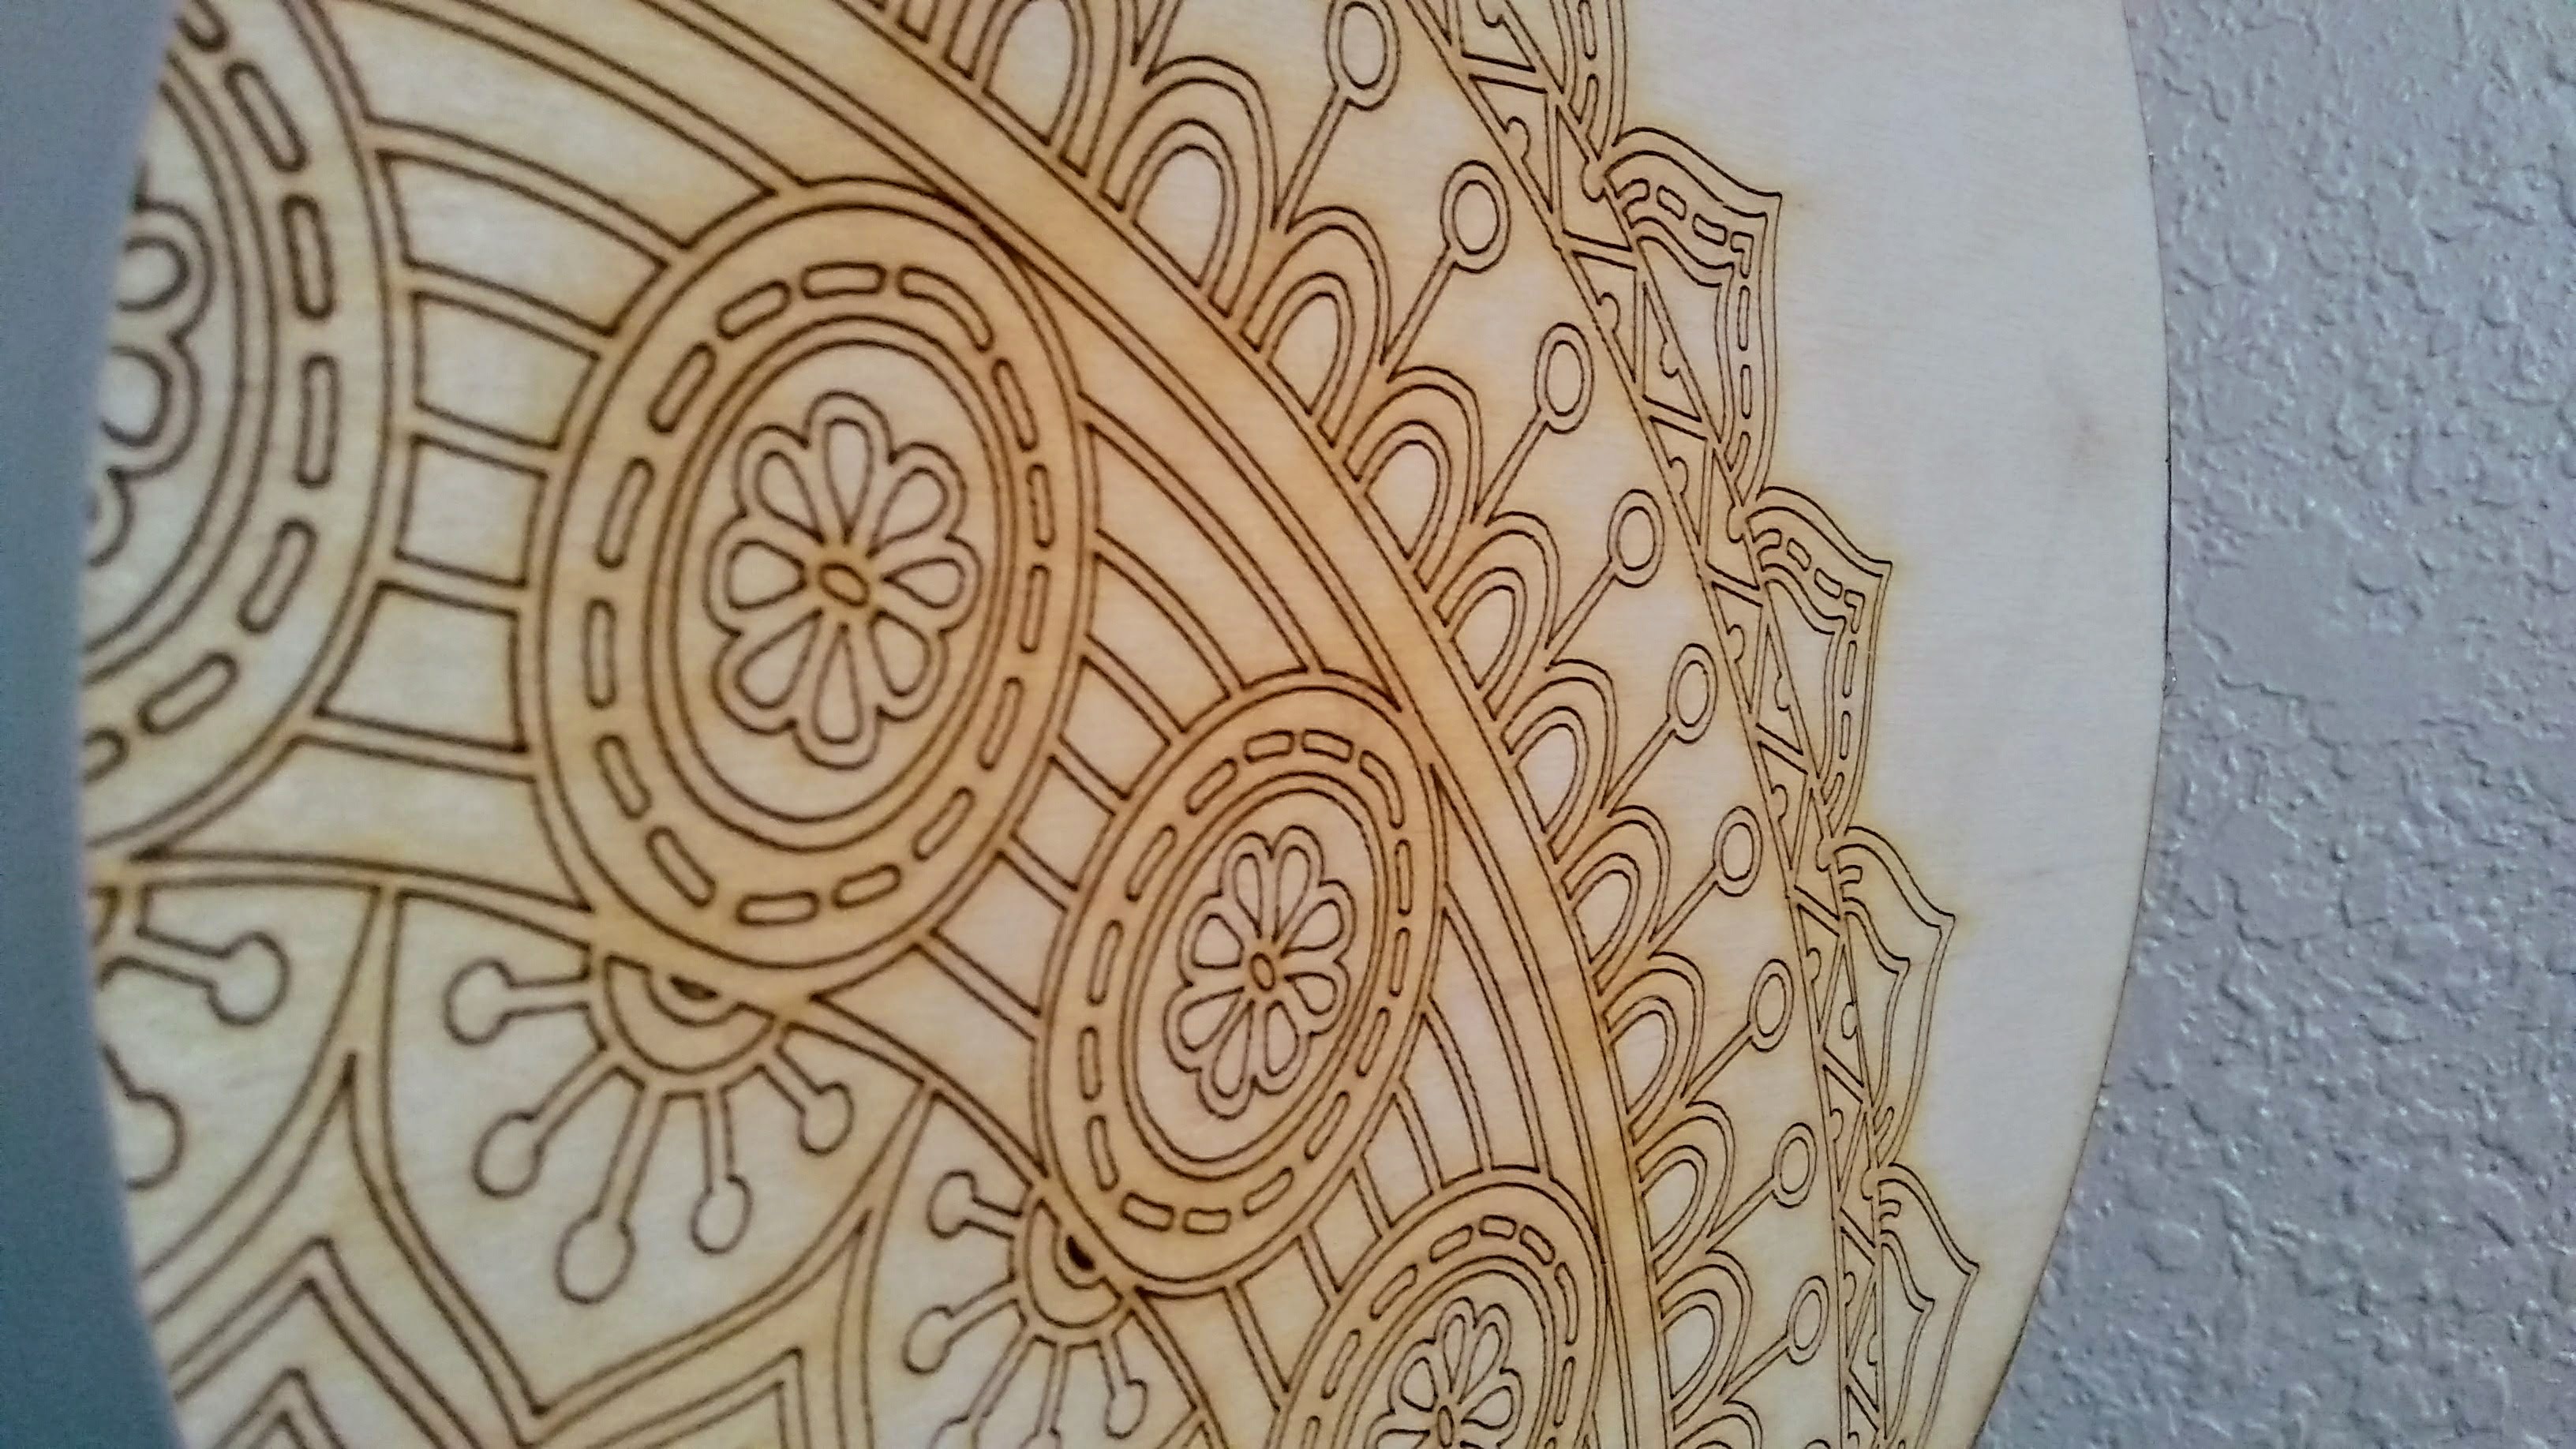
As pictured below, our initial concept was in the form of a picture frame, backlit with an LED light. Upon getting feedback and considering the impact of the design, we brainstormed around creating a form that was more representative of 'home' for the user and that had a stronger design element and more dynamic functionality. Our first prototype incorporated motion (a spinning cylinder), different colored light (using plastic colored film), and projection. These additional components made for a higher impact product; however, we still wanted to improve upon the form from an aesthetic and functional perspective. Aesthetically, we wanted the form to be clean while incorporating art from our student's country of origin. We explored doing this through painting and through laser cutting wood and ultimately found that the laser cut wood created a cleaner aesthetic. For our form, we changed the stepper motor rotation axis from a z-axis rotation to a y-axis rotation in order to create a simpler mechanism by which to support the light above the stepper motor.
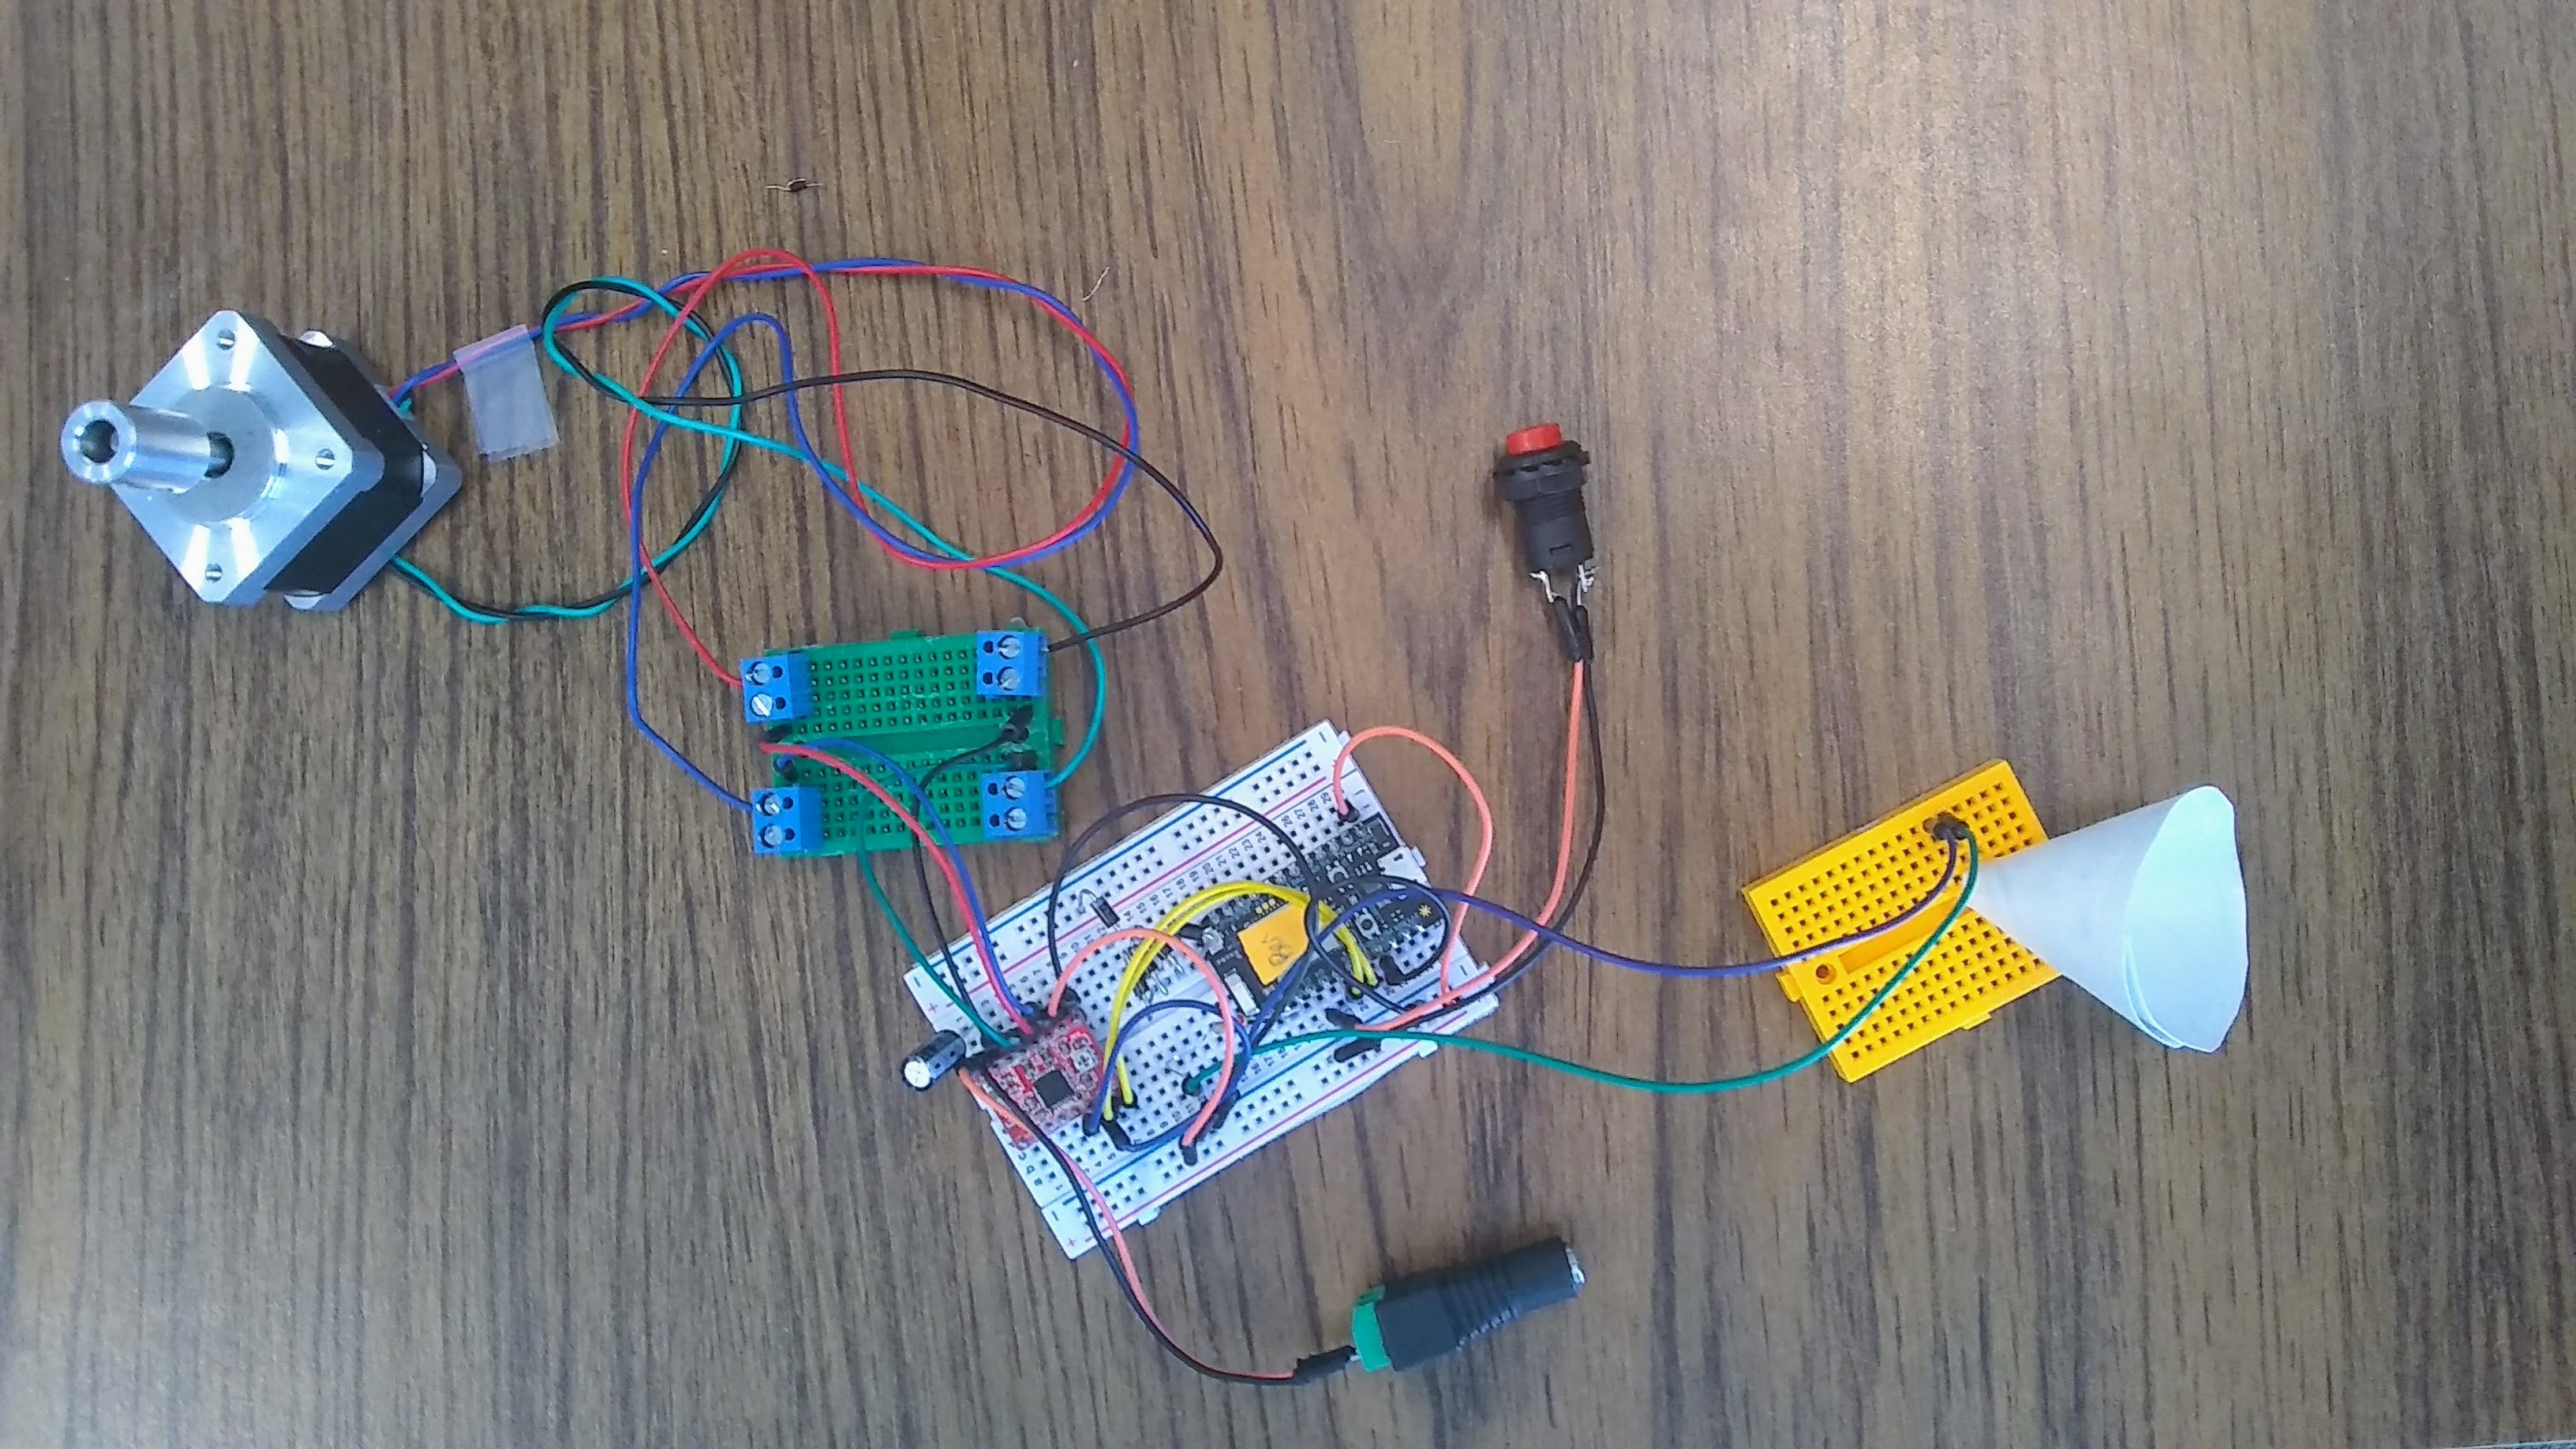
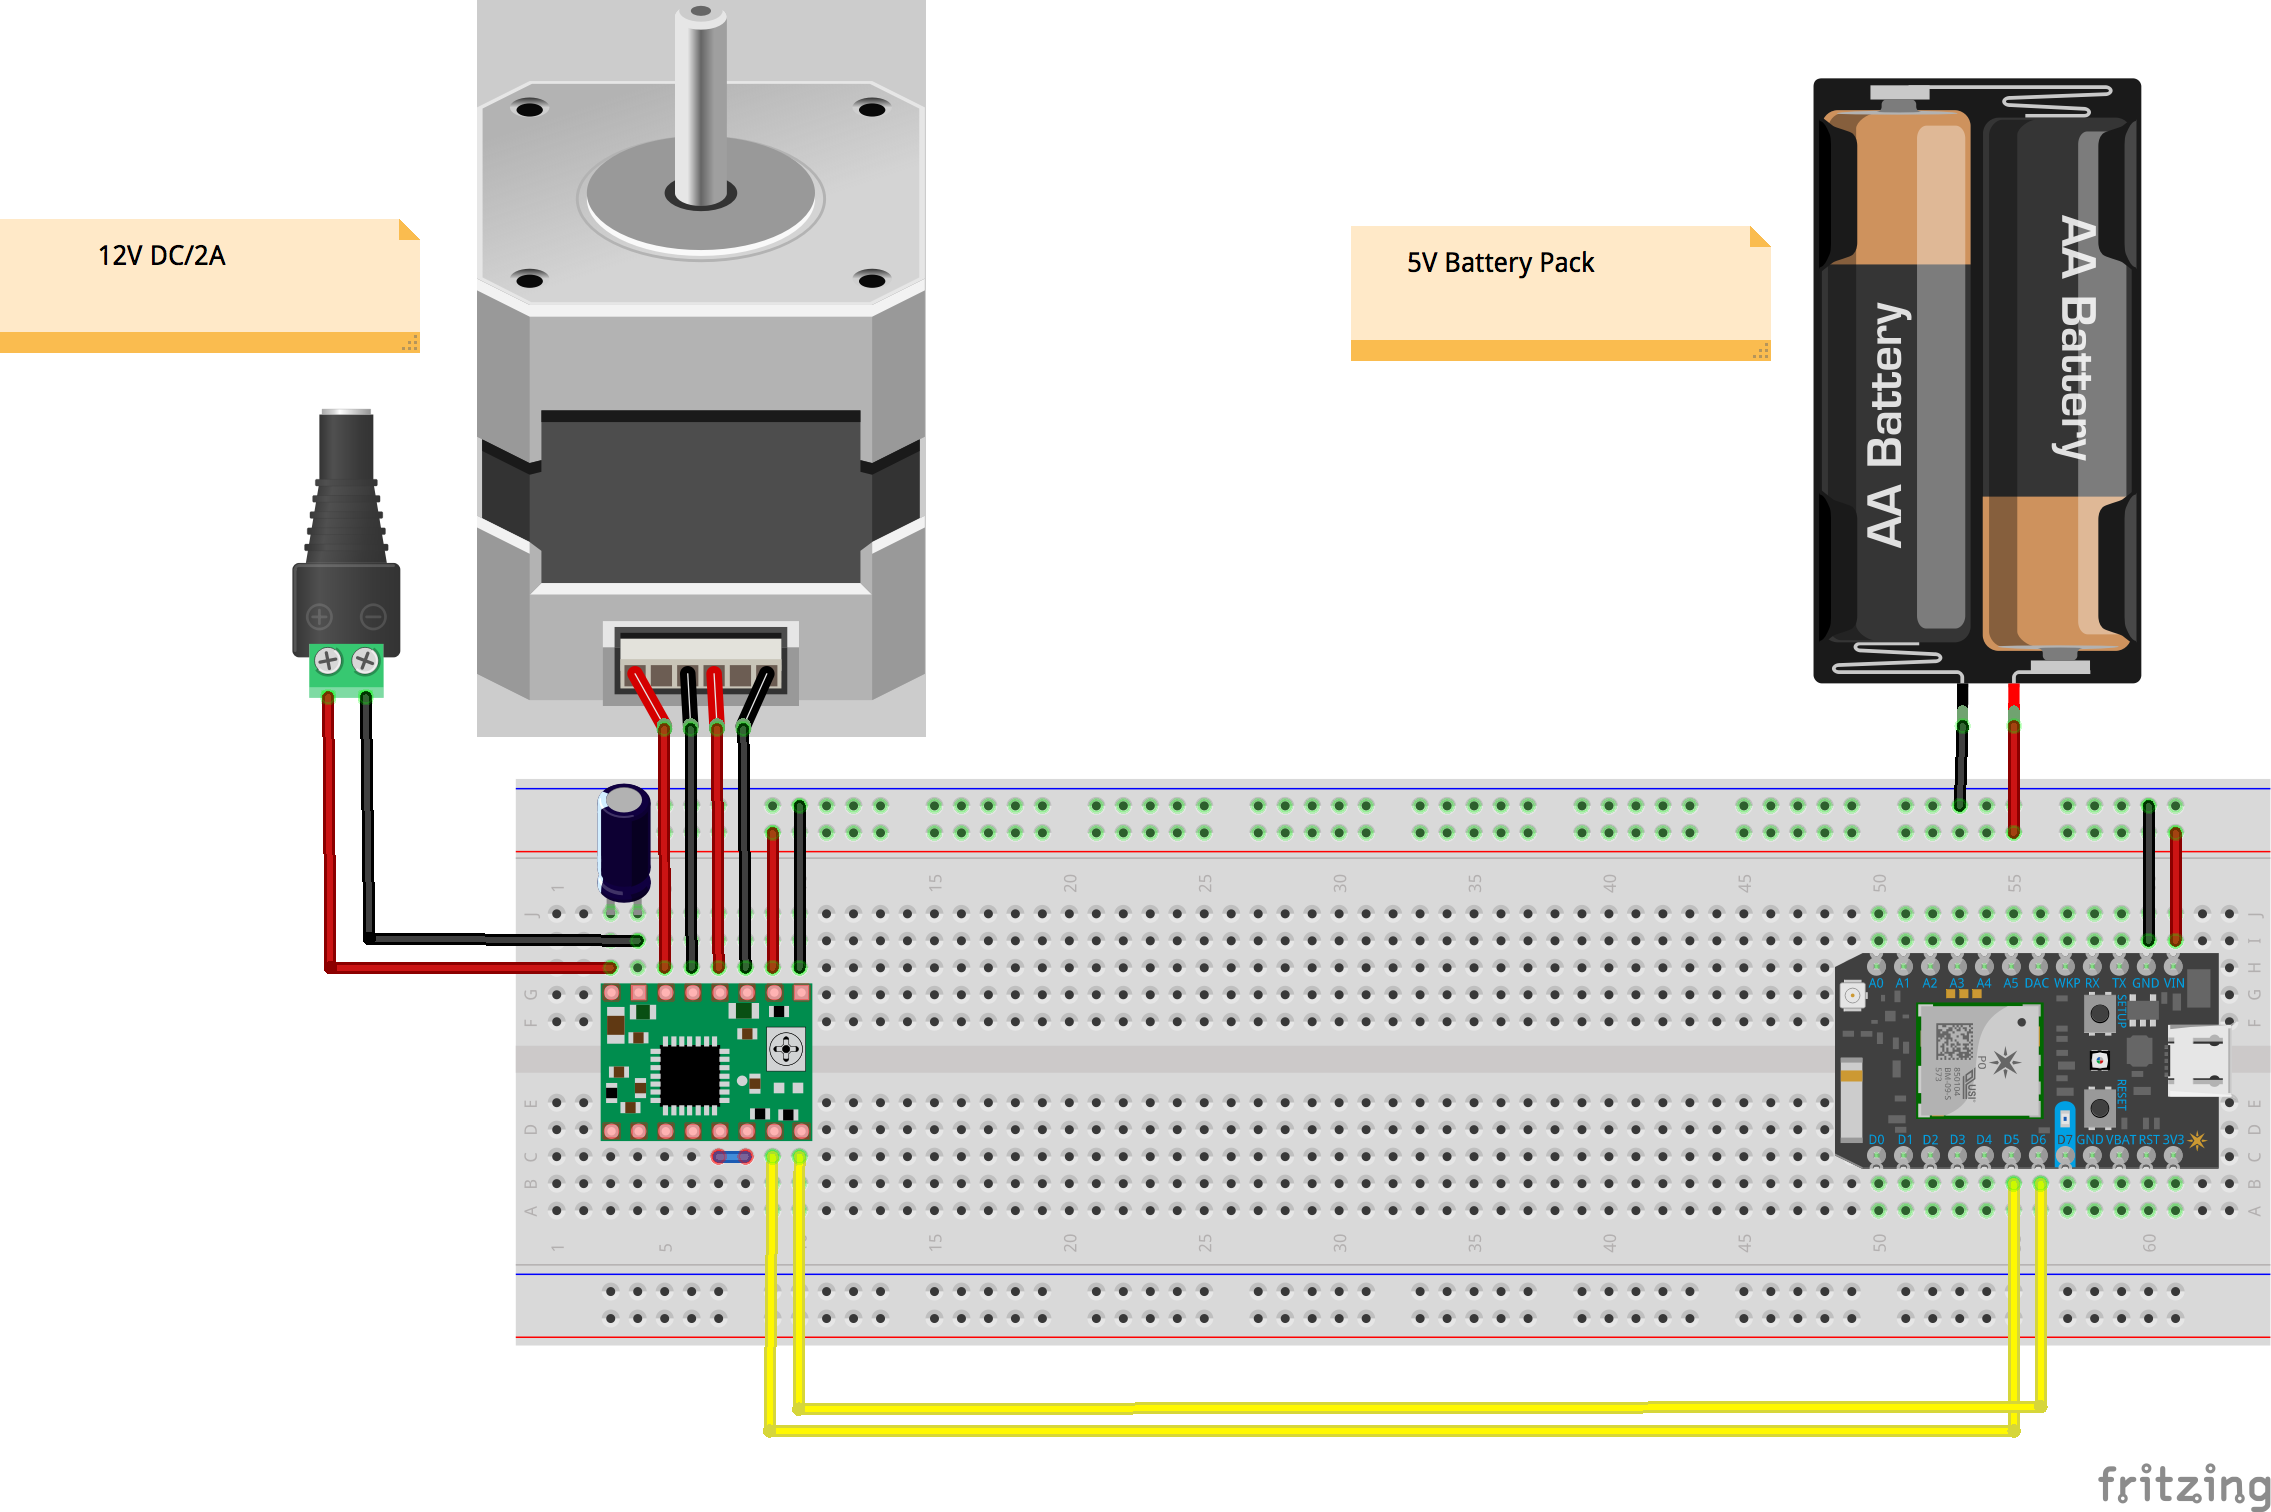
Building The Circuit
Starting with the breadboard, we added an LED and then the stepper motor and driver. From that point, the team tested the light and realized that it was not strong enough to project onto a wall. We then replaced the LED with a neopixel; however, this solution did not work either. We considered using an 8x8 LED matrix but realized that given our desired functionality, a light that was consistently on would work just as well. We opted to use a flashlight that was not connected to the circuit. From this point, we removed all lighting components from the circuit. We initially had a button in the circuit to activate the stepper motor; however, for the purposes of the system and demo we opted to control the circuit through a computer instead of a physical button. We tested the functionality of the circuit intermittently to ensure that it worked well in conjunction with the physical prototype.
The team's final prototype included an external light and power source. The motion was created by a stepper motor. As described above, the team iterated, each time ensuring that the design and engineering choices were as simple as possible while still providing the desired functionality. The following summarizes the bill of parts for the circuit and physical prototype, the circuit configuration, and the final code used.
Circuit - Bill of Materials:
Physical Prototype - Bill of Materials:
/*
* Project aHome_Sight
* Description: Requires integration with aHome_Sound
* Author: Ben Fisher
* Date:
*/
// stepper
// defines pin numbers
int stepPin = D5;
int dirPin = D6;
int whereIsTheStepperNow = 0;
int numSteps = 0; // number of steps to travel (currently unused)
int stepsPerRev = 200; // stepper motor steps per revolution of the spindle
int numberOfDrawings=4; // number of possible "outcomes" represented in 360 deg.
// stepper-related variables
int degreeChangeRequired = 0;
int currentPicture = 0; // ranges from 0 to (numberOfDrawings-1)
int desiredPicture = 0; // ranges from 0 to (numberOfDrawings-1)
// weather
String weatherIcon = "";
double temperature = 0;
double precipProbability = 0;
double precipIntensity = 0;
// setup() runs once, when the device is first turned on.
void setup() {
// Put initialization like pinMode and begin functions here.
//stepper
pinMode(stepPin,OUTPUT);
pinMode(dirPin,OUTPUT);
// make the temperature values visible online
Particle.variable("weatherIcon", &weatherIcon, STRING );
// debug motor
Particle.variable("currentPos", ¤tPicture, INT );
Particle.variable("desiredPos", &desiredPicture, INT );
// connect to other devices
Particle.subscribe( "diot/2018/connected/atHome" , handleSharedEvent );
// opens serial port for LCD shield
Serial.begin(9600);
}
void getData() // For weather
{
// Publish an event to trigger the webhook
Particle.publish("forecast", "19.0896,72.8656", PRIVATE);
}
// loop() runs over and over again, as quickly as it can execute.
void loop() {
}
void moveStepper( int steps ){
if (steps > 0){
// Enables the motor to move in a particular direction
digitalWrite(dirPin, HIGH);
// Makes "steps" number of steps (200 = full revolution)
for(int x = 0; x < abs(steps); x++) {
digitalWrite(stepPin, HIGH);
delayMicroseconds(5000);
digitalWrite(stepPin, LOW);
delayMicroseconds(5000);
}
}else{
// Enables the motor to move in the opposite direction
digitalWrite(dirPin, LOW);
// Makes "steps" number of steps (200 = full revolution)
for(int x = 0; x < abs(steps); x++) { //abs() in case steps is negative
// alternatively, for(int x = 0; x > steps; x--){
digitalWrite(stepPin, HIGH);
delayMicroseconds(5000);
digitalWrite(stepPin, LOW);
delayMicroseconds(5000);
}
}
// Either way, update whereIsTheStepperNow
whereIsTheStepperNow = whereIsTheStepperNow + steps;
if( whereIsTheStepperNow >= 200 ){ // we passed the 0 point moving cw
whereIsTheStepperNow = whereIsTheStepperNow - 200;
}
if( whereIsTheStepperNow < 0 ){ // we passed the 0 point moving ccw
whereIsTheStepperNow = whereIsTheStepperNow + 200;
}
delay(1000); // One second delay
Serial.print( "Current number of steps from 0 is " );
Serial.println( whereIsTheStepperNow );
}
void handleSharedEvent(const char *event, const char *data)
{
// Now we're getting ALL events published using "diot/2018/connected/atHome"
// This includes events from this device.
// So we need to ignore any events that we sent.
// Let's check the event name
String eventName = String( event ); // convert to a string object
// This gives us access to a bunch of built in methods
// Like indexOf()
// Locates a character or String within another String.
// By default, searches from the beginning of the String,
// but can also start from a given index,
// allowing for the locating of all instances of the character or String.
// It Returns: The index of val within the String, or -1 if not found.
// We can use this to check if our event name contains the
// id of this device
String deviceID = System.deviceID();
weatherIcon = String(data);
if( eventName.indexOf( deviceID ) != -1 ) //is mark publishing anything
{
// if we get anything other than -1
// the event came from this device.
// so stop doing stuff
return;
}
// otherwise do your stuff to respond to
// the paired device here
Serial.print("weather icon is ");
Serial.println(weatherIcon);
// move the stepper motor accordingly
/*
note that these are based on the event published by other devices,
not getting it from forecast.io using a webhook
*/
if (weatherIcon == "cloud") {
desiredPicture = 1;
}
else if (weatherIcon == "wind") {
desiredPicture = 2;
}
else if (weatherIcon == "clear"){
desiredPicture = 3;
}
else if (weatherIcon == "rain"){
desiredPicture = 0;
} //otherwise it's none of these, and no motion is required
Serial.print("desiredPicture is");
Serial.println(desiredPicture);
// reminder: need {} if using 2+ lines in the "then" statements
int picDifference = desiredPicture - currentPicture;
// reset from previous iteration of looo
degreeChangeRequired = 0;
if (picDifference == 1 || picDifference == (1 - numberOfDrawings))
degreeChangeRequired=(360 / numberOfDrawings);
if (picDifference == -1 || picDifference == (numberOfDrawings - 1))
degreeChangeRequired=(-360 / numberOfDrawings);
if (picDifference == 2 || picDifference == (2 - numberOfDrawings))
degreeChangeRequired=(-2 * 360 / numberOfDrawings);
// otherwise, no motion is required
numSteps = degreeChangeRequired*stepsPerRev/360;
moveStepper( numSteps );
// update currentPicture
currentPicture = desiredPicture;
}Integrating with different teams was difficult because we all had different visions and ideas. As we designed, tested, and iterated, it was important to keep communication open between groups to ensure that our updated designs and functionalities worked well in concert with the other prototypes. We found it helpful to create a specific use case and target user that we could reference as we designed to ensure we were solving for the right pain points. We also learned how to integrate a number of new components and processes into our design process.
Learnings
Challenges
Future Iterations
A hands-on introductory course exploring the Internet of Things and connected product experiences.
~
February 24th, 2018